Windowsills accumulate dust, dirt, and grime from daily outdoor exposure and indoor activities. With the right tools and a simple routine, you can restore bright, clean edges to any room. This guide provides practical steps, recommended tools, and pro tips to make windowsill cleaning efficient and thorough for American homes.
Quick Answer
Best starter approach: gather a microfiber cloth, an extendable window squeegee with a silicone blade, a window cleaning kit, an angled brush, and a telescoping wand. Wipe, scrub, rinse, and dry in a single pass to reduce streaking. For stubborn grime, use a sponge scrubber and scraper to lift residue without scratching the sill.
What You’ll Need
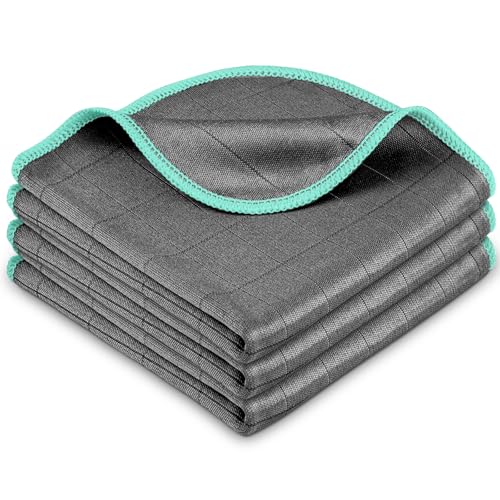
- Microfiber window cleaning cloth 12×12 inches for windowsills
- Extendable window squeegee with silicone blade 14 inch
- Window cleaning kit with sponge scrubber and scraper
- Angled window sill cleaning brush with stiff bristles
- Telescoping window cleaning wand with microfiber sleeve


Before You Start
Clear the area around the sill and remove any decorative items. Protect nearby surfaces with a drop cloth or old towels to catch drips. Test cleaning products on a small, inconspicuous area to avoid damage. Plan for a two-step process: wipe dust and grime, then rinse. A typical cleaning session for a standard room takes 15–30 minutes, depending on sill material and grime level.
Cautions: avoid using abrasive pads on painted or varnished sills to prevent scratches. If you have wooden sills, ensure the cleaner is safe for wood finishes. Wear gloves if you have sensitive skin or use a cleanser with stronger formulations.
Step-By-Step: How To Clean Windowsills
- Dust the sill with a dry microfiber cloth to remove loose debris.
- Use the angled window sill cleaning brush with stiff bristles to scrub deeper grime in corners and grooves.
- Apply a mild cleaning solution to a microfiber cloth or the brush, and work from left to right along the length of the sill.
- For textured or stubborn areas, scrub with a window cleaning kit with sponge scrubber and scraper to lift stuck-on residue.
- Rinse the area with a damp cloth or use the extendable window squeegee with silicone blade to remove excess liquid without streaking.
- Wipe the sill dry with a clean microfiber cloth to prevent moisture seepage and water rings.
- If you have high or hard-to-reach sills, attach the telescoping window cleaning wand with microfiber sleeve to reach the top surface safely.
- Inspect for spots you may have missed and repeat the necessary steps in those sections.
- Finish by buffing with a dry, lint-free cloth for a bright, even finish.
- Return items to their place and dispose of any waste from the cleaning process responsibly.
- Optionally apply a light protective spray appropriate for your sill material to slow future dirt buildup.
- Record any maintenance notes for future cleaning intervals and efficiency improvements.
Troubleshooting
| Symptom | Likely Cause | Fix | Prevention |
|---|---|---|---|
| Streaks after wiping | Residue from cleaner or water | Use a fresh microfiber cloth and a light touch; don’t over-soak the cloth | Use distilled water for hard-water areas |
| Scratches on painted sill | Abrasive scrub pad or harsh cleaner | Switch to a non-abrasive pad and gentle cleaner | Test cleaners first; choose materials designed for wood/paint |
| Cannot reach corners | Limited reach/tools | Attach the telescoping wand and angle the brush accordingly | Store accessible extendable tools for quick grabs |
| Excess moisture pooling | Overly wet wipe or cloth | Wring cloth well and wipe in a single direction | Keep a small dry cloth handy |
Common Mistakes
- Using harsh chemicals on wood or painted finishes
- Over-wetting the sill, causing water damage or warping
- Neglecting corners and grooves where dust accumulates
- Skipping a final dry wipe, leading to streaks
Tips For Best Results
- Start with dusting to minimize grit grinding into surfaces.
- Use microfiber materials for superior dust capture and lint-free finishes.
- Work with light, even pressure to protect delicate surfaces.
- Keep tools clean and dry between sections to prevent re-depositing dirt.
- Schedule periodic cleaning to avoid heavy buildup that requires more scrubbing.
Call A Professional
Consider professional help if windowsills are severely warped, painted with delicate finishes, or if infestation and mold are suspected. Signs to seek a pro include persistent staining that resists cleaning, persistent odor, or structural damage to the sill.
FAQ
What tools are essential for cleaning Windowsills?
Essential tools include a microfiber window cleaning cloth, an extendable squeegee, a window cleaning kit with sponge scrubber and scraper, and an angled sill cleaning brush with stiff bristles for tough grime.
Can I use water alone on wooden windowsills?
Water alone can work for light dust, but mild cleaners are often needed for grime; test on a hidden area first to avoid damage.
How do I prevent water damage when cleaning high sills?
Wringe towels well, use a squeegee to remove excess liquid, and dry the area promptly to prevent moisture penetration.
How often should I clean windowsills?
Typically every 2–4 weeks for busy homes, or anytime you notice dust buildup or fingerprints.
What should I do if paint chips while cleaning?
Stop immediately and assess; avoid scrubbing, and consider touch-up painting or consulting a professional for deeper issues.
Are there eco-friendly cleaners for windowsills?
Yes, mild soap and water or vinegar-based solutions work for many surfaces; always verify compatibility with your sill material.
Is it safe to use a scraper on all sill types?
Only on non-porous surfaces or intact painted edges; test on a small area to avoid damage.
Buying Guide
When selecting tools for cleaning windowsills, consider size, reach, material compatibility, and ease of use. A compact kit with an extendable wand and angled brush helps reach high or recessed sills without ladders. Noise and energy efficiency matter if using powered tools, so manual methods with a microfiber cloth and squeegee are often quieter and cheaper. Placement considerations include ensuring tools store neatly in a cleaning caddy near windows, minimizing trip hazards. Compare cleaning efficiency with multiple tools—microfiber cloths capture dust effectively, while a silicone blade reduces streaks. Look for kits that bundle the essential items in a durable tray or bag for quick access.