Cleaning under the stove can feel like a chore, but with the right tools and a simple plan, it becomes a quick, repeatable task. This guide covers step-by-step methods to remove dust, crumbs, and grime from tight spaces behind and beneath the stove using gear designed for under-appliance cleaning. The goal is a cleaner kitchen and a more hygienic cooking area without moving heavy appliances every week.
By following practical techniques and leveraging specialized tools, homeowners can maintain a tidy kitchen footprint while reducing the need for professional deep cleans. The methods here emphasize safety, efficiency, and measurable results, making it easy to schedule a quick maintenance session between larger cleaning projects.
Quick Answer
Best quick method: Use a slim cordless vacuum with an extendable wand to reach tight gaps, paired with crevice tool attachments for stubborn debris. For surfaces and edges, an extendable microfiber dusting wand helps lift dust without scratching. Finish with a flexible cleaning brush wand for under appliances to sweep out crumbs and grime.
What You’ll Need
The following tools are recommended for effective under-stove cleaning. Gather these before starting to streamline the process.
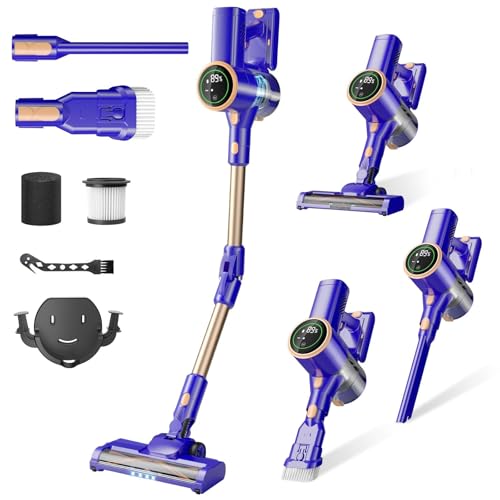
- Slim cordless vacuum with extendable wand for under stove
- Crevice tool attachments for vacuum for tight spaces under appliances
- Extendable microfiber dusting wand for under stove
- Flexible cleaning brush wand for under appliances
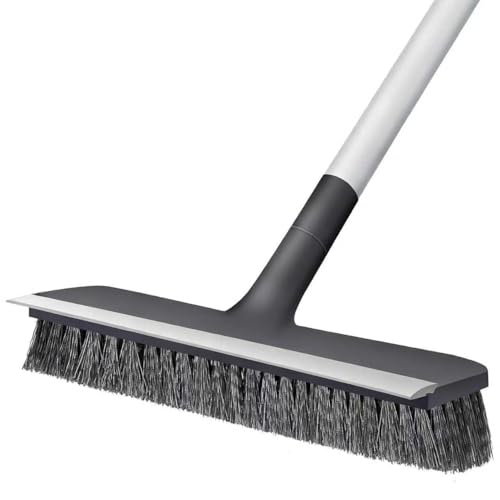
- Long-handled scrub brush for under stove and cabinet cleanup

Before You Start
Preparation helps prevent damage to floors and appliances. Clear the area, unplug or switch off power where required, and ensure there is adequate lighting to spot dust and grime. Move the stove only if it’s safe and feasible; otherwise, focus on reachable gaps from the sides and back. Time estimate: about 20–40 minutes for a thorough pass on both sides and the floor beneath.
Critical cautions: Do not use excessive moisture near electrical outlets or gas lines. Avoid harsh chemicals that could corrode grout or seals. If you notice fuel or gas odors, discontinue cleaning and ventilate the area immediately.
Step-By-Step: How To Clean Under The Stove
- Switch off and unplug or turn off the stove’s power at the switch, then pull the nearest edge away from the wall if safe.
- Use the slim cordless vacuum with extendable wand for under stove to vacuum loose dust and crumbs around the back and sides.
- Attach the crevice tool attachments for vacuum for tight spaces under appliances and clean along baseboard gaps and alcoves where dust collects.
- Switch to the extendable microfiber dusting wand for under stove and wipe the top of any kick plates or exposed trim to lift settled dust.
- Reach into narrow seams with the flexible cleaning brush wand for under appliances to dislodge stuck debris, then vacuum again.
- For stubborn grime near edges, use the long-handled scrub brush for under stove and cabinet cleanup with a mild cleaning solution on the bristles, then wipe with a dry microfiber cloth.
- Inspect beneath the stove and along the kick plate for remaining dust; repeat vacuuming or brushing as needed.
- Wipe the floor surface beneath the stove with a damp cloth, moving outward to prevent tracking dust toward the rest of the kitchen.
- Return the stove to its position and reseat any trim pieces. Recheck for dusty edges under the unit after a few hours of normal use.
- Establish a quick maintenance routine, such as a monthly under-stove wipe-down and quarterly depth clean, to avoid heavy buildup.
Troubleshooting
| Symptom | Likely Cause | Fix | Prevention |
|---|---|---|---|
| Dust returns quickly to gaps | Dry air or previous loose debris | Vacuum thoroughly and wipe surfaces with microfiber wand | Maintain humidity and regular light cleanings |
| Stubborn grime near back wall | Shelf grime or spilled food | Use flexible brush wand with mild cleaner; rinse and dry | Spot-clean spills promptly |
| Crevice tool won’t reach tight spot | Tool length or angle limitation | Extend wand and adjust angle; use rotating wrist motion | Rearrange layout or use alternate tool orientation |
| Vacuum loses suction | Clog from accumulated dust | Check and empty canister; detach and clear hose | Empty after each deep clean session |
Common Mistakes
- Using excessive moisture near electrical components or outlets.
- Forgetting to unplug before starting the cleaning process.
- Rushing in tight corners and causing scratches with stiff bristles.
- Neglecting to wipe the floor surface after debris removal.
- Skipping a full sweep behind the stove, assuming it’s clean enough.
Tips For Best Results
- Keep a routine: schedule a quick under-stove clean every 1–2 weeks for best results.
- Dependent on space, use a combination of tools to cover all angles—extendable wands reach higher and fit tight gaps.
- Alternate between dry vacuuming and damp wiping to lift dust without smearing grime.
- Label and store attachments near the cleaning area for faster sessions.
Call A Professional
Consider calling a professional if you notice persistent mold, corrosion around seals, damaged venting, or if moving the stove is risky or impractical. Seek expert help for electrical concerns, gas line issues, or if you detect unpleasant chemical odors that persist after cleaning.
FAQ
Can I clean under the stove without moving it?
Yes, use a slim cordless vacuum with extendable wand, along with crevice tool attachments, to reach tight gaps from the sides and back.
What should I do if the crannies are stubborn?
Switch to a flexible cleaning brush wand and an extendable microfiber wand to agitate and lift embedded grime, then vacuum again.
Is it safe to use water under the stove?
Limit moisture and avoid saturating areas; use damp cloths or mild cleaners only when there is no electrical exposure.
How often should I clean under the stove?
Plan a quick maintenance session every 1–2 weeks and a deeper clean every 1–3 months, depending on kitchen usage.
What if I smell gas or observe a leak?
Stop cleaning immediately, ventilate the area, and contact the utility or emergency services as needed.
Do different stoves require different tools?
Tools listed here are versatile for most under-stove cleaning tasks; adapt techniques to fit your stove design and clearance.
Should I replace tools over time?
Replace worn brushes and wands when effectiveness drops, and keep attachments clean for consistent performance.
Buying Guide
Choosing the right gear for cleaning under the stove depends on space, flexibility, and ease of use. Consider size, weight, and maneuverability; a slim cordless vacuum with extendable wand should fit easily into tight gaps without requiring much effort. Noise level matters for routine maintenance, especially in homes with open layouts.
Energy efficiency affects ongoing operation costs, so look for compact, efficient models. Controls should be intuitive, with simple power and wand-extension buttons. Placement of cleaning tools is important; store attachments near the cleaning zone for quick access. Compare dusting wands vs. scrub brushes to balance gentle lifting with deeper cleaning. For homes with narrow gaps, prioritize flexible attachments that preserve floor finish and avoid scratches.
Consider hybrid kits that include a crevice tool attachments for vacuum for tight spaces under appliances for precise access, and a long-handled scrub brush for deeper grime near cabinets. If space is severely restricted, a dedicated extendable microfiber dusting wand for under stove can speed up routine dusting. Finally, ensure the kit can reach behind and around all sides of the stove for a comprehensive clean.