Cleaning oven burners keeps gas stoves functioning safely and efficiently. A well-maintained burner yields even flames, better heat control, and longer appliance life. This guide walks through practical steps, recommended tools, and common pitfalls to avoid.
Whether you’m a weekend chef or a busy home cook, regular maintenance can prevent stubborn buildup and improve overall performance. The methods below are designed for common household stoves with removable gas stove burners and porcelain burner caps.
Quick Answer
To clean oven burners effectively: disconnect power, remove burner grates and caps, scrub with a dedicated brush and degreaser, rinse thoroughly, and dry before reassembly. Avoid harsh abrasives on porcelain to prevent scratching.
What You’ll Need
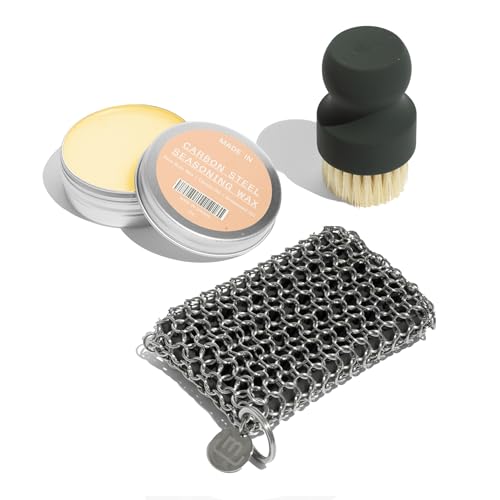
- Gas stove burner cleaning brush set
- Porcelain burner cap cleaning brush
- Stove burner grate cleaning tool
- Oven burner cleaning kit stainless steel
- Gas stove burner cleaning spray degreaser


Before You Start
Before beginning, unplug the range or switch off the circuit breaker to ensure safety. Remove grates and burner caps, study the manufacturer’s manual for specific disassembly instructions, and work in a well-ventilated area. Do not use metal tools to scrape porcelain caps as this can scratch the surface. Allow the parts to cool completely before handling to avoid burns. Plan for a 30–60 minute cleaning window, depending on buildup.
Step-By-Step: How To Clean Oven Burners
- Remove all grates and burner caps from the stove. Take a photo if needed to reassemble correctly.
- Gently brush loose debris from the burner ports using the gas stove burner cleaning brush set and the porcelain burner cap cleaning brush.
- Spray degreaser onto the burner surfaces and caps, letting it sit for 1–2 minutes to break down baked-on grease.
- Use a soft brush or cloth to wipe away loosened grime. For stubborn spots, apply a second round of spray and repeat brushing, avoiding jetting cleaner directly into vent holes.
- Rinse metal components with warm water and a mild soap, ensuring no residue remains in the ports. Dry thoroughly with a towel or air dry.
- Inspect the burner ports for clogs. If you notice blockages, use a pin or the straight edge of a paperclip to clear the holes gently, then wipe clean.
- Reassemble caps and grates in the correct orientation. Place them back on the range, ensuring a secure fit.
- Reconnect power or restore the circuit and test the burners to confirm a clean, even flame.
- For ongoing maintenance, wipe down after each use and perform a deep clean monthly or as needed based on usage.
- Keep a routine: record dates on a calendar or notebook to stay consistent with cleaning intervals.
Troubleshooting
| Symptom | Likely Cause | Fix | Prevention |
|---|---|---|---|
| Uneven flame or low heat | Buildup blocking ports | Clean burner ports with a pin and degreaser | Clean regularly; avoid letting spills dry on ports |
| Burner won’t ignite | Cap misaligned or clogged ports | Realign cap; clear ports | Inspect after reassembly |
| Gas smell | Leak or improper seal | Turn off supply, inspect hoses, call a professional | Schedule annual professional checkups |
| Flames yellow or flickering | Grease creating an obstruction | Clean thoroughly and check air shutter if applicable | Regular light cleaning |
Common Mistakes To Avoid
- Using harsh abrasives on porcelain burner caps, which can scratch or dull the surface.
- Soaking parts too long in water near electrical components; always dry completely before reassembly.
- Forgetting to re-seat burner caps properly, leading to misaligned flames.
- Relying on the spray degreaser near flame openings—spray from a distance and avoid oversaturation.
Tips For Best Results
- Schedule a routine clean after heavy cooking sessions to prevent heavy buildup.
- Keep a dedicated brush set and degreaser for kitchen use to avoid cross-contamination with other cleaning tasks.
- When possible, use warm water rather than cold to aid grease loosening; finish with thorough drying to prevent rust.
- Label parts if you remove multiple pieces to ensure accurate reassembly.
- Match the cleaning method to material: metal parts tolerate brief soaking; porcelain caps benefit from gentler brushing.
Call A Professional
Consider contacting a licensed technician if any of the following occur: a persistent gas odor, flames that won’t light despite cleaning, visible corrosion, or repeated ignition failures. Signs of damage, unusual noises, or hissing sounds warrant immediate expert evaluation.
FAQ
How often should I clean oven burners?
Clean after heavy cooking sessions or at least monthly for households with frequent use to maintain optimal performance.
Can I soak burner parts?
Soak metal components briefly in warm soapy water; avoid soaking porcelain caps for long periods to prevent wear.
Is it safe to use a wire scrub brush?
Avoid metal scrubs on porcelain; use soft-bristled brushes to prevent scratching and possible cracks.
What should I do if flames stay yellow after cleaning?
Yellow flames indicate incomplete combustion; ensure ports are clear and the air supply is not obstructed. If unresolved, seek professional help.
Can I use bleach or ammonia on burners?
Do not use household bleach or ammonia directly on burners; use approved degreasers specifically designed for gas ranges.
Should I replace burner caps if they crack?
Yes, replace cracked burner caps to ensure proper flame distribution and safety.
Buying Guide
When evaluating products for cleaning oven burners, consider size compatibility with your stove, the materials of caps and grates, and the effectiveness of cleaning agents.
Size and fit: Ensure replacement or accessory parts align with your stove model. Check diameters, connector types, and cap shapes to avoid ill-fitting components.
Noise and ease of use: Tools like brushes and scrubbers should offer comfortable grips and low-resistance brushing while avoiding metal-on-metal scraping that could damage surfaces.
Energy efficiency and performance: Regular maintenance improves burner efficiency, translating to steadier flames and consistent heat output.
Controls and compatibility: Use degreasers labeled safe for kitchen use and compatible with stainless steel, porcelain, and metal finishes.
Placement and storage: Keep cleaning kits near the stove for convenient access, and store separate tools to prevent cross-contamination with food prep items.
In practice, many households favor a combined approach: a dedicated gas stove burner cleaning spray degreaser paired with a gas stove burner cleaning kit stainless steel for resilient parts, plus a porcelain burner cap cleaning brush for delicate caps. Compare kits for included brushes and cap cleaners to cover all burner components.