Spring cleaning refreshes living spaces and boosts overall cleanliness. A structured approach makes the process faster and more thorough, especially for American households juggling busy schedules. This guide outlines practical steps, recommended tools, and safety tips to achieve a spotless home, from floors to ceilings.
Quick Answer
Plan a single weekend, divide tasks by room, gather a basic set of tools, start with dusting and decluttering, then move to surfaces, fabrics, and floors. Use microfiber gear for streak-free results and a cordless handheld vacuum for quick cleanups on stairs and in cars.
What You’ll Need
- microfiber mop with 360-degree swivel head for hardwood tile floors
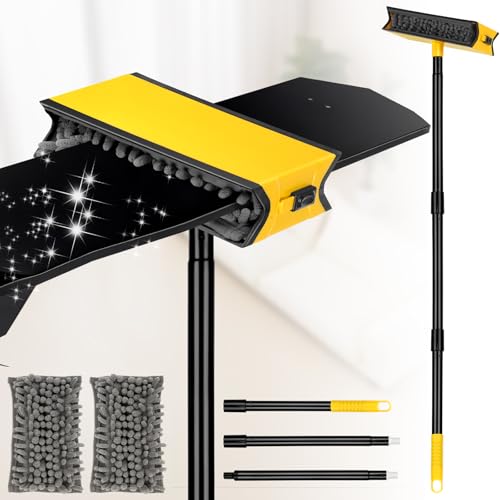
- extendable duster with microfiber mop head for ceiling fans and high shelves
- cordless handheld vacuum for stairs upholstery and car interiors
- streak-free microfiber cloths 12 pack for windows and mirrors
- scrub brush set with nylon bristles for bathroom grout and kitchen surfaces


Before You Start
Set aside a dedicated cleaning window, ideally a full Saturday or Sunday. Gather all supplies before beginning to reduce interruptions. Protect floors with mats and move lightweight furniture as needed. Wear gloves and a mask if you’re sensitive to dust. For homes with allergies, consider high-efficiency air filters and opening windows for ventilation. Estimate 4–8 hours for a thorough deep clean, depending on home size and clutter level.
Step-By-Step: How To Spring Clean Your Home
- Declutter each room by removing items that don’t belong or aren’t used regularly. Set up labeled baskets to streamline the process.
- Dust from top to bottom. Use the extendable duster with microfiber mop head for ceiling fans, shelves, and light fixtures to catch dust before it falls.
- Wipe surfaces with streak-free microfiber cloths. Start with high surfaces like cabinet tops and then move to countertops, switches, and door frames to reduce re-dusting.
- Clean glass and mirrors with dedicated microfiber cloths. For best results, use a simple solution of water and a touch of mild vinegar if needed.
- Refresh bathrooms with the scrub brush set for grout and tiled surfaces. Scrub seams and corners, then rinse with clean water and wipe dry to prevent mineral buildup.
- Deep-clean floors using a microfiber mop with a 360-degree swivel head. Work in sections, starting from the farthest corner and moving toward the exit to avoid stepping on clean areas.
- Vacuum hard-to-reach places and fabric surfaces with a cordless handheld vacuum. Focus on stairs, upholstery, and car interiors, paying attention to crevices and upholstery seams.
- Refresh textiles such as curtains and cushions. If possible, launder or sun-dry them and rotate pillows to distribute wear evenly.
Troubleshooting
| Symptom | Likely Cause | Fix | Prevention |
|---|---|---|---|
| Streaks on mirrors | Residue from cleaner or hard water | Wipe with clean microfiber cloths and use distilled water | Use streak-free cloths and avoid over-wetting surfaces |
| Dust reappears quickly on shelves | Dirty dusting tools or improper technique | Wash microfiber tools regularly; dust from top down | Dust daily or every few days during peak seasons |
| Floor feels sticky after mopping | Detergent residue or over-wetting | Rinse area with clean water and wring mop well | Use a light cleaning solution and change water frequently |
| Smudges on windows | Dirty cloth or streak-prone solution | Switch to another microfiber cloth and use a proper glass cleaner | Keep a dedicated window cloth separate from general cloths |
Common Mistakes
- Trying to clean too many tasks in one pass; it reduces effectiveness and increases fatigue.
- Using old or worn cloths that shed fibers onto surfaces.
- Neglecting ventilation; avoid cleaning with closed windows when volatile cleaners are used.
- Skipping floor drying, which can leave residue or cause slipping hazards.
Tips For Best Results
- Work room by room and set a timer to pace the cleaning session.
- Use microfiber tools for most surfaces to minimize residue and maximize lint-free results.
- Dust high areas first and finish with floors to prevent re-cleaning lower surfaces.
- Keep a small cleaning caddy with essentials to reduce trips to the storage closet.
- Rotate textiles and wash or air out soft furnishings to keep the space fresh.
Call A Professional
Consider contacting a professional cleaner if there is extensive mold growth, structural issues, or hard-to-reach areas that require specialized equipment. Stop signs include persistent odors, water damage, or unfinished repairs. If safety is a concern—such as a steep multi-story ceiling or asbestos suspicion—seek licensed assistance immediately.
FAQ
What is the best order for spring cleaning?
Start with decluttering, then dust, wipe surfaces, clean glass, tackle bathrooms, sweep and mop floors, vacuum, and refresh textiles.
How often should I spring clean?
A thorough spring clean is typically annual, but high-traffic homes may benefit from a mid-year refresh.
Which tools make spring cleaning easier?
Microfiber gear, extendable dusters, and a cordless handheld vacuum help reach high spots and tight corners efficiently.
Are there safety considerations I should follow?
Protective gloves, proper ventilation, and avoiding mixing incompatible cleaners are important for safe cleaning.
Can I reuse cleaning cloths?
Yes—wash microfiber cloths after use and air dry to maintain effectiveness. Replace worn fibers as needed.
How do I remove tough grout stains?
Use a nylon-bristle scrub brush and a mild cleaning solution; scrub gently to avoid damaging surrounding tiles.
What about pet hair?
Use a microfiber mop and vacuum attachments designed for pet hair to capture fur efficiently.
Buying Guide
When selecting equipment for spring cleaning, consider several buying factors to fit household needs and space size. Size and storage: choose compact, easy-to-store tools for apartments or small homes, or extendable tools for large houses. Noise level: cordless vacuums and power scrub brushes vary in sound; select models with lower decibel ratings for quieter use, especially in open floor plans.
Energy efficiency and performance: prefer tools with energy-efficient motors and high-efficiency cleaning heads, such as microfiber mops and spray-free cloths that require less chemical usage. Controls and ergonomics: look for lightweight designs, comfortable grips, and easy-to-reach buttons or triggers for extended cleaning sessions.
Placement and compatibility: ensure tools fit your floor types (hardwood, tile) and are compatible with existing cleaning solutions. Consider whether you need a multi-tool kit that covers ceilings, fans, and upholstery, or if separate specialized tools suffice. Finally, factor in maintenance: choose items with washable pads and readily available replacement parts to extend lifespan.