Maintaining a clean litter robot not only reduces odors but also promotes healthier living for both pets and owners. A thorough deep clean helps remove built-up waste, residue, and bacteria that daily maintenance may miss. This guide provides a practical, step-by-step approach tailored for U.S. households using standard litter robots and common supplies.
Regular cleaning routines can extend the device’s life and improve overall performance. The process below outlines a complete deep-clean workflow, including prep, cleaning agents, and drying times to ensure the unit is ready for use again without lingering smells or residue.
Quick Answer
Deep clean steps in under an hour with the right tools: remove litter, wipe and scrub bins, treat with enzyme cleaner, rinse, dry thoroughly, and reassemble. Schedule a full clean every 1–2 weeks depending on usage and litter brand.
What You’ll Need
- cat litter box deep cleaning kit
- enzyme cleaner for cat litter box 32 oz
- nitrile gloves heavy duty 6 mil
- microfiber towel 16×24 litter box cleaning
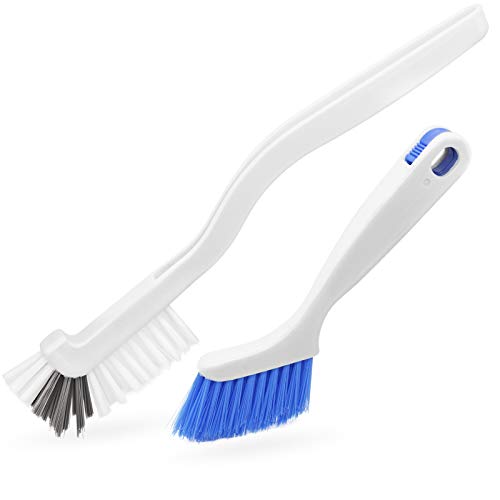
- scrub brush for litter box corners


Before You Start
Power down the litter robot and unplug it before beginning any disassembly. Remove all waste from the unit and empty the waste drawer if applicable. Work in a well-ventilated area and wear nitrile gloves to protect skin from cleaning agents and odors. Prepare a stable workspace and have a trash receptacle within reach. Allow adequate time for drying to prevent mold or mildew and to avoid humidity-related sensor issues.
Step-By-Step: How To Deep Clean Litter Robot
- Power off the unit, unplug, and remove the waste drawer or collection bin if your model has one.
- Take out any remaining litter and set it aside for disposal. Use a dry wipe to remove loose debris from the interior surfaces.
- Mix a targeted enzyme cleaner for cat litter box usage or apply the product directly to all interior surfaces per label instructions. Let it sit for the recommended contact time to break down odors and stains.
- Using a scrub brush for litter box corners, scrub all interior plastic surfaces, including corners, rails, and door seals where fecal matter can accumulate.
- Wipe sealed surfaces with a microfiber towel to remove loosened grime, rinsing the towel as needed to avoid spreading residue.
- Rinse surfaces with clean water or a damp towel to remove cleaner residues, ensuring no sticky film remains on any contact surfaces.
- Dry thoroughly with another microfiber towel, focusing on joints and crevices. Ensure there is no trapped moisture around sensors or moving parts.
- Reassemble the unit, refill with fresh litter as directed by the manufacturer, and perform a test cycle with no waste to confirm smooth operation and odor-free performance.
Troubleshooting
| Symptom | Likely Cause | Fix | Prevention |
|---|---|---|---|
| Litter robot emits strong odor after cleaning | Residual cleaner or damp surfaces | Rewipe with a dry microfiber towel and allow full air-dry | Ensure complete drying before use |
| Sensors or motors not responding | Moisture exposure or debris | Dry thoroughly and inspect connections | Keep unit dry during cleaning; wipe sensors gently |
| Clumping or uneven rotation | Improper litter level or residue | Clean interior thoroughly and refill to recommended level | Use recommended litter type and avoid overfilling |
| Persistent stains | Organic residues | Reapply enzyme cleaner and let sit longer; repeat | Clean promptly after spills |
Common Mistakes
- Using harsh cleaners that can degrade plastic seals or sensors
- Not removing all litter before cleaning, making the process messier
- Rinsing with excessive water near electrical components
- Skipping thorough drying, leading to mildew or odor rebound
Tips For Best Results
- Schedule deep cleans on a regular cadence (every 1–2 weeks depending on usage).
- Test a small area first when using new enzyme cleaners to ensure compatibility with plastic surfaces.
- Wipe in a consistent, overlapping pattern to avoid missed spots.
- Keep a dedicated cleaning kit to streamline the process.
Call A Professional
Seek professional help if the litter robot shows persistent electrical issues, cracking plastics, unusual noises, or resistance during rotation that does not resolve after cleaning. Do not attempt repairs that involve opening sealed electronics or tampering with safety mechanisms.
FAQ
How often should I deep clean my litter robot?
Most households benefit from a deep clean every 1–2 weeks, with more frequent cleaning for high-traffic households.
Can I use any enzyme cleaner for the litter box?
Choose an enzyme cleaner labeled safe for pet use and compatible with plastic surfaces; follow the product instructions closely.
Is it necessary to wear gloves during cleaning?
Yes. Nitrile gloves protect skin from cleaners and odors and prevent contamination.
What should I do if the unit still smells after cleaning?
Repeat the cleaning cycle focusing on hidden crevices and ensure complete drying before use.
Buying Guide
When selecting products to support a deep clean routine for a litter robot, consider factors such as cleaning efficacy, surface safety, and ease of use. The right kit and cleaners can make maintenance simpler and more reliable.
Size and compatibility: Ensure any accessory kit or brush matches your specific litter robot model and interior dimensions. Some deeper-clean tools may be model-specific, so verify compatibility before purchase.
Surface safety: Use enzyme cleaners designed for pet households and avoid abrasive or solvent-based products that could damage plastic surfaces or seals. Read labels for safe use on plastics and electronics near the unit.
Odor control: Enzyme-based cleaners break down organic waste more effectively than standard cleaners, reducing lingering odors between cleanings. Look for products with enzymes optimized for cat waste.
Tool ergonomics: A scrub brush with firm bristles and a flexible head helps reach corners and under rails. Pair with microfiber towels that absorb moisture well and dry quickly.
Protection and durability: Heavy-duty nitrile gloves provide a barrier against fluids and cleaners, and reusable towels reduce waste. Choose long-lasting tools to handle repeated cleanings without tearing or wearing out.
Cost and availability: Accessible, readily available cleaning kits and enzyme cleaners are convenient for ongoing maintenance. Consider multi-pack options to stock up for future cleans.
Placement and storage: Store cleaning supplies in a dedicated bin or shelf near the litter area to streamline future sessions. Keep a spare set of towels and a brush within reach of the unit.