Windshield haze can reduce visibility and compromise safety. This guide outlines practical steps to remove haze using commonly available auto detailing products and household tools. The approach combines surface preparation, chemical treatment, and careful maintenance to restore clear glass without scratches.
Quick Answer
Identify the haze on the windshield and choose a gentle cleaner first. If haze persists, progress to a windshield polishing compound and then a microfiber cloth set. Avoid abrasive tools that can scratch the glass. Regular maintenance with a dedicated cleaner helps prevent haze buildup.
What You’ll Need
- car windshield haze remover kit
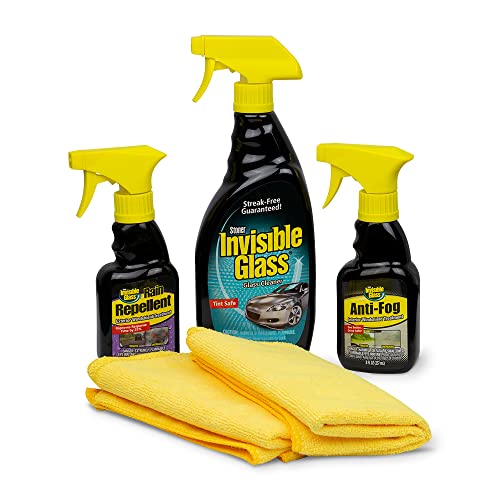
- auto glass cleaner spray with microfiber cloth set
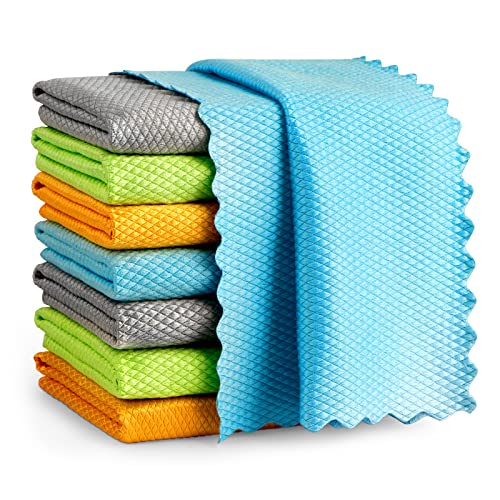
- microfiber cleaning cloth for windshield glass
- windshield glass polishing compound kit
- auto detailing razor blade scraper windshield

Before You Start
Prepare a clean working area and ensure the vehicle is parked in a shaded, well-ventilated space. Wash the exterior of the windshield to remove loose dirt. Wear protective gloves if you have sensitive skin and keep solvents away from painted surfaces. Time estimate: 30–60 minutes for initial haze removal; up to 2 hours for deep polishing and final detailing. Critical cautions include never using abrasive pads on the windshield and avoiding solvent overuse near the gasket or edge seals.
Step-By-Step: How To Clean Windshield Haze
- Assess the haze level: look for milky or cloudy areas that don’t disappear with basic cleaning.
- Initial cleaning: spray auto glass cleaner on a microfiber cloth and wipe the entire windshield with steady, overlapping strokes.
- Rinse and dry: use a clean microfiber cloth to remove residue and dry the surface completely.
- Inspect for remaining haze: note any spots that require deeper treatment or polishing.
- Apply windshield polishing compound: use a clean microfiber pad or cloth to apply a small amount of the windshield glass polishing compound kit in a circular motion over affected areas.
- Work in small sections: maintain light pressure and continue until the haze diminishes and clarity improves.
- Buff the area: switch to a fresh microfiber cloth and buff in straight lines to remove any compound residue.
- Final wipe-down: spray a light cleaner or water to remove any remaining polishing residue, then dry thoroughly.
- Edge and gasket care: avoid getting cleaner into the gasket; use a corner edge to prevent seepage.
- Check visibility: test drive in a safe area to confirm clarity under varying light conditions.
- Optional seal and protect: apply a dedicated windshield treatment if recommended by the product guidelines to slow future buildup.
- Store tools properly: wipe down all tools and store them in a dry place to prevent residue buildup.
Troubleshooting
| Symptom | Likely Cause | Fix | Prevention |
|---|---|---|---|
| Persistent milky haze after cleaning | Residual mineral deposits or seal failure | Use windshield polishing compound kit and re-clean with microfiber cloth | Regular maintenance and use of distilled water for final rinse |
| Streaks after polishing | Excess compound or dirty cloth | Switch to clean cloths and remove all residue | Clean tools frequently during process |
| Scratches appear after scraping | Razor blade used too aggressively | Use light pressure or switch to a polishing process; avoid metal blades | Only use razor on label-approved areas and follow kit instructions |
| Cloudy film forms after drying | Chemical residue left behind | Wipe with a fresh microfiber cloth dampened with cleaner | Rinse thoroughly during steps |
Common Mistakes
- Using abrasive pads or rough cloths on the windshield
- Overusing solvent-based cleaners near the edges
- Skipping a dedicated polishing step for heavy haze
- Not allowing adequate drying time between steps
Tips For Best Results
- Work in a controlled, shaded environment to prevent rapid drying that can leave streaks.
- Test any new product on a small, inconspicuous area first.
- Maintain a clean supply of microfiber cloths to avoid transferring residues.
- Angle the windshield to optimize the cleaning motion and visibility during the process.
- Follow each product’s instructions for cure times and recommended dwell periods.
Call A Professional
Consider consulting a professional if the haze remains after a thorough home treatment, if there are deep scratches, or if the windshield shows signs of pitting or cracking. Stop and contact a pro if the glass appears warped, if the edge seals show damage, or if you notice moisture behind the glass that could indicate a more serious issue.
FAQ
What causes windshield haze?
Windshield haze is often caused by mineral buildup, hard water deposits, or residue from cleaners that aren’t designed for glass surfaces.
Can I use household cleaners on my windshield?
It’s best to use products specifically formulated for auto glass to avoid scratches and film buildup.
How often should I wax or seal my windshield for haze prevention?
Regular maintenance with a dedicated glass cleaner and periodic polishing can help prevent haze buildup over time.
Is it safe to use a razor blade scraper on a windshield?
Only use an auto detailing razor blade scraper windshield as directed by the product guidelines and with caution to avoid damage.
Will polishing damage the tint or coatings?
Follow product instructions and test on a small area to ensure compatibility with tint and coatings.
Should I replace the windshield if haze returns frequently?
Frequent haze may indicate deeper issues. A professional inspection can determine if there are structural or seal problems.
Buying Guide
When selecting tools to combat windshield haze, consider size, noise, energy usage, control features, and placement in the vehicle care routine. A comprehensive kit with a car windshield haze remover kit plus auto glass cleaner spray with microfiber cloth set provides an integrated approach. Look for a windshield glass polishing compound kit that offers safe abrasives for glass and compatible pads. For edge precision, a auto detailing razor blade scraper windshield can help with stubborn residues, but use it carefully to avoid scratches. Placement matters: store cleaners in a cool, dry compartment within easy reach of your usual car care area. Compare kits by included accessories, drying time, and user reviews to ensure suitability for standard home use and typical American vehicles.