Maintaining clean walls can brighten a room and remove built-up dust, fingerprints, and smudges. This guide focuses on simple, effective methods using common mopping tools designed for wall cleaning. It explains how to select the right attachments, prep surfaces, and execute a safe cleaning routine that protects paint and wallpaper while achieving real results.
Whether you’re refreshing a fresh coat or reviving decades-old walls, the right equipment and a steady technique make wall cleaning straightforward and efficient.
Quick Answer
Use a microfiber mop designed for wall cleaning with an adjustable handle or extendable pole. For tight spots or high ceilings, switch to a slim wall mop with a bendable head or add a scrub brush attachment. Regular maintenance includes quick dusting followed by a damp wipe to remove smudges without soaking the surface.
What You’ll Need
- Microfiber mop for wall cleaning adjustable handle — effective dust pickup and gentle on paint
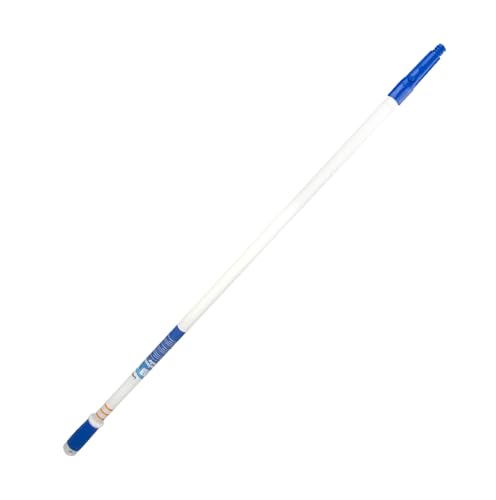
- Extendable mop pole for wall cleaning 48 inch — reach high areas safely
- Wall cleaning microfiber mop head replacement — for fresh, clean fibers without residue
- Slim wall mop with bendable head for cleaning walls — contours to irregular surfaces
- Scrub brush attachment for mop for wall cleaning — for stubborn spots
- Water bucket or spray bottle with mild cleaning solution (mainly for damp cleaning)


Before You Start
Prepare a clear workspace, remove nearby picture frames or decor, and lay down a drop cloth to protect floors. Test a small, inconspicuous wall area with your chosen cleaning solution to ensure no adverse paint reactions. Allow for a time range of 15–30 minutes to complete a typical room, more for larger spaces or heavily soiled walls. Keep surfaces dry to prevent streaks and avoid saturating paint or wallpaper.
Step-By-Step: How To Clean Walls With A Mop
- Attach the extendable mop pole for wall cleaning 48 inch or an adjustable handle to the chosen microfiber mop for wall cleaning.
- Dust the walls using a dry microfiber head to remove loose debris and prevent muddy streaks.
- Mix a light cleaning solution in a bucket or spray bottle. Use a mild, non-abrasive cleaner suitable for paint or wallpaper.
- Dip the mop head lightly and wring out excess moisture to avoid dripping.
- Start at the top of the wall and work downward in even vertical or horizontal strokes.
- For stubborn marks, switch to the slim wall mop with bendable head and gently angle to target the spot; use the scrub brush attachment if needed.
- Rinse the mop head frequently or switch to a fresh microfiber head to prevent spreading grime.
- Wipe surfaces in small sections, drying each area with a clean, dry microfiber pad to prevent water damage.
- Address corners and edges with the brush attachment to remove dust along trim and baseboards.
- Inspect walls for missed spots and repeat as necessary, focusing on high-traffic zones.
- Allow walls to dry completely before rehanging items or replacing furniture near the walls.
Troubleshooting
| Symptom | Likely Cause | Fix | Prevention |
|---|---|---|---|
| Streaks after cleaning | Over-wetting or dirty mop head | Wring mop well; switch to fresh microfiber | Use a damp, not soaking, wipe |
| Grey smudges reappearing | Residual grime in folds or baseboard areas | Focus on edges with brush attachment | Spot-clean regularly to prevent buildup |
| Scratches on wall | Abrasion from hard materials | Use flat microfiber head only; avoid scrub brush on delicate finishes | Test in hidden area first |
| Wet patch near ceiling | Overly wet mop or nozzle angle | Angle mop downward and reduce moisture | Wring thoroughly, work in short passes |
Common Mistakes
- Using soaking-wet mops on painted or wallpapered walls
- Overlooking corners and baseboards during cleaning
- Neglecting to replace dirty mop heads or microfiber pads
- Ignoring manufacturer instructions for cleaning solutions
- Cleaning in direct sunlight, which can cause streaks as surfaces dry unevenly
Tips For Best Results
- Always start with a dry dusting to remove loose dirt before damp cleaning.
- Choose a microfiber mop head replacement designed for walls to prevent fiber shedding on walls.
- Maintain a consistent cleaning pattern (top-to-bottom) to minimize streaks.
- Test any new solution on a small area to ensure compatibility with your wall finish.
- Store mop heads clean and dry to prevent mold or musty smells.
Call A Professional
Consider professional help if walls show extensive water damage, peeling paint, or wallpaper that is loose or moldy. Signs to consult a pro include persistent staining, discoloration after cleaning, or delicate finishes that require specialized products or methods.
FAQ
Can I use regular household cleaner on walls with a mop?
Yes, but choose a mild, non-abrasive cleaner and test a hidden area first to avoid damage.
Is a bendable head necessary for cleaning walls?
Not always, but a bendable head helps reach corners and curved surfaces more effectively.
How often should walls be cleaned?
Dust walls weekly and do a damp cleaning every few months, or sooner in high-traffic areas.
What if my wall has wallpaper?
Use a gentler cleaner and a soft microfiber pad to avoid lifting adhesive or tearing.
Buying Guide
When selecting tools for cleaning walls, several factors improve results and ease of use. Consider size and reach, noise level is generally not a concern for cleaning walls, but maneuverability matters. Energy efficiency isn’t a major factor for manual cleaning, yet opting for lightweight, ergonomic handles reduces fatigue. Look for adjustable or extendable poles, reliable microfiber mop heads, and compatibility with a scrub brush attachment for tough spots. Placement options matter: a wall clean kit should fit into cabinets or closets without taking up excessive space. Compare multiple setups to match room height, wall finish, and preferred cleaning motion. Is a bendable head worth it for your space? If ceiling-high walls are common, the slim bendable option can save time and effort.