Walleye filleting is a valuable skill for home cooks and anglers alike. A clean, well-prepared fillet maximizes meat yield and ensures a safe, tasty finish. This guide covers efficient methods, essential tools, and practical tips to keep your walleye preparation consistent and easy.
Whether you’re cleaning a single fish after a day on the lake or processing a small catch for the freezer, following a structured process helps reduce waste and preserves flavor. The steps below emphasize safety, speed, and accuracy to produce boneless, well-textured fillets.
Quick Answer
Begin with a sharp fillet knife, scale or skin as needed, remove head and guts, and follow the natural contour of the fillet for clean, even slices. Keep your work area organized and rinse fillets as you go to prevent sticking. For best results, use a dedicated cutting board and a sharpening steel between fish.
What You’ll Need
- 7-inch stainless steel fillet knife for walleye cleaning
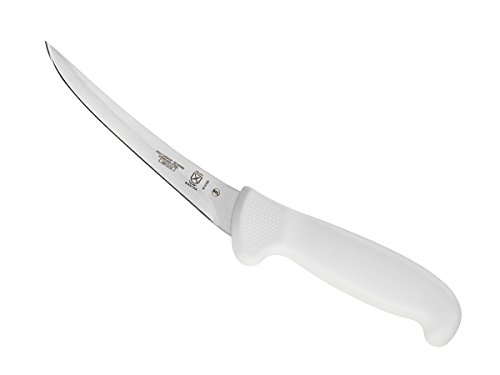
- boning knife for fish fillet walleye processing 6-7 inch
- fish scaler with scraper stainless steel for walleye
- slotted fish cleaning cutting board with groove
- fillet knife sheath and sharpening steel set for walleye


Before You Start
Prepare a clean workspace with a stable, non-slip cutting board. Have a sharp knife ready and keep a damp cloth handy to wipe hands and blades. Wear cut-resistant gloves if needed and practice safe knife handling. Time estimate: 10–20 minutes per fish for a typical 2–4 lb walleye.
Safety notes: keep fingers away from the blade, work near a sink or basin, and sanitize surfaces after processing. If the fish smells off or shows abnormal coloring, discard it. Always dispose of viscera promptly to avoid contamination.
Step-By-Step: How To Clean Walleye
- Place the fish on the cutting board belly down, with a towel for stability. If needed, scale the fish first using the fish scaler with scraper stainless steel for walleye, working from tail toward head to remove all scales.
- Remove the head by making a clean cut just behind the gills. This provides easier access to the body and reduces splatter.
- Open the body cavity and remove internal organs with a firm, downward stroke. Rinse the cavity with cold running water to remove blood and entrails.
- Rinse and pat dry the fish, then reposition it so the spine faces away and the dorsal fin is toward you. This gives better control during filleting.
- Make the first knife cut along the backbone near the vertebrae, keeping the blade angled slightly toward the rib cage. Use long, steady strokes to separate fillet from the rib cage.
- Follow the contour of the fish, guiding the blade along the spine to lift the fillet away. Apply even pressure and avoid forcing through bones to maintain a clean fillet.
- Clean the rib section to remove any remaining bones or cartilage. Flip the fish and repeat on the other side if processing a second fillet.
- Optional skin-on or skin-off—for skinless fillets, lay the fillet skin-side down and slide the knife between skin and flesh, keeping blade flat. For skin-on, leave the skin intact and trim only the flesh as needed.
- Trim and square the fillets by removing any dark meat along the edges and shaping into uniform portions. Rinse lightly to remove residue and pat dry.
- Store or portion the fillets on ice or in a refrigerator, or wrap and freeze for longer storage. Label with date to track freshness.
Troubleshooting
| Symptom | Likely Cause | Fix | Prevention |
|---|---|---|---|
| Fillet sticks to blade | Dull knife or blade angle | Sharpen with sharpening steel; adjust angle to about 15 degrees | Keep knife sharp; use light, even strokes |
| Ragged bone spots | Improper cutting along rib bones | Trace along the rib cage more carefully; remove small sections | Take smaller, deliberate cuts |
| Fillet tears or bruises | Too much force or wrong edge | Adjust pressure and blade angle; use a boning knife for tricky areas | Move slowly and maintain blade control |
| Excess water on fillets | Over-rinsing or not patting dry | Light rinse only; pat dry with clean cloth | Minimal moisture before storage |
Common Mistakes
- Using a dull knife, which increases tearing and bone damage
- Rushing through steps, leading to missed bones or uneven fillets
- Not patting fillets dry, causing ice crystals during freezing
- Ignoring safety practices, risking cuts or contamination
Tips For Best Results
- Keep your knives sharp and use a dedicated fillet knife for walleye to maximize precision
- Maintain a clean, cool workspace; cold fish are easier to handle
- Angle control matters—small adjustments yield cleaner fillets
- Label portions with date and species for organized storage
- If freezing, flash-freeze on a tray before bagging to prevent clumping
Call A Professional
Consider contacting a professional fishmonger if you encounter persistent bone fragments, difficult-to-clean fillets, or uneven processing. Stop and seek help if the fish shows signs of spoilage, or if you’re unsure about safety practices. For commercial aims, professional processing ensures consistent yields and safety compliance.
FAQ
What tools are essential for cleaning walleye?
Essential tools include a 7-inch fillet knife, a boning knife, a fish scaler, a slotted cutting board, and a sharpening steel. These support efficient filleting, deboning, and surface preparation.
Should I remove the skin?
Removing skin is optional. If you plan to cook fillets skinless, use a sharp knife to separate skin from flesh. For pan-searing, skin-on fillets may be preferred.
How do I prevent fillets from sticking to the board?
Keep the board dry and use a non-slip mat. Lightly salt or dust with a thin coat of flour to reduce sticking during processing.
How long can cleaned fillets be stored?
Fresh fillets can be kept on ice for 1–2 days or frozen for 3–6 months. Label with date and use within recommended periods for best flavor and texture.
Buying Guide
When selecting gear for cleaning walleye, consider size, material, and ergonomics. A 7-inch fillet knife is a versatile choice for many anglers, while a 6–7 inch boning knife helps with precise deboning. Stainless steel blades resist corrosion and are easier to maintain in wet environments.
Key factors include:
- Size and purpose: Choose a dedicated fillet knife for walleye to handle the fish’s contours effectively. A separate boning knife can simplify deboning.
- Blade material: Stainless steel blades resist rust and simplify cleanup in humid conditions.
- Weight and grip: Ergonomic, non-slip handles reduce fatigue during long filleting sessions.
- Cutting board with groove: Slotted boards drain liquids away and prevent mess on countertops.
- Maintenance tools: A sharpening steel helps maintain edge integrity between sessions.
- <b]Storage: Knife sheathes protect blades and ensure safe transport.
Consider your typical catch size, storage space, and how often you fillet when choosing gear. If you process multiple fish, investing in a full set may improve efficiency and consistency over time. What combination of tools best fits your workflow and kitchen setup?