Tap lines can accumulate mineral deposits, rust, and buildup that reduce water flow and drip. This guide explains a practical, step‑by‑step method to clean faucet lines using common tools and specialized accessories. The process emphasizes safety and efficiency for typical American homes.
Readers will learn how to inspect, flush, and clean tap lines, including working with faucet aerators and internal piping. The steps are designed to minimize mess and downtime while preventing damage to fixtures.
Quick Answer
Quick Method: Shut off water, remove the faucet aerator, use a faucet aerator cleaning kit to soak and scrub, then flush the line with a water line flushing wand tool. If deposits persist, wire or snake the line with a plumbing snake for faucet lines and finish with a gentle scrub using a pipe cleaning brush set.
What You’ll Need
- Faucet aerator cleaning kit for removal and cleaning of aerators
- Faucet line scale remover for mineral deposits on internal lines
- Pipe cleaning brush set for brushing interior pipe surfaces
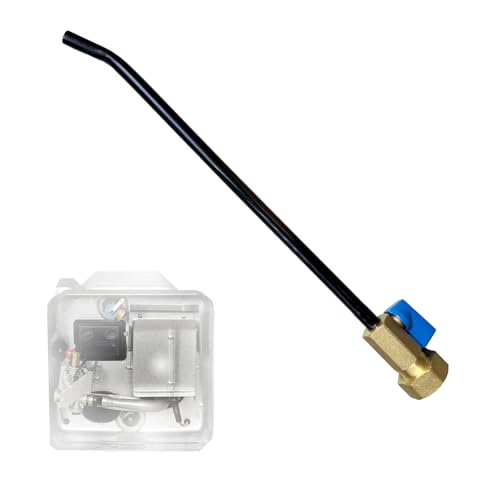
- Water line flushing wand tool to flush and clear debris
- Plumbing snake for faucet lines to dislodge stubborn clogs


Before You Start
Prepare a towel or shallow tray to catch water and debris. Turn off the water supply to the affected faucet before disassembly. If your home has a dual supply, shut off both hot and cold lines. Use protective eyewear and gloves to avoid contact with cleaning agents or sharp edges. Allow any heat from recent use to dissipate before beginning. Estimate a typical session of 20–60 minutes, depending on line length and deposit severity.
Step-By-Step: How To Clean Tap Lines
- Disconnect the faucet from the supply lines if accessible, or simply loosen the aerator to access the line end.
- Remove the faucet aerator and inspect for visible buildup. Separate the aerator components if needed.
- Soak aerator parts in the faucet aerator cleaning kit recommended solution for 10–15 minutes to loosen mineral deposits.
- Rinse aerator parts under running water, using a soft brush to scrub tiny outlets and screens.
- Reinstall the aerator and turn the water back on briefly to test flow. If flow remains reduced, move to internal line cleaning.
- Insert the water line flushing wand tool into the faucet shank or supply line and flush with clean water to push out loose debris.
- If deposits persist, insert the plumbing snake for faucet lines into the line and gently advance to dislodge buildup, avoiding excessive force.
- Run the water again to clear debris. For stubborn scale, apply the faucet line scale remover according to product instructions and rinse thoroughly.
- Use the pipe cleaning brush set to scrub accessible internal surfaces where possible, then flush once more.
- Re-check for smooth water flow. If performance is still poor, consider repeating steps or consulting a professional plumber.
- Reassemble any components, restore full water supply, and observe for drips or leaks over the next 24 hours.
Troubleshooting
| Symptom | Likely Cause | Fix | Prevention |
|---|---|---|---|
| Water flow improves briefly but returns to low | Deposits reaccumulate inside line | Repeat cleaning cycle; consider scale remover soak | Install filters, clean lines annually |
| Airy spray after cleaning | Aerator still clogged or damaged | Replace aerator or use aerator cleaning kit again | Inspect aerator periodically |
| Leaking after reassembly | Thread damage or improper sealing | Re-seat connections, replace gasket | Use thread sealant sparingly if appropriate |
| Noisy line during flushing | Air pockets or turbulence | Pause to allow air to escape, finish flushing gradually | Avoid high-pressure bursts |
Common Mistakes
- Using excessive force with a plumbing snake for faucet lines, which can damage pipes.
- Omitting a proper shutoff before disassembly, risking water damage.
- Overlooking aerator replacement after cleaning, leading to poor flow.
- Relying on harsh chemicals that can corrode fixtures; follow kit instructions.
Always verify compatibility of cleaning products with your faucet materials and avoid abrasive tools on delicate finishes.
Tips For Best Results
- Perform cleaning during low-use periods to minimize disruption.
- Keep a small tray to collect water and debris for easy cleanup.
- Schedule periodic maintenance to prevent heavy buildup, especially in hard-water areas.
- Label parts during disassembly to simplify reassembly and reduce mistakes.
- Consider pairing a faucet aerator cleaning kit with a dedicated line cleaner for thorough results.
Call A Professional
Experts should be consulted if:
- Leaks persist after reassembly or if aggressive cleaning is required.
- Repeated clogs occur in multiple fixtures, suggesting a broader plumbing issue.
- The faucet is old or has corroded supply lines that require replacement.
Urgent signs include water pooling, sudden loss of pressure across fixtures, or gas-like smells near lines. If any of these occur, stop work and contact a licensed plumber.
FAQ
Can I use store-bought cleaners for tap lines?
Yes, but follow the product instructions and ensure compatibility with your faucet materials to avoid damage.
How often should tap lines be cleaned?
Hard-water homes may benefit from annual maintenance; otherwise, every 1–2 years is common depending on usage.
Is a water line flushing wand safe for all faucets?
For most standard fixtures, yes, but avoid high-pressure settings on delicate components.
What if the problem persists after cleaning?
Persistent issues may indicate internal pipe corrosion or supply line problems best handled by a professional.
Buying Guide
When selecting tools to clean tap lines, consider size, compatibility, and ease of use. A comprehensive kit that includes a faucet aerator cleaning kit, a faucet line scale remover, and a pipe cleaning brush set covers most common deposits. A water line flushing wand tool helps flush debris from lines, while a plumbing snake for faucet lines resolves stubborn clogs.
Key buying factors include:
- <bSize and compatibility: Ensure tools fit your faucet type and pipe diameter.
- <bNoise and ease of use: Look for user-friendly handles and low-noise operation during flushing.
- <bEnergy impact: Cleaning minimizes water pressure loss; not a direct energy feature but improves efficiency.
- <bControls: Simple on/off and adjustable flushing settings help manage debris removal.
- <bPlacement and storage: Compact kits store easily under sinks or in utility closets.
For best results, compare bundles that combine essential tools with replacement parts and read user reviews about durability and effectiveness. If unsure, start with a basic kit and add accessories as needed.