Sterling silver chains can develop a dark tarnish layer when exposed to air, moisture, and oils. This guide explains practical, safe steps to restore shine using common household tools and proven jewelry cleaners. The instructions emphasize avoiding damage to delicate links while achieving professional-looking results.
Readers will find a clear, step-by-step method, plus quick fixes for common issues and guidance on when to seek professional help. The focus is on real-world use for American households seeking an effective, affordable silver chain restoration.
Quick Answer
Gently clean the chain with a silver tarnish remover液 or dip solution, then polish with a silver polishing cloth. For stubborn tarnish, consider an ultrasonic cleaner or a dedicated jewelry cleaning kit. Rinse thoroughly and dry completely to prevent water spots.
What You’ll Need
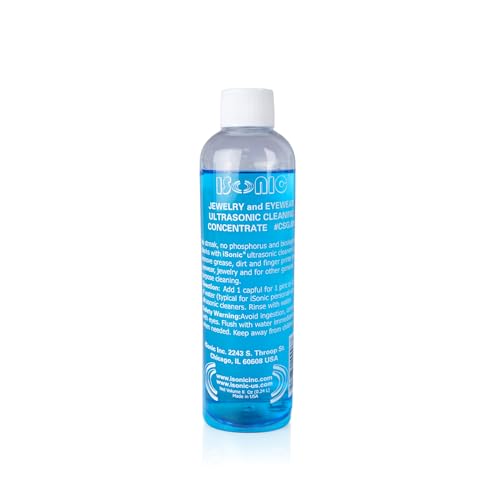
- Sterling silver tarnish remover liquid 8 oz
- Silver polishing cloth for sterling silver jewelry
- Ultrasonic jewelry cleaner for silver chains
- Jewelry cleaning kit silver tarnish remover with cloth
- Sterling silver chain cleaning dip solution
- Soft microfiber cloth


Before You Start
Prepare a clean workspace and gather tools. If the chain has gemstones or delicate links, verify compatibility with cleaners. Always wear gloves when handling chemical solutions. Do not soak fashion or plated pieces; this guide targets genuine sterling silver. Allow the chain to reach room temperature before cleaning, and work in a well-ventilated area. Total time for a typical cleaning ranges from 15 to 45 minutes depending on tarnish severity.
Step-By-Step: How To Clean A Sterling Silver Chain That Turned Black
- Inspect the chain for loose links or clasps. If any weak areas are found, stop and repair before cleaning to avoid loss during handling.
- Choose a cleaning method: liquid tarnish remover, dip solution, or ultrasonic cleaner. For light tarnish, a polishing cloth may suffice; deeper tarnish benefits from a chemical cleaner or ultrasonic action.
- Prepare a cleaning tray with lukewarm water. If using a dip solution, follow product directions precisely and limit immersion time to recommended intervals.
- Submerge the chain in the cleaner for the advised duration. Do not leave it soaking longer than the recommended time to protect the chain’s finish.
- Rinse the chain under lukewarm running water to remove all residue. Ensure no cleaner remains on the chain or in the clasp.
- Dry thoroughly with a soft microfiber cloth. Pat gently and avoid abrasive rubbing that could scratch the surface.
- Buff with a silver polishing cloth to restore luster. Use gentle, circular motions rather than aggressive scrubbing.
- For persistent tarnish, run the chain in an ultrasonic cleaner according to the device’s instructions. Keep the setting appropriate for jewelry and avoid overheating the metal.
- Inspect again for remaining discoloration. If tarnish persists in crevices, repeat the cleaning process or apply a second pass with a targeted cleaner.
- Store the chain in a dry, airtight bag or jewelry box to slow future tarnish. Consider anti-tarnish strips for longer-term protection.
- If the chain contains gemstones, ensure the cleaner is compatible with the stone type and use gentler methods as needed.
- Document your process for future reference, noting which cleaner provided best results for your specific chain.
Troubleshooting
| Symptom | Likely Cause | Fix | Prevention |
|---|---|---|---|
| Chain remains dull after cleaning | Deposits left on surface | Rinse thoroughly and re-polish | Rinse twice; use a softer cloth |
| Discoloration returns quickly | Oxygen exposure or oils | Polish and apply storage with anti-tarnish measures | Keep in a sealed pouch when not wearing |
| Clasp or links appear scratched | Abrasive cleaning or harsh cloth | Switch to gentler cloth; avoid abrasive pads | Use polishing cloths designed for silver |
| Gemstones look cloudy | Cleaner incompatibility | Rinse and dry; use stone-safe methods | Research cleaner compatibility with stones |
Common Mistakes
- Over-soaking or using harsh dips on delicate or antique chains
- Scrubbing with abrasive tools that scratch the silver surface
- Assuming all cleaners are safe for stones embedded in the chain
- Neglecting thorough drying, leading to water spots or further tarnish
Tips For Best Results
- Test cleaner on a small, inconspicuous area of the chain first to check for adverse reactions.
- Use a dedicated silver polishing cloth between cleanings to maintain shine.
- For ongoing wear, consider pairing a weekly light wipe with monthly deeper cleanings.
- Store silver in a dry, low-humidity environment to slow tarnishing.
- Opt for ultrasonic cleaning only if the chain lacks fragile components or loose settings.
Call A Professional
Seek professional help if the chain shows deep pitting, extensive corrosion, or if gemstones appear loose or damaged. Stop immediately if you notice >
Signs to contact a jeweler include persistent black tarnish that reappears quickly after cleaning, discoloration around clasps, or any structural damage to links. A professional can assess metal integrity and perform re-plating or advanced cleaning without risking further harm.
FAQ
Can I use toothpaste to clean a sterling silver chain?
Toothpaste can be abrasive and may scratch silver; use a proven silver cleaner or polishing cloth instead.
Is ultrasonic cleaning safe for all sterling silver chains?
Ultrasonic cleaners are safe for many chains, but exclude pieces with soft stones or glued components unless specified by the manufacturer.
How often should I clean a tarnished silver chain?
Clean when tarnish becomes noticeable; routine light cleaning can help prevent heavy buildup over time.
What storage helps prevent tarnish?
Store in an airtight container with anti-tarnish strips or in a soft pouch; avoid humidity and direct sunlight.
Can cleaning damage vermeil or plated pieces?
Yes. Avoid aggressive cleaners on vermeil or plated surfaces; use gentler methods or seek professional guidance.
Buying Guide
When choosing products to restore sterling silver chains, consider the following factors to optimize results and safety.
- Size and format: Liquid cleaners, dips, and cloths come in various sizes. For occasional use, a smaller bottle and a care cloth may suffice; for frequent maintenance, a larger bottle saves time.
- Noise and ease of use: Ultrasonic cleaners offer quick results but require careful setup. If you prefer simplicity, a liquid cleaner plus polishing cloth is more straightforward.
- Energy efficiency: Ultrasonic devices consume energy; compare models with energy-saving features or manual cleaning options to minimize usage.
- Controls and safety features: Look for gentle settings, timers, and temperature limits. Ensure cleaners are designed for jewelry and indicate stone compatibility if applicable.
- Placement and storage: Store cleaners away from children and pets; keep containers sealed and labeled to avoid cross-contamination with other metals.
Choosing the right kit or combination of tools depends on tarnish severity, the presence of stones, and personal preference for speed versus control. For many users, a basic toolkit with a tarnish remover liquid, polishing cloth, and optional ultrasonic cleaner provides complete coverage for routine maintenance and occasional deep cleaning.