Slate surfaces, from floors to bathroom walls, require a careful cleaning approach to preserve their natural beauty and longevity. This guide outlines practical steps, recommended products, and common troubleshooting tips to keep slate looking its best without damage.
Whether you’re refreshing a slate countertop, tile, or a decorative panel, following a gentle, pH-neutral routine helps prevent staining and dullness. The following sections provide a clear, task-focused path for homeowners and DIY enthusiasts alike.
Quick Answer
Best starting point: use a pH-neutral slate cleaner spray and a microfiber cloth for routine cleaning. For tougher spots, a slate tile cleaning brush with stiff bristles can help lift grime without scratching. Always seal cleaned slate to protect against future staining.
What You’ll Need
- slate cleaner spray pH neutral stone cleaner
- slate tile cleaning brush stiff bristles
- microfiber cloth slate cleaning
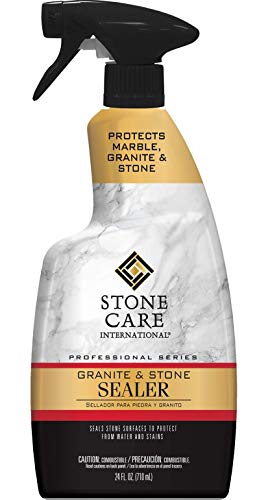
- slate stone sealer protector
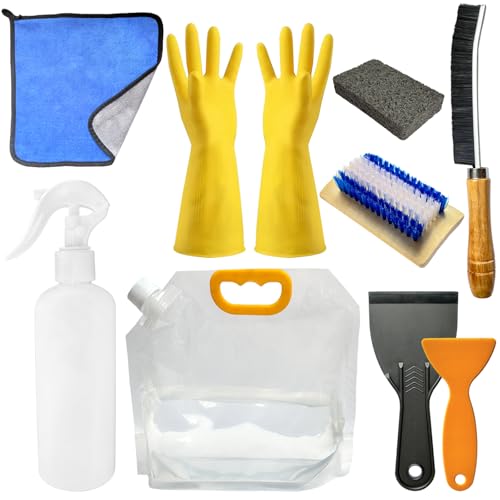
- slate cleaning kit

Before You Start
Prepare a small, inconspicuous test area to ensure the cleaner does not alter color or texture. Work in a well-ventilated space and avoid acidic cleaners, ammonia, or bleach unless the slate manufacturer explicitly allows them. Plan a cleaning session during a time when you won’t need the surface for at least an hour to allow any residue to dry completely. Critical cautions: never use abrasive pads on polished slate and always rinse thoroughly after cleaning to prevent residue buildup.
Step-By-Step: How To Clean Slate Surfaces
- Remove loose debris with a dry microfiber cloth to prevent scratching during cleaning.
- Spray a light mist of slate cleaner spray pH neutral stone cleaner onto the surface or onto your microfiber cloth.
- Wipe in a consistent direction, covering the entire area to lift dirt without saturating the surface.
- For stubborn spots, apply cleaner directly to a slate tile cleaning brush stiff bristles and gently scrub in gentle circles.
- Rinse the area with a clean, damp microfiber cloth to remove any cleaner residue.
- Dry the surface with a fresh microfiber cloth to prevent water spots and streaking.
- Inspect for remaining stains. If necessary, repeat the cleaning cycle on those zones only.
- Apply a thin coat of slate stone sealer protector after the surface is completely dry, following the product’s instructions.
- Allow the sealer to cure as directed before exposing the area to use or moisture.
- For routine maintenance, perform a light clean every 1–2 weeks and reseal as recommended by the sealer manufacturer.
- Store cleaning products away from children and pets, and keep surfaces dry between cleanings to extend the slate’s life.
- Document any difficult stains with photos to track how well cleaning methods perform over time.
Troubleshooting
| Symptom | Likely Cause | Fix | Prevention |
|---|---|---|---|
| Cloudy or dull surface after cleaning | Residue from cleaner or hard water | Wipe with a damp microfiber cloth, then dry thoroughly | Use distilled water and a pH-neutral cleaner |
| Streaks on polished slate | Improper drying or excessive cleaner | Dry with a clean cloth in a single pass | Apply cleaner sparingly and wipe evenly |
| Stains that won’t lift | Deep or uneven staining | Spot clean with targeted application and repeat | Seal slate after cleaning to minimize future staining |
| Sealer shows uneven finish | Surface not fully clean or not dry | Re-clean, ensure complete dryness, reapply sealer | Follow manufacturer curing times and environmental conditions |
Common Mistakes
- Using acidic or bleach-based cleaners on slate
- Over-wetting porous slate surfaces before sealing
- Using abrasive scrub pads on polished finishes
- Skipping a proper sealing step after cleaning
- Neglecting to dry the surface thoroughly after cleaning
Tips For Best Results
- Test any cleaner on a hidden area first to avoid color changes
- Routinely dust with a microfiber cloth to reduce buildup
- Choose slate cleaner spray pH neutral stone cleaner for regular maintenance
- Follow the sealer’s reapplication schedule to extend slate life
- Label cleaning tools to avoid cross-contamination with other surfaces
Call A Professional
Consider calling a professional if slate shows deep staining, significant cracking, or if the sealer has failed and needs restoration. Signs to stop DIY attempts include persistent discoloration despite multiple cleanings, warping, or surface flaking. A pro can assess porosity, confirm sealer compatibility, and provide advanced restoration options.
FAQ
What is the best cleaner for slate surfaces?
A pH-neutral slate cleaner spray is ideal for routine cleaning and protective maintenance.
Can I use a regular household brush on slate?
Use a dedicated slate tile cleaning brush with stiff bristles to avoid scratching delicate finishes.
How often should slate be sealed?
Most slate surfaces benefit from resealing every 1–3 years, depending on use and porosity.
Is it safe to use water alone on slate?
Water can help, but a specialized cleaner helps remove oils and mineral deposits more effectively.
What maintenance steps prevent staining?
Clean regularly with a pH-neutral cleaner, dry thoroughly, and reseal as recommended.
Should slate be dried after cleaning?
Yes—drying prevents water spots and helps ensure even sealer absorption.
Can sealing be done on damp slate?
No, sealer must be applied on a completely dry, clean surface for proper adhesion.
Buying Guide
When selecting products for cleaning and protecting slate, consider size, noise level, energy efficiency, controls, and placement. Key buying factors include:
- Size and coverage: Choose a cleaning kit or spray size that matches the area you plan to maintain to avoid waste.
- Safety and ingredients: Opt for pH-neutral cleaners that are gentle on stone and indoor air-friendly.
- Sealer type: A penetrating stone sealer protector provides lasting protection, but check for compatible formulations with your slate finish.
- Application tools: A dedicated slate cleaning kit with a soft microfiber cloth and a stiff-bristle brush ensures effective cleaning without scratching.
- Ease of use: Look for spray cleaners for quick touch-ups and kit combos that simplify routine care.
- Maintenance frequency: Compare sealant durability and required reapplication intervals to plan ongoing upkeep.
- Placement considerations: For kitchens or bathrooms, choose products with low odor and fast curing times to minimize downtime.