Keeping a kitchen sink free of clogs starts with a clean, well-maintained trap. This guide provides practical, step-by-step instructions using common tools to safely remove buildup and prevent future blockages. The goal is a smooth, odor-free drain and a reliable trap seal that protects your plumbing.
Quick Answer
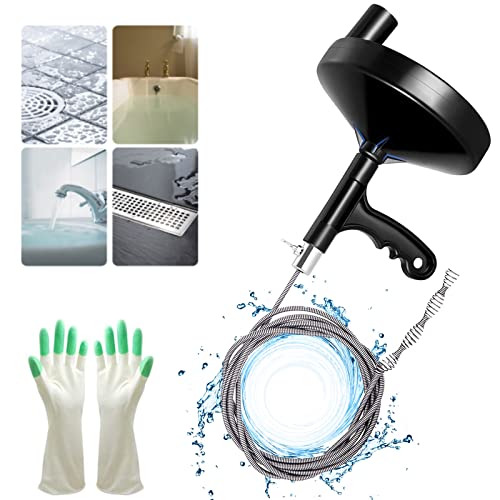
Disconnect the P-trap, clear debris with a hand drain snake auger or drain cleaning tool kit, rinse thoroughly, and reassemble. If the clog persists beyond simple debris, inspect the slip joints and nuts, replace worn components, and test the drain.
What You’ll Need
- hand drain snake auger for kitchen sink clog
- P-trap cleaning kit with slip joint nuts and brushes
- basin wrench for removing sink trap nuts
- drain cleaning tool kit for kitchen sink
- adjustable pipe wrench for P-trap removal


Before You Start
Prepare the workspace by placing a bucket underneath the plumbing, clearing the area around the sink, and wearing protective gloves. Protect the cabinet floor with a towel to catch spills. Time estimate: 20–45 minutes depending on clog severity. Always depressurize and disconnect the sink’s water supply if working near valves and avoid forcing parts beyond their normal movement, which can cause leaks.
Step-By-Step: How To Clean A Sink Trap
- Place a bucket under the P-trap and loosen the slip nuts with the basin wrench or adjustable wrench.
- Carefully remove the U-shaped P-trap and empty its contents into the bucket.
- Inspect the interior for hair, grease, and food debris; use gloved hands or a small brush to remove buildup.
- Reinsert the trap loosely and run a quick rinse to assess flow, then disconnect again to apply a hand drain snake auger if a clog remains.
- Insert the auger into the drain line, pushing slowly while twisting to dislodge the clog, then pull out any obstruction.
- Clean the trap with a brush and rinse thoroughly before reattaching; ensure the brush reaches into each curve of the trap.
- Reassemble the trap with clean slip joints, snug but not overtightened, and check for leaks by running warm water.
- If leaks appear at joints, disassemble and reseat the washers or replace a worn P-trap cleaning kit nut/washer.
Troubleshooting
| Symptom | Likely Cause | Fix | Prevention |
|---|---|---|---|
| Slow drain after cleaning | Residual buildup or partial clog | Re-run the auger or use a basin brush to detangle remaining debris | Regular cleaning every 1–3 months |
| Water backflow into sink | Improper trap reassembly or loose connections | Recheck slip joints and tighten evenly | Use appropriate lubricants on threads and avoid overtightening |
| Persistent foul odor | Dry trap or residue buildup | Flush with hot water and clear the trap; replace worn washers | Keep trap full of water when unused for long periods |
| Leaks after reassembly | Damaged gaskets or washers | Replace gaskets or entire P-trap cleaning kit components | Inspect seals during every reassembly |
Common Mistakes
- Overlooking the slip joints and not lubricating threads before reassembly
- Using excessive force when loosening nuts, which can strip threads
- Rinsing with hot water before the trap is fully sealed, which may push debris back in
- Forgetting to inspect the entire drain path beyond the trap for hidden clogs
Tips For Best Results
- Schedule routine trap maintenance to prevent buildup; a quick quarterly clean can avert major clogs.
- Keep a small brush handy to scrub the interior curves of the trap for easiest debris removal.
- Wear gloves to protect hands from sharp edges and dirty water; dispose of waste responsibly.
- Label and photograph the trap setup before disassembly to simplify reassembly.
- Choose a compact, user-friendly drain cleaning tool kit designed for kitchen sinks for future use.
Call A Professional
Contact a plumber if any of the following occur: persistent clogs after multiple cleanouts, repeated leaks at joints after reassembly, or if you notice signs of pipe damage or corrosion. In these cases, a pro can assess underlying issues such as pipe obstructions beyond the trap, damaged fittings, or venting problems.
FAQ
Do I need to remove the entire sink to clean the trap?
Most situations only require removing the P-trap beneath the sink with basic hand tools.
Can I use chemical drain cleaners to clean a trap?
Chemical cleaners are not ideal for trap maintenance and can damage pipes; mechanical cleaning is safer for traps.
How often should I clean my sink trap?
Light maintenance every 1–3 months helps prevent major clogs; deeper clean annually or as needed.
What if there’s a foul odor even after cleaning?
Inspect for dry traps, check seals, and ensure there is no sewer gas entering the cabinet; reseal or replace as needed.
Is it okay to reuse the old washers?
Worn washers can cause leaks; replace with new washers from a compatible kit.
Will a basin wrench help with tight nuts?
Yes, a basin wrench is effective for reaching stubborn or tight slip-nut connections under the sink.
Buying Guide
When choosing tools to clean a sink trap, consider size, ease of use, and compatibility with kitchen plumbing. For trap maintenance, look for a compact hand drain snake auger and a P-trap cleaning kit with slip joint nuts and brushes designed for standard kitchen traps. Assess noise and material quality if you plan routine cleaning. A basin wrench can be helpful for tight spaces, and an adjustable pipe wrench adds versatility for different trap configurations. Consider a drain cleaning tool kit that includes multiple attachments for comprehensive access to elbows, bends, and the trap’s curves. Finally, ensure the kit includes durable brushes and replacement washers to extend the life of your trap components.