Keeping a shower head clean helps maintain steady water flow and water pressure while preventing mineral buildup. This guide walks through simple, effective methods suitable for most homes in the United States, using common cleaning tools and safe household products.
Regular maintenance can extend the life of fixtures and improve cleanliness. The steps below cover quick fixes for mineral deposits and routine upkeep, with safety tips to minimize risk of damage.
Quick Answer
Best overall method: Use a vinegar soak to dissolve mineral buildup, followed by a thorough rinse. If deposits are stubborn, employ a descaling kit or descaling tablets with a cleaning wand for targeted work. Finish with a microfiber cloth to wipe fixtures dry and prevent spots.
What You’ll Need
- Shower head descaling kit
- Shower head cleaning brush with long handle
- Descaling tablets for shower heads
- Shower head cleaning wand
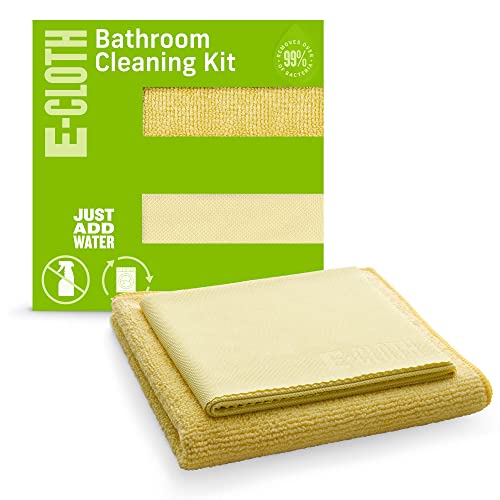
- Microfiber cleaning cloth for shower head and fixtures


Before You Start
Before beginning, turn off the water supply to the shower and remove any removable shower head if possible. If the head is fixed, proceed with a non-invasive method to avoid damage. Protect surrounding surfaces with towels or plastic wrap to catch drips, and work in a well-ventilated area. Time estimates: 15–45 minutes for standard cleaning, longer if deposits are heavy.
Step-By-Step: How To Clean A Shower Head
- Remove the shower head from the arm, if possible, to allow full access to mineral buildup.
- Prepare a cleaning solution: mix equal parts white vinegar and water in a container large enough to submerge the shower head or fill a plastic bag with the solution and secure it around the head.
- Soak the head in the solution for 30–60 minutes. For fixed heads, wrap with a vinegar-soaked cloth and let sit.
- Use the shower head descaling kit or descaling tablets for shower heads to loosen tough deposits according to product instructions.
- Gently scrub the nozzles with the shower head cleaning brush with long handle to dislodge mineral buildup without scratching.
- Rinse the head thoroughly under running water. Reattach it to the arm if removed, and run hot water to flush remaining debris.
- If deposits persist, repeat the soak or switch to a shower head cleaning wand for targeted cleaning of stubborn areas.
- Wipe the exterior with a microfiber cleaning cloth for shower head and fixtures to remove water spots and restore shine.
- Reassemble and test: turn on the shower to ensure a steady spray pattern and no leaks.
- For ongoing prevention, wipe down after use and schedule a monthly quick clean to keep mineral buildup at bay.
Troubleshooting
| Symptom | Likely Cause | Fix | Prevention |
|---|---|---|---|
| Sporadic spray or reduced flow | Mineral deposits clogging nozzles | Soak and scrub; use descaling tablets if necessary | Regular cleaning every 1–2 months |
| Streaks after cleaning | Soap scum or hard water residue | Wipe with microfiber cloth; rinse thoroughly | Dry after use, use water softeners if hard water is severe |
| Head won’t come apart | Tersa thread or mineral buildup locking joint | Apply penetrating oil or warm water soak; do not force | Gentle disassembly during routine maintenance |
| Leaks after reassembly | Gasket or O-ring damaged during cleaning | Replace seal; ensure proper seating | Inspect seals during reassembly |
Common Mistakes To Avoid
- Using aggressive abrasive tools that scratch surfaces
- Over-soaking fixed shower heads, which can loosen seals
- Using hot water on brass or delicate components if not rated for high temperatures
- Neglecting exterior cleaning, which leads to visible buildup
Tips For Best Results
- Schedule monthly light cleanings to prevent heavy buildup.
- Alternate cleaning methods: vinegars for routine maintenance, descaling kits for tougher deposits.
- Keep a soft microfiber cloth handy to dry surfaces after cleaning.
- Ensure proper ventilation to avoid lingering vinegar odor and moisture buildup in bathrooms.
Call A Professional
Consider contacting a plumber if the shower head remains clogged after multiple cleaning attempts, or if there are persistent leaks around the connection. Seek professional help when there is rust, corrosion, or persistent water pressure loss that does not improve with cleaning.
FAQ
What is the best method to clean a shower head with hard water?
Soak the head in a vinegar solution or use a descaling kit, then scrub with a long-handle brush and rinse well.
Can I use vinegar on all shower heads?
Most metal and plastic shower heads are compatible with white vinegar, but check manufacturer care instructions for any contraindications.
How often should I clean a shower head?
For homes with hard water, aim for a monthly quick clean and a deeper clean every 2–3 months.
What should I do if the spray is still weak after cleaning?
Inspect for mineral buildup in the arm or flow restrictors inside the head; consider replacing the inner nozzles if worn.
Is a descaling kit really necessary?
Descaling kits simplify stubborn mineral removal, especially on mineral-heavy showers, but basic maintenance can be done with vinegar and a brush.
Buying Guide
When choosing shower-cleaning tools, consider size, compatibility, and ease of use. The kit should include options for low-maintenance upkeep and tackle common mineral buildup in the United States.
Buying Guide: Key Factors To Consider
- <bSize and fit: Ensure the cleaning tools match your shower head’s size and connection type. Some heads use standard 1/2-inch fittings; others may vary.
- <bDescaling efficiency: Descaling tablets and kits should effectively dissolve mineral deposits without harsh chemicals. Look for user-friendly instructions and safe ingredients.
- <bEase of use: Long-handled brushes and wands reduce the need to contort or remove fixtures, improving accessibility.
- <bCleaning performance: A microfiber cloth is great for finishing; brushes with flexible bristles help reach irregular nozzle patterns.
- <bMaintenance interval: Choose tools that support quick monthly upkeep and deeper quarterly cleaning.
- <bDurability and materials: Stainless steel or sturdy plastics resist corrosion in bathroom environments.
Want a simple routine? Start with a basic vinegar soak and a microfiber wipe, then add a descaling kit for stubborn buildup. For households with persistent mineral deposits, combining a wand with a descaling tablet can simplify the process. If there are questions about compatibility or installation, consult product instructions or a professional.