Scuff marks on walls are a common nuisance in homes, especially in high-traffic areas or rooms used by kids and pets. This guide explains practical, safe techniques to remove or minimize scuffs without damaging paint or wallpaper. Readers will learn step-by-step methods, tools that work, and when to call a professional for advanced repairs.
Quick Answer
Start with gentle options like a damp microfiber mitt or a soft bristle brush. For stubborn marks, try a melamine eraser sponge, then seal or touch up with a repair kit if needed. Always test a small, inconspicuous area first.
What You’ll Need
- Magic Eraser melamine sponge wall scuff remover
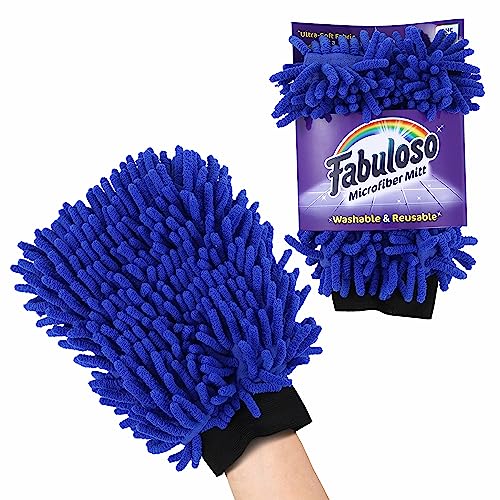
- Wall cleaning microfiber mitt scuff marks
- Non-scratch scrubbing sponge for walls
- Soft bristle wall scrub brush for scuffs
- Wall touch-up repair kit with sponge and paint pen


Before You Start
Prepare the area by removing furniture or protecting the floor with a drop cloth. Gather cleaning supplies and wear gloves if you have sensitive skin. Avoid excessive moisture on painted walls and rare wallpaper finishes, which can be damaged by harsh or prolonged dampness. Time estimate for a typical room: 15–45 minutes depending on the number of scuffs and wall finishes.
Step-By-Step: How To Clean Scuff Marks Off Walls
- Inspect the wall finish to determine the appropriate method, noting paint gloss level and any delicate textures.
- Dust the wall surface with a microfiber mitt to remove loose dirt before treating marks.
- Test a small area with a damp microfiber cloth or soft sponge to gauge response without removing paint.
- For light scuffs, gently rub with a damp microfiber mitt or non-scratch scrubbing sponge in a circular motion.
- If marks persist, use a Magic Eraser melamine sponge with light pressure, testing again on a hidden area first.
- Wipe residue with a clean, damp cloth and dry the wall with a soft towel to prevent streaks.
- For textured walls, use a soft bristle wall scrub brush and light strokes along the grain to avoid damage.
- If color loss or staining remains, apply a wall touch-up repair kit with sponge and paint pen to blend in the repair.
- Allow touch-ups to dry completely and inspect the area from different angles to ensure uniform appearance.
- Repeat steps for other scuffs, prioritizing the gentlest method first to minimize impact on the paint.
- Seal the process with a light coat of clear protective spray on highly trafficked surfaces if recommended by the paint manufacturer.
- Maintain walls by cleaning periodically with a microfiber mitt and addressing marks promptly to prevent buildup.
Troubleshooting
| Symptom | Likely Cause | Fix | Prevention |
|---|---|---|---|
| Paint fades or erodes after cleaning | Excessive scrubbing or harsh cleaners | Switch to gentler methods; use water and mild cleaners | Avoid aggressive scrubbing; test first |
| Streaks or shiny patches | Moisture left on wall | Wipe with a dry cloth; allow to air dry | Dry between passes |
| Texture damage on wallpaper or textured paint | Rough scrubbing or abrasive tools | Use soft tools; skip melamine sponge on delicate finishes | Identify wall type before cleaning |
| Marks return after cleaning | Embedded stains or scuffs | Apply touch-up kit for color blend | Address marks soon and with appropriate methods |
Common Mistakes
- Using excessive water on painted walls, which can cause bubbling or finish damage
- Rubbing hard with abrasive sponges or brushes
- Testing cleaners on visible areas without prior spot testing
- Skipping a dry-off step after cleaning, leading to streaks or moisture damage
Tips For Best Results
- Always start with the mildest method, such as a damp microfiber mitt or microfiber cloth
- Test cleaners on a hidden area to confirm no color change
- Keep cleaning tools clean to avoid transferring dirt back onto walls
- Use a dedicated touch-up kit for repairs rather than repainting large areas unless necessary
- Label and organize tools so you can grab the right item for the wall type you encounter
Call A Professional
Call a professional if the wall shows significant paint lifting, water damage, or if texture restoration requires specialized equipment. Stop and consult a pro if you notice peeling, deep gouges, or mold growth on the wall surface.
FAQ
Can I use household cleaners to remove wall scuffs?
Many light scuffs respond to mild soap and water or a dedicated wall cleaning product. Always test first and avoid harsh or solvent-based cleaners on sensitive finishes.
Is a Magic Eraser safe on all wall types?
Most painted walls tolerate it, but it may remove sheen or paint in some finishes. Test in a small area before broader use.
What if the scuff won’t come off with cleaning?
Try a soft bristle brush with gentle strokes, then a touch-up kit for color matching if needed.
Should I repaint after cleaning stubborn scuffs?
If the finish remains uneven or the color has changed, consider touch-ups or a full wall repaint depending on scope and consistency.
How long should touch-up paint dry before using the room?
Follow the paint pen or repair kit instructions, typically 1–4 hours for touch-ups to dry to touch, longer for full cure.
Buying Guide
Choosing the right tools for cleaning scuff marks off walls depends on wall type, finish, and typical traffic. Key factors include size, noise level, energy efficiency, controls, and placement considerations for stored items and cleaning energy use. When comparing options, consider:
- Size and reach of tools to cover walls quickly without overexertion
- Non-abrasive materials to protect paint and wallpaper
- Durability and ease of replacement parts for long-term use
- Compatibility with common wall finishes in homes across the United States
- Portability and storage convenience for cleaning supplies
Practical comparison perspectives include the effectiveness of each tool on different textures, the risk of color removal, and how easily the tool is to clean after use. For households with sensitive finishes or premium paint, opt for gentler options first and reserve stronger abrasives for stubborn marks with caution. A well-rounded cleaning kit often blends a microfiber mitt, a soft brush, and a touch-up repair kit to handle routine scuffs efficiently.