Keeping a sandwich maker clean extends its life and ensures every grilled cheese or panini tastes just as good as the first. This guide covers safe techniques and practical tools to remove grease, burnt bits, and odor without damaging nonstick plates.
Quick Answer
For quick, effective cleaning, unplug the unit and let it cool. Wipe the plates with a damp microfiber cloth, use a non-abrasive sponge for stubborn spots, and finish with a light spray of grease cleaning spray. Dry thoroughly before reuse to prevent residue buildup and ensure optimal nonstick performance.
What You’ll Need
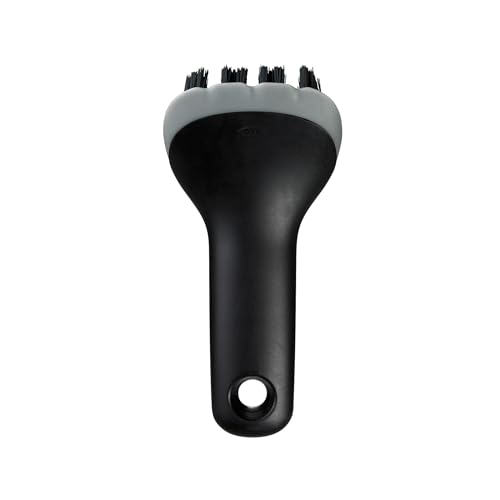
- Silicone scrub brush for nonstick sandwich maker plates
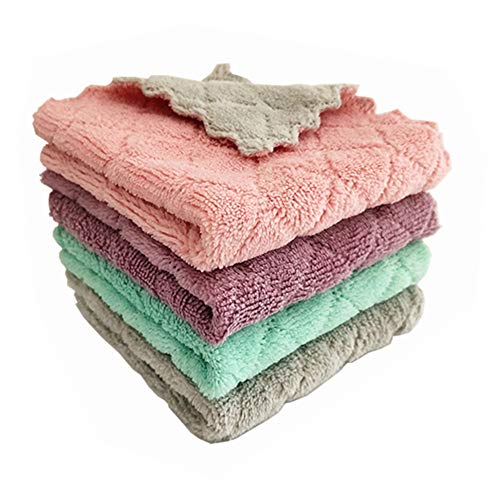
- Microfiber cleaning cloth for sandwich maker nonstick plates
- Non-abrasive sponge for cleaning panini press plates
- Grease cleaning spray for electric grill and sandwich maker
- Panini press cleaning kit with brush and sponge

Before You Start
Safety first: unplug the appliance and let it cool completely before cleaning. Do not immerse the base in water or run water over electrical components. Remove any detachable crumbs with a dry wipe. If the plates are removable, follow the manufacturer’s guidance for detaching and cleaning. Time estimate: 5–15 minutes per cleaning session.
Cautions: Avoid abrasive cleaners or steel wool on nonstick surfaces, which can scratch and ruin the coating. Do not use metal utensils that could gouge the plates. Ensure all cleaning materials are dry or only lightly damp to prevent moisture from seeping into electrical parts.
Step-By-Step: How To Clean A Sandwich Maker
- Unplug the unit and let it cool completely to a safe handling temperature.
- Wipe away loose crumbs with a dry cloth or brush designed for cookware.
- Prepare the nonstick plates for cleaning by wiping with a damp microfiber cloth to loosen grease.
- Use the silicone scrub brush for stubborn spots on nonstick plates, applying gentle, circular motions to lift residue without scratching.
- For tougher buildup, apply a light spray of grease cleaning spray and let it sit for 30 seconds, then wipe with the microfiber cloth.
- Clean any removable plates according to the manufacturer’s directions, using the panini press cleaning kit brush and sponge as needed.
- Rinse the cloth or sponge and wipe away any cleaner residue from the plates.
- Dry the plates thoroughly with a clean towel or let them air dry before reassembling.
- Wipe the exterior housing with a damp cloth and dry completely to prevent moisture from entering controls.
- Reassemble the sandwich maker and run a short no-food cycle or a few minutes of heating with a clean cloth on the plates to season lightly (if the manufacturer recommends).
- Store in a dry place, ensuring the plates are fully dry to avoid odor formation.
Troubleshooting
| Symptom | Likely Cause | Fix | Prevention |
|---|---|---|---|
| Grease residue remains after cleaning | Grease buildup on nonstick coating | Repeat cleaning with silicone brush and grease spray; avoid soaking | Clean after each use to prevent buildup |
| Nonstick coating appears scratched | Abrasive tools or metal utensils | Switch to non-abrasive sponge and soft brush | Use only soft cleaning tools |
| Electrical components damp after cleaning | Moisture near controls | Wipe thoroughly and allow full drying time | Dry completely before use |
| Odor persists | Food odors trapped in plates | Clean with gentle cleaner, air-dry fully | Clean promptly after cooking |
Common Mistakes
- Using abrasive pads or metal tools on nonstick plates
- Soaking the base or immersing the appliance in water
- Skipping drying steps, leaving moisture on plates
- Overusing cleaning sprays that leave residue
Tips For Best Results
- Clean while plates are still warm (not hot) to loosen grease more easily.
- Use a dedicated microfiber cloth to avoid lint and abrasive particles.
- Keep a small spray bottle of diluted cleaner handy for quick touch-ups after cooking.
- Regular maintenance reduces buildup and preserves nonstick performance.
Call A Professional
Seek professional help if the nonstick coating visibly peels, chips, or if electrical components show signs of damage or malfunction after cleaning. Do not operate a unit with exposed wiring or compromised seals.
FAQ
Can I put the sandwich maker in the dishwasher?
Most models should not be fully submerged or placed in a dishwasher. Refer to the user manual; typically only removable plates may be hand-washed.
What’s the best method to remove burnt-on cheese?
Warm water and a silicone brush combined with a non-abrasive sponge usually works best without scratching.
How often should I clean my sandwich maker?
Clean after each use to prevent buildup, with a deeper clean weekly if used frequently.
Is it safe to use oil or spray on the plates?
Use sparingly and only if recommended by the manufacturer; otherwise, rely on grease sprays designed for nonstick surfaces.
What if the plate becomes sticky over time?
Gently scrub with a non-abrasive sponge and consider a light re-seasoning if the manufacturer advises.
Should I store with plates closed or open?
Store with plates closed to protect the coating, ensuring both the plates and exterior are dry.
What if there’s a strange smell after cleaning?
Ventilate the kitchen and perform a quick bake test with a clean, dry cloth to evaporate any cleaners left behind.
Buying Guide
Choosing the right cleaning setup for a sandwich maker depends on plate material, usage frequency, and cleaning preference. Consider these factors to optimize results and maintain nonstick performance.
- <bSize and compatibility: Ensure cleaning tools fit the plate dimensions and shape without scraping edges.
- <bNoise and effort: Some brushes and sponges require minimal effort; look for soft-bristle brushes and dense microfiber cloths for efficient cleaning.
- <bEnergy efficiency: Cleaning should not affect energy use, but a well-maintained unit heats more evenly and reduces the risk of overheating caused by residue buildup.
- <bControls and accessibility: Simple access to the power switch and removable plates simplifies cleaning and reduces risk of moisture penetration.
- <bPlacement and storage: Store in a dry area with plates closed and fully dry to prevent odors and moisture damage.
When comparing options, look for kits that combine a brush, sponge, and spray cleaner designed for nonstick surfaces. A dedicated cleaning kit can streamline routines and protect the coating. Do you prefer a compact kit for quick wipe-downs or a more robust kit for frequent use?