Keeping a Roomba in top shape ensures optimal suction, longer battery life, and fewer jams. Regular cleaning is quick and can be done with common tools and a few Roomba-specific supplies. This guide covers practical steps, safety notes, and when to seek professional help.
Quick Answer
Regularly empty the bin, check and clean brushes, replace worn parts as needed, and run a maintenance cycle with basic care. For deeper cleanings, use replacement parts to restore performance without downtime.
What You’ll Need
- Roomba cleaning brush replacement kit
- iRobot Roomba replacement filter 3-pack
- Roomba roller brush replacement
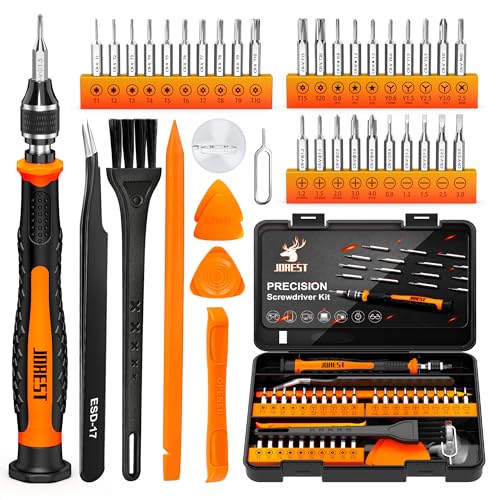
- Precision screwdriver set for Roomba repair
- Robot vacuum maintenance kit for Roomba


Before You Start
Before beginning, power off the Roomba and remove it from charging if possible. Work on a clean, well-lit surface to avoid losing small screws. Avoid water exposure on electronics and never submerge the Roomba. A basic inspection takes about 5–10 minutes; a full deep clean can take 15–25 minutes depending on access to screws and brushes.
Safety notes: disconnect the charging dock during maintenance, use the correct screwdriver size, and handle brushes carefully to prevent hair entanglement or cuts. Have a trash bin handy for debris and bagged waste if needed.
Step-By-Step: How To Clean A Roomba
- Power down and remove the Roomba from its dock. If possible, open the bin compartment to access the dustbin.
- Empty the dustbin and rinse it with water if allowed by your model. Let it dry completely before reassembling.
- Remove the roller brush and the side brush according to your model’s manual. Clean hair and debris from the roller, wheels, and housing with the corresponding brush or cloth.
- Clean the Roomba cleaning brush by removing hair wrapped around it. Use scissors or a small detangling tool if necessary, taking care not to damage bristles.
- Inspect the filters and replace them if they appear clogged or worn. Insert fresh filters from the iRobot Roomba replacement filter 3-pack.
- Reinstall the roller brush and side brush, ensuring they spin freely and are secured with the correct screws. Use the precision screwdriver set for Roomba repair for precise torque.
- Check the wheels and sensors for obstructions. Remove hair, fibers, or carpet fibers that may hinder movement or obstacle detection.
- Wipe the underside and wheels with a damp cloth, avoiding the charging contacts. Allow any damp parts to fully dry before reassembly.
- Run a short maintenance or test cycle to ensure the Roomba starts correctly and moves without hesitation. Listen for unusual noises that may indicate a misalignment.
- Document any wear or part replacements needed for future maintenance. If you notice persistent performance issues, consider scheduling a full servicing session or replacing worn components.
Troubleshooting
| Symptom | Likely Cause | Fix | Prevention |
|---|---|---|---|
| Roomba won’t start | Dead battery or blocked sensors | Charge fully; clean sensors | Regular top-ups and sensor upkeep |
| Poor suction | Clogged filter or dirty brushes | Replace filter; clean brushes | Routine maintenance every few weeks |
| Uneven cleaning | Worn side roller or misaligned brush | Replace brushes | Check alignment after every cleaning |
| Roomba gets stuck | Hair around wheels or sensors | Clear debris and re-seat brushes | Frequent debris removal |
Common Mistakes
- Using water or cleaners on electronics
- Forgetting to remove hair from brushes before reinstalling
- Using incorrect replacement parts or mismatched model numbers
- Neglecting regular filter changes
Keeping to a routine reduces downtime and prolongs the life of the Roomba’s components.
Tips For Best Results
- Set a reminder to inspect brushes and filters every 1–2 weeks for homes with pets or high dust levels.
- Use the Roomba cleaning brush replacement kit and roller brush replacement proactively to avoid performance dips.
- Store the Roomba in a dry, elevated place to minimize exposure to humidity and dust when not in use.
- Keep a small toolkit handy, including the precision screwdriver set for Roomba repair, to make quick part changes easier.
- Clean the sensors and charging contacts during each maintenance cycle to ensure proper docking and navigation.
Call A Professional
Seek professional help if the Roomba exhibits repeated malfunctions after routine maintenance, experiences electronic failures, or requires complex internal repairs. Stop using the device if there is a strong burning smell, smoke, or unusual heat, and contact a certified repair technician or the manufacturer’s service line for guidance.
FAQ
How often should I replace Roomba filters?
Replace filters every 1–3 months depending on usage and household pets.
Can I clean a Roomba with water?
Only rinse removable bins and brushes as directed; avoid water on electronics and charging contacts.
What tools help with Roomba maintenance?
A precision screwdriver set for Roomba repair and the robot vacuum maintenance kit for Roomba streamline upkeep.
Is it safe to replace brushes myself?
Yes, with the correct replacement parts and a proper screwdriver, installation is straightforward.
Buying Guide
Choosing the right accessories and replacement parts for a Roomba involves assessing size compatibility, replacement frequency, and specific maintenance needs. When considering replacement parts, ensure model compatibility by checking the Roomba’s model number and the part SKU.
Key factors include
- <bSize and fit: Confirm that brushes, filters, and rollers match your Roomba model to ensure proper seating and performance.
- <bNoise level: Replacement parts typically do not affect noise; consider overall wear and motor health for quieter operation.
- <bEnergy efficiency: Clean filters and unrestricted brushes help maximize battery life and cleaning efficiency.
- <bControls and compatibility: Replacement kits should align with current control features and docking capabilities.
- <bPlacement and storage: Store parts in a labeled container to keep the maintenance kit organized and accessible.
For households with pets or high traffic, proactive replacements reduce downtime and maintain cleaning effectiveness. If you’re deciding between kits, prioritize a complete maintenance kit for routine upkeep and a filter pack for ongoing air quality and suction performance. Curious about the long-term value of regular maintenance? The answer lies in predictable cleaning results and fewer service interruptions.