Regular maintenance keeps a reverse osmosis (RO) system delivering clean, great-tasting water. This guide walks American homeowners through a practical, step-by-step cleaning routine using common RO-specific products. Clear, safe procedures help protect the membrane and extend system life.
The instructions assume a standard under-sink or countertop RO setup with accessible filters and a storage tank. Always consult the manufacturer’s manual for model-specific steps and safety notes before starting a clean.
Quick Answer
Best practice: gather the RO cleaning kit, membrane brushes, a descaling cleaner, a disinfection kit, and filter maintenance parts. Follow the step-by-step plan, rinse thoroughly, and test water quality after a clean. Schedule regular maintenance every 6–12 months or as recommended by the RO system’s manufacturer.
What You’ll Need
- Reverse osmosis cleaning kit for RO system
- RO membrane cleaning brush and tools
- Descaling cleaner for reverse osmosis membrane
- RO system sanitizer and disinfection kit
- Pre/post filter maintenance kit for RO system


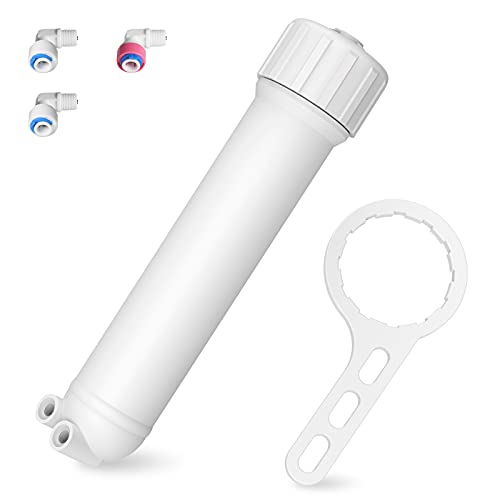
Before You Start
Turn off the water supply and relieve pressure from the tank according to the system’s manual. Disconnect power if the unit includes an electronic monitor. Wear eye protection and gloves when handling cleaners and sanitizers. Protect the work area from spills and keep pets away. Plan for a cleaning session that takes about 45–90 minutes, depending on your system’s complexity.
Important cautions: never mix cleaners or use household bleach unless specifically approved by the manufacturer. Run a thorough rinse after cleaning to prevent residue. If your system uses a remineralization stage, account for potential need to recalibrate or replace parts after cleaning.
Step-By-Step: How To Clean A Reverse Osmosis System
- Shut off the feed water and close the RO storage tank valve to stop fresh water from entering the system.
- Open the faucet and release pressure from the tank. This helps prevent splashes and ensures cleaner water during the process.
- Remove and inspect pre/post filters as needed. If they appear clogged or near the end of their life, replace them with the pre/post filter maintenance kit for RO system.
- Prepare the descaling cleaner for reverse osmosis membrane according to the product label. Use a dedicated cleaning reservoir or bottle to avoid contamination of drinking water lines.
- Connect the cleaning solution to the system’s sanitation port or as directed by the RO cleaning kit. Circulate the cleaner through the membrane for the recommended dwell time, then flush as instructed.
- Disassemble or access the RO membrane as needed. Use the RO membrane cleaning brush and tools to gently agitate and remove mineral scale and biofilm around the housing and connections.
- Rinse the membranes and housing thoroughly with clean water. Reconnect and begin a flush cycle to remove residual cleaner from all lines.
- Apply the RO system sanitizer and disinfection kit per the label. Allow the system to sit for the specified contact time, then flush again until the water runs clear and odor-free.
- Replace any filters or cartridges removed during the process with fresh ones from the maintenance kit, and ensure seals and fittings are snug but not overtightened.
- Restore water supply, open the storage tank valve, and allow the system to replenish. Run several gallons of water through the faucet and test for taste and clarity before normal use.
- Document the cleaning date and set a future maintenance reminder. If water quality isn’t improving after cleaning, consider replacing the RO membrane or contacting support.
- Optional: recalibrate any post-treatment stages or remineralization if your model includes them.
Troubleshooting
| Symptom | Likely Cause | Fix | Prevention |
|---|---|---|---|
| Water flow is weak after cleaning | Clogged filters or dirty membrane | Replace pre/post filters; re-clean or replace membrane | Schedule routine cleanings and timely filter changes |
| Off taste or odor persists | Cleaner residue or incomplete rinsing | Re-flush system and run more clean water | Follow rinsing steps exactly and use proper sanitizing steps |
| Leak at fittings | Loose connections or damaged seals | Tighten fittings to spec; replace seals if needed | Check for wear during maintenance |
| Membrane failure after cleaning | Membrane damage or incompatible cleaner | Replace membrane; ensure cleaner compatibility | Use manufacturer-approved cleaners only |
Common Mistakes
- Using household cleaners or bleach not approved for RO systems
- Skipping the final rinse, leaving chemical residues in the lines
- Forgetting to replace pre/post filters when performing a clean
- Not verifying tank pressure and system shutoffs after maintenance
Sticking to manufacturer guidelines helps avoid damage and ensures safety. Maintain a simple cleaning cadence to prevent mineral buildup and membrane fouling.
Tips For Best Results
- Schedule cleanings on a regular cycle, such as every 6–12 months, depending on water quality and use.
- Label filter replacements and keep spare parts within reach to minimize downtime.
- Keep a small cleaning log with dates, parts changed, and any issues observed.
- Test water quality after cleaning with basic taste tests or a home water test kit to confirm improvements.
Call A Professional
Seek a professional if any of the following occur: persistent leaks after resealing fittings, repeated poor water quality despite cleaning, unusual noises from the unit, or uncertain membrane condition. Do not attempt advanced disassembly beyond your comfort level, especially on sealed membranes or high-pressure sections.
FAQ
How often should I clean my RO system?
Typical guidance suggests every 6–12 months, but adjust based on water hardness, contaminant load, and system usage.
Can I use regular household cleaners to clean my RO membrane?
No. Use only cleaners specifically designed for RO systems to avoid chemical damage and safety risks.
Do I need to replace filters during a clean?
Yes. Replacing pre/post filters during maintenance helps prevent fouling and ensures effective cleaning.
What should I do if the water tastes metal-like after cleaning?
Rinse more thoroughly and verify that all residues are removed. If taste persists, replace the membrane or consult a professional.
Is it safe to disinfect the system with an RO sanitizer kit?
Yes, when used as directed by the product label and after ensuring all residues are flushed out.
Do I need to recalibrate after a cleaning?
Some systems require recalibration of remineralization or flow settings; consult the manufacturer’s instructions.
Buying Guide
Choosing the right components for an RO cleaning routine involves several factors beyond the basic kit. Consider size and footprint to fit under your sink space, noise levels if the unit sits close to living areas, and energy efficiency of any integrated pump systems. Look for a complete kit that includes a membrane brush, descaling cleaner, sanitizer, and a pre/post filter maintenance set to minimize multiple purchases. Controls and ease of use matter, especially for first-time homeowners. When evaluating purchase options, ask whether the kit includes replacement parts compatible with common RO models and if it provides explicit, model-specific instructions. Placement under the sink should allow easy access to the faucet, drain, and storage tank. Finally, ensure the products are sourced from reputable brands with clear safety data and return policies.