Rear view cameras provide essential situational awareness during parking and reversing maneuvers. Over time, dust, fingerprints, and road grime can blur the camera lens, reducing image clarity. This guide offers a practical, step-by-step approach using commonly available tools to safely clean a car’s rear view camera without damaging the sensor or housing.
In addition to maintaining visibility, regular cleaning helps extend the life of camera components and preserves imaging quality for optimal safety conditions on the road.
Quick Answer
To quickly restore clarity, power off the vehicle, gently remove loose debris with an air blower, apply a camera-specific cleaning solution with a microfiber cloth, and finish with a soft brush to dislodge stubborn particles. Avoid harsh chemicals and aggressive scrubbing near the lens edge.
What You’ll Need
- microfiber cleaning cloth for camera lenses
- car rear view camera cleaning kit
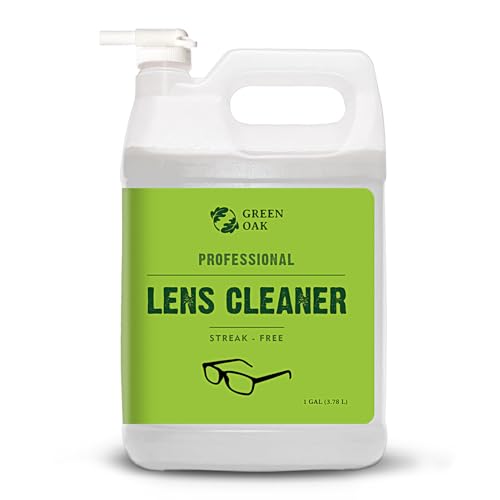
- lens cleaning solution for camera lenses automotive
- soft brush for cleaning car rear view camera
- air blower dust remover for camera lenses


Before You Start
Prepare a clean, shaded workspace around the vehicle to prevent rapid drying or streaks from sunlight. Ensure the engine is off and the vehicle is in park with the parking brake engaged. Keep tools away from wiring and sensors. Avoid applying cleaning solutions directly to the camera housing or connections; mist the cloth instead. Time estimate: 5–15 minutes depending on grime level.
Step-By-Step: How To Clean A Rear View Camera
- Loosen loose debris from the camera lens and housing with a gentle puff of air from the air blower dust remover for camera lenses.
- Inspect the lens for smudges, water spots, or dust; note any areas that look particularly dirty.
- Lightly mist a microfiber cleaning cloth for camera lenses with a small amount of lens cleaning solution for camera lenses automotive. Do not spray directly on the lens.
- Wipe the lens using a vertical and horizontal motion with even pressure; avoid circular hard scrubbing to prevent micro-scratches.
- If smudges persist, apply a second, very light pass with a clean area of the microfiber cloth.
- Use a soft brush for cleaning car rear view camera to gently lift dust from crevices around the lens and housing edges.
- Recheck the lens for remaining residues; wipe again if necessary and allow a brief air dry of any moisture.
- Test the camera by activating the reverse gear to confirm the image is clear; look for even lighting and no streaks.
- Inspect the area around the camera for any signs of wear, cracks, or moisture intrusion; address promptly if detected.
- Store the cleaning materials away from heat or direct sunlight when not in use to maintain material integrity.
- If the image remains blurred after cleaning, consider professional inspection for sensor or housing misalignment.
- Document routine cleaning in a maintenance log to track when the last intervention occurred and plan future checks.
Troubleshooting
| Symptom | Likely Cause | Fix | Prevention |
|---|---|---|---|
| Blurry image after cleaning | Residue left on the lens | Repeat cleaning with fresh microfiber cloth and cleaner | Use quality microfiber and minimal solution |
| Water spots or streaks | Excess liquid on lens | Wipe with a dry microfiber cloth until dry | Apply solution sparingly; wipe promptly |
| Moisture inside housing | Seal compromised | Professional inspection to reseal or replace housing | Avoid cleaning with excess moisture near seams |
| Camera intermittently cuts out | Electrical connection loosened | Check connectors and harness, reseat | Inspect for corrosion and secure mounting |
| Streaks when backing up | Lens coating damaged | Replace lens or consult OEM guidelines | Use non-abrasive cleaning methods |
Common Mistakes
- Using household glass cleaners on the lens—these can leave residue and damage coatings.
- Prying or applying pressure near the camera wiring or seal; it can cause misalignment or leaks.
- Spraying liquids directly onto the lens or housing — moisture can seep into sensitive components.
- Rushing the process; failing to dry the lens can produce streaks that impair visibility.
Tips For Best Results
- Work in a shaded area to prevent rapid drying and streak formation.
- Use a dedicated lens cleaning solution formulated for camera optics to avoid coatings damage.
- Keep a dedicated microfiber cloth strictly for camera lenses to avoid cross-contamination with other surfaces.
- Regular cleaning reduces buildup and maintains image clarity during night and rain conditions.
- Perform a quick check after heavy rain or off-road driving to ensure the lens remains clean.
Call A Professional
Seek professional help if any of the following occur: persistent blur after cleaning, signs of moisture inside the camera housing, visible cracks around the lens, or electrical intermittent failures. Complex repairs or resealing typically require trained technicians and OEM parts.
FAQ
How often should I clean a rear view camera?
Clean the camera whenever you notice reduced clarity, especially after driving in dusty or wet environments. A routine monthly check during harsh seasons helps maintain visibility.
Can I use compressed air to clean the camera lens?
Yes, a short burst from an air blower can remove loose dust, but avoid excessive force that could dislodge the lens or spray liquid into the housing.
Is water safe for camera lenses?
Water alone can leave mineral deposits; use a dedicated lens cleaning solution designed for camera lenses to minimize residue.
What if the lens coating is damaged?
Damaged coatings can worsen glare; replacing the lens or consulting the manufacturer is advised.
Are aftermarket cleaning kits reliable?
Choose kits with camera-specific components like microfiber cloths, soft brushes, and automotive-grade lens solutions for compatibility and safety.
Buying Guide
When evaluating cleaning supplies and accessories for a rear view camera, consider size compatibility with your camera model, the gentleness of cleaning agents, and the effectiveness of tools on curved lens surfaces. A practical kit often includes a microfiber cloth, a soft brush, an air blower, and a targeted lens cleaning solution. Look for items labeled safe for optical coatings and designed for automotive electronics to minimize risk.
Key Buying Factors
- <bSize and compatibility: Ensure tools fit your camera housing and lens diameter without obstructing edges.
- <bNoise level (for air blowers): Seek quiet options to avoid disturbance during in-car use or parking lot cleaning.
- <bEnergy efficiency not directly applicable, but choose rechargeable air blowers with efficient performance for quick cleanups.
- <bControls: Simple spray mechanism and comfortable grip improve ease of use in tight spaces.
- <bPlacement: Store cleaning kits in the trunk or glove box for ready access without clutter.
Having the right tools helps maintain a clear rear view camera, supporting safer backing and parking. Regular maintenance, careful cleaning, and following basic safety notes reduce the risk of damage and preserve imaging quality. If any step feels confusing or if the camera requires disassembly, consulting a professional is a sensible option.