Maintaining a clean pH probe is essential for reliable measurements in laboratories, classrooms, and field work. Regular cleaning helps prevent drift, extends electrode life, and ensures consistent results across tests. This guide walks through practical steps and safety tips to keep your pH meter performing at its best.
Proceed with care, following manufacturer guidelines for your specific probe model. When in doubt, consult the user manual or contact the equipment vendor for support.
Quick Answer
Use a dedicated pH probe cleaning kit with a soft brush and cleaning solution. Rinse with distilled water, then dry gently before recalibrating. Avoid abrasive cleaners, and never soak probes beyond recommended times. Regular maintenance intervals depend on usage and sample types.
What You’ll Need
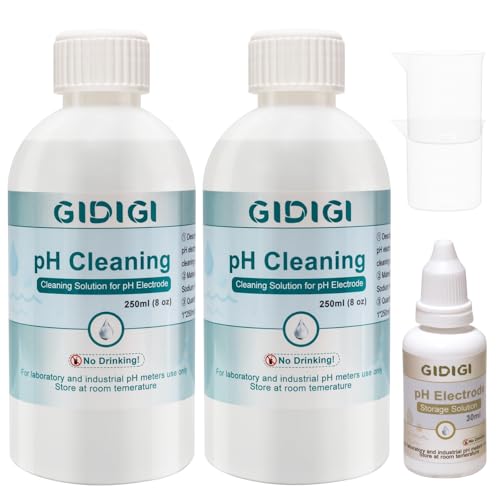
- pH meter electrode cleaning kit
- pH probe cleaning solution
- pH meter distilled water rinse bottle
- pH meter electrode cleaning brush
- pH probe maintenance kit
- Protective gloves and eyewear
- Soft lint-free cloths


Before You Start
Before cleaning, power off the meter and remove the probe from any solution. Check the probe for cracks or visible damage; do not clean a damaged probe. Work in a clean, well-lit area and label test solutions to avoid cross-contamination. Plan for a cleanup window of about 15–30 minutes per probe, depending on fouling level. Avoid high concentrations of caustic cleaners and salts that can damage the electrode. Keep cleaning solutions away from skin and eyes and follow all safety data sheets (SDS) for each chemical used.
Step-By-Step: How To Clean A pH Probe
- Rinse the probe tip with distilled water from the rinse bottle for 15–20 seconds to remove loose residues.
- Gently blot excess water with a soft cloth; do not rub the glass bulb or reference junction.
- Prepare the cleaning solution according to the kit instructions. Use a small container to avoid cross-contamination.
- Apply a thin coating of pH probe cleaning solution to the electrode tip or soak briefly if the kit permits.
- Use the pH meter electrode cleaning brush to lightly scrub any visible fouling on non-glass components or connectors, using gentle, circular strokes.
- Rinse again with distilled water to remove cleaning residues. Repeat if necessary to remove persistent deposits.
- Re-immerse the probe in a cleaning solution if required by the kit, and then perform a final rinse in distilled water.
- Dry the probe tip with a lint-free cloth and allow any remaining moisture to air-dry briefly before calibration.
- Recalibrate the pH meter according to the user manual, starting with a fresh buffer solution and recording the new slope and offset readings.
- Store the probe in an appropriate storage solution or in the maintenance solution recommended by the manufacturer.
- Document the cleaning date in the maintenance log and schedule routine cleanings based on use and sample types.
Troubleshooting
| Symptom | Likely Cause | Fix | Prevention |
|---|---|---|---|
| Unstable readings after cleaning | Residual cleaning solution interfering with calibration | Rinse thoroughly with distilled water and recalibrate | Rinse twice, use recommended cleaning products |
| Slow response or drift | Fouling at the junction or worn membrane | Clean with brush; replace probe if needed | Clean regularly; replace per maintenance schedule |
| Orange or cloudy films | Biofilm or mineral deposits | Use specialized cleaning solution; rinse well | Keep samples clean; avoid cross-contamination |
| Damage to glass bulb | Excessive force during cleaning | Inspect; stop cleaning and contact support if cracked | Use soft tools; follow guidelines |
Common Mistakes
- Using abrasive brushes or harsh cleaners on the probe
- Letting the probe dry out between uses
- Skipping a proper rinse after cleaning solutions
- Calibrating immediately after cleaning without adequate stabilization
- Using tap water instead of distilled water for rinsing
Following these tips helps maintain accuracy and extends probe life. Always consult manufacturer recommendations for your specific model and cleaning reagents.
Tips For Best Results
- Schedule routine cleaning after completing a series of samples with high ionic content or proteins that foul the sensor.
- Label and date every maintenance action to track performance over time.
- Use a dedicated cleaning kit rather than household cleaners to avoid residues that affect readings.
- Store probes in the appropriate storage solution to preserve the glass membrane and reference cell.
- Keep spare cleaning brushes clean and dry to prevent cross-contamination between probes.
Call A Professional
Consult a professional if the probe shows persistent drift after cleaning and recalibration, or if there is visible damage to the electrode. Seek assistance when the electrode fails to reach stable readings after multiple maintenance cycles, or if calibration buffers do not align with expected pH values.
FAQ
How often should I clean a pH probe?
Clean after sessions with fouling-prone samples or, at minimum, when readings drift or after use with challenging chemistries. Follow the maintenance schedule from the manufacturer.
Can I use any cleaning solution on a pH probe?
Use only cleaning solutions designed for pH probes as specified by the manufacturer to avoid damage.
What if the probe is still slow to respond after cleaning?
Inspect for physical damage, membrane fouling, or electrolyte depletion; consider replacing the probe if performance does not improve.
Is distilled water necessary for rinsing?
Yes, distilled water minimizes mineral residues that could affect readings or introduce contaminants.
Should I soak the probe in cleaning solution?
Only if the cleaning kit’s instructions permit soaking; never exceed recommended soak times.
How should I store a pH probe?
Store in the recommended storage solution with the probe tip protected from physical damage.
With consistent maintenance, pH probes deliver accurate results and longer service life.
Buying Guide
When selecting a cleaning and maintenance setup for pH probes, consider these factors to optimize performance:
- Size and compatibility: Ensure the cleaning kit and solutions fit your probe model and workspace.
- Cleaning solution performance: Look for formulations that remove organic and inorganic fouling without harming the membrane.
- Cleaning tools: A soft brush designed for delicate sensor surfaces reduces risk of damage.
- Rinse and storage options: Distilled water bottles and appropriate storage solutions prevent contamination and dehydration.
- Maintenance frequency: Plan based on sample types, usage, and manufacturer recommendations to balance cost and accuracy.
- Ease of use: Clear instructions, validated calibration procedures, and safety data sheets simplify routine care.
- Durability and warranty: Choose reliable brands with good support and replacement parts availability.
- Safety considerations: Proper PPE, chemical handling guidelines, and spill containment are essential in any lab setup.
Think about your workflow: how often you calibrate, the typical sample matrix, and whether you need a portable rinse bottle for field work. A well-chosen cleaning kit reduces downtime and keeps measurements trustworthy.