Clean dried-on paint from rollers to extend their life and maintain a smooth finish on future projects. This guide walks through practical, step-by-step methods, safe products, and professional tips to restore rollers to usable condition. It covers common scenarios, from latex to oil-based finishes, and offers quick fixes for stubborn buildup.
Quick Answer
Restore a dried-on paint roller by soaking and scraping, then use a dedicated cleaning tool to scrub away residue. For stubborn paint, progress from warm water and gentle soap to stronger solvents like acetone when appropriate, ensuring thorough rinsing and drying before reuse.
What You’ll Need
- Paint roller cleaner kit for dried paint
- Roller cleaning comb and scraper for paint rollers
- Acetone for cleaning dried paint from rollers
- Paint roller cleaning tray with brush and grate
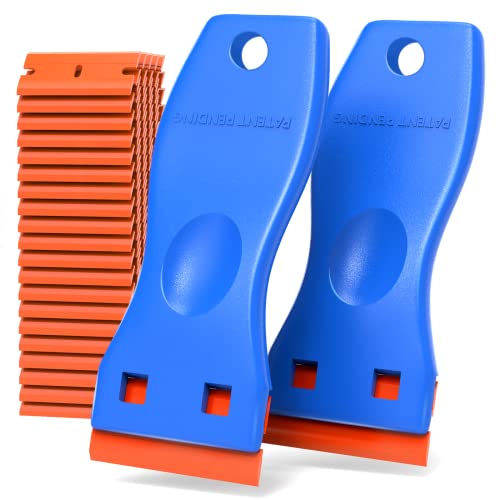
- Rubber blade scraper for removing dried paint from rollers


Before You Start
Prepare a well-ventilated area and wear gloves to protect skin. Identify the type of paint on the roller—water-based paints clean with soap and water, while oil-based paints require solvents. Set up a cleaning tray with a grate to drain excess liquid and a dedicated, disposable surface to prevent mess. Time estimates vary: plan 30–60 minutes for a single roller, longer for heavily encrusted rollers. Keep solvents away from heat and flames, and follow local disposal guidelines for used solvents and paint waste.
Step-By-Step: How To Clean Paint Rollers With Dried Paint
- Assess the roller and remove excess paint. Use a rubber blade scraper to strip as much dried paint as possible, working with firm, even pressure from end to end.
- Soak in warm water for water-based paints. Place the roller in a cleaning tray with warm, soapy water and let it soak for 10–15 minutes to soften the dried film.
- Use a roller cleaning comb and scrub. Run the comb along the roller’s nap to lift softened paint and break up clumps. Rinse under running water and continue until the water runs clear.
- Switch to a solvent for oil-based paints if needed. Soak the roller in acetone or a dedicated paint solvent for 10–20 minutes, then agitate with the cleaning tray brush and comb to release residue.
- Rinse thoroughly and inspect. Rinse with clean water (or solvent-free rinse if using acetone). Check for remaining dry patches; repeat soaking and scrubbing if necessary.
- Dry on a grate and reshape. Place the roller on the cleaning tray’s grate to drain excess liquid. Gently squeeze the nap with a clean cloth to remove moisture, then lay flat or stand upright to air-dry completely.
- Test before reuse. After drying, rotate the roller on a clean surface to ensure the nap is fluffy and evenly charged with paint-ready fibers.
- Store properly. Once fully dry, store rollers in a clean, dry container to prevent dust buildup and maintain nap quality.
Troubleshooting
| Symptom | Likely Cause | Fix | Prevention |
|---|---|---|---|
| Nap stays firm and clumpy after cleaning | Deep-set dried paint in the nap | Repeat soak with solvent and scrubbing; consider replacement if nap is irreparably damaged | Clean promptly after use; avoid leaving rollers dry with paint |
| Acetone odor lingers | Insufficient ventilation | Move to a well-ventilated area, extend airing time | Always use in a ventilated space |
| Roller nap frays or sheds fibers | Over-aggressive scrubbing or harsh chemicals | Switch to gentler cleaning tools and milder cleaners | Handle carefully; use appropriate cleaners for the nap material |
| Stubborn dried paint remains after cleaning | Paint type incompatible with chosen solvent | Try a different solvent or commercial cleaner designed for that paint | Match solvent to paint type from the start |
Common Mistakes
- Not testing the nap for looseness before reuse
- Using hot water on oil-based paints, which can set the film
- Rushing drying, which traps moisture and odors
- Neglecting proper disposal of solvents and paint waste
Tips For Best Results
- Always separate solvent-cleaning steps by paint type to avoid cross-contamination.
- Keep a dedicated cleaning tray for each project to minimize cross-use of solvents.
- For stubborn cases, repeat the cleaning cycle with fresh solvent rather than reusing dirty solvent.
- Consider using a roller cleaner kit with a built-in mechanism to press and squeeze excess paint from the nap.
- Rinse thoroughly after solvent use to prevent residue from affecting subsequent paint jobs.
Call A Professional
Reach out to a professional if the roller nap is severely damaged, if there is lingering odor after cleaning, or if the roller shows signs of warped or uneven wear. Seek help if repeated cleanings fail to restore performance, or if there are safety concerns with solvent use in a residential setting.
FAQ
Can I reuse a roller after cleaning with acetone?
Yes, if the nap remains plush and uniform after drying, the roller can be reused. Inspect for any remaining residue before painting.
Is hot water safe for all paints when cleaning rollers?
No. Hot water is best for water-based paints; oil-based paints require solvents to avoid setting residue.
What if the nap still smells after cleaning?
Air dry in a well-ventilated area and, if needed, wash again with a mild soap solution to remove solvent traces.
How do I prevent dried paint on rollers in the future?
Clean rollers promptly after use, wipe excess paint, and store them in a clean container away from dust and heat.
Buying Guide
When selecting tools for cleaning dried paint from rollers, consider size, material, and compatibility with paint types. A dedicated paint roller cleaner kit for dried paint saves time by combining scrapers, combs, and brushes. Look for a paint roller cleaning tray with brush and grate to maximize drainage and airflow during drying. If using solvent-based paints, ensure the included acetone for cleaning dried paint from rollers is suitable for your project and handled with care. A roller cleaning comb and scraper for paint rollers helps lift stubborn residue without damaging the nap. For stubborn, thick paint, a rubber blade scraper for removing dried paint from rollers can provide precise control. Finally, verify that the kit’s components are durable and easy to clean, since longevity matters for frequent pitchers of cleanup.
Common Buying Factors
- Size and nap compatibility: Choose rollers matching the project and nap material for effective cleaning.
- Material compatibility: Ensure cleaners and solvents match the paint type (water-based vs oil-based).
- Noise and ease of use: Tools with comfortable grips reduce fatigue during thorough cleanings.
- Durability and warranty: Look for robust plastics or metal components and a reasonable warranty.
- Storage and organization: A compact kit with a tray and grate simplifies cleanup storage.
- Safety features: Ventilation needs, non-slip trays, and clear labeling help maintain safe usage.
- Cost vs value: A comprehensive kit may cost more upfront but saves time and extends tool life.