Leather soles add a refined finish to dress shoes, but they require care to maintain grip and prolong life. This guide walks through a practical, safe method to clean leather soles without damaging the material, plus tips to prevent wear in the future.
Quick Answer
Start with a dry brush to remove surface dirt, use a damp cloth for stubborn spots, and finish with a leather-safe conditioner. For deep scuffs, a leather sole cleaning eraser tool can help, followed by a light application of conditioner. Always allow soles to dry completely before wearing.
What You’ll Need
- Leather shoe cleaning brush set (soft-bristle brush for dust, hard-bristle brush for tough grime)
- Leather sole cleaning kit with brush (includes sole-specific brush and cleaner)
- Hard bristle shoe brush for leather soles (for scuffs and embedded dirt)
- Microfiber shoe cleaning cloth leather care kit (for gentle wiping and drying)
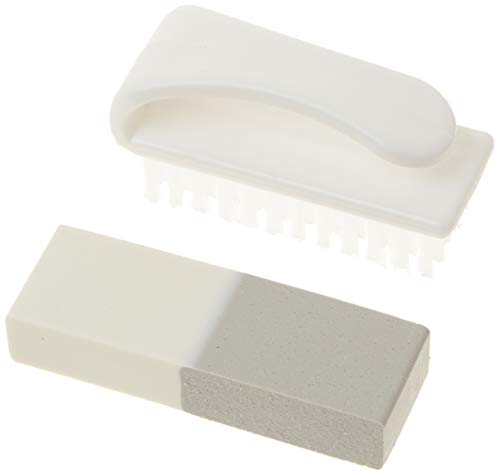
- Leather sole cleaning eraser tool (eraser-like pad for rubberized scuffs and stains on leather)


Before You Start
Prepare a clean workspace and check for any sole damage that could worsen with cleaning. Test cleaners on a small, inconspicuous area first to avoid discoloration. Work in a well-ventilated area and allow soles to dry fully before wearing. Time estimate: 10–20 minutes per pair, depending on stain depth and shoe condition.
Step-By-Step: How To Clean Leather Soles
- Remove loose dirt with a soft-bristle brush from the top of the sole to the edges, brushing in one direction to lift debris.
- Wipe away remaining dust with a microfiber cloth, using light, circular motions to avoid abrading the leather.
- Apply a small amount of leather sole cleaning kit with brush cleaner to the bristle brush and work the solution into the sole with gentle strokes, focusing on stained areas.
- For stubborn scuffs, use the hard bristle shoe brush for leather soles to lift embedded dirt. Avoid aggressive scrubbing that can wear away leather.
- Gently wipe the sole with another clean microfiber cloth to remove cleaner residues and lift loosened grime.
- If a stain persists, employ the leather sole cleaning eraser tool with light pressure, moving in small circles until the spot fades.
- Let the soles air-dry completely in a shaded area. Avoid direct heat, which can dry and crack leather.
- Finish with a thin coat of leather conditioner or sole-safe balm to preserve moisture and flexibility, then buff lightly with a clean cloth.
- Inspect the outsole edges for loosened stitching or separation and address any issues promptly to prevent further damage.
- Store shoes properly with stands or forms to maintain sole shape and prevent moisture buildup between wears.
- Repeat maintenance every few wears or when visible grime returns to keep leather soles looking clean and performing well.
Troubleshooting
| Symptom | Likely Cause | Fix | Prevention |
|---|---|---|---|
| Persistent stain after cleaning | Deep-set grime or conditioner residue | Re-clean with cleaner and re-apply conditioner sparingly | Spot-clean promptly to prevent set-in stains |
| Leather feels stiff after cleaning | Over-drying or harsh cleaners | Apply a thin conditioner layer and let it absorb | Use mild cleaners and avoid heat |
| White residue on sole | Residue from cleaner or conditioner | Wipe with a damp cloth and dry completely | Use sparing amounts and test first |
| Soles squeak after cleaning | Residual moisture or residue | Dry thoroughly and buff with cloth | Ensure complete drying before wear |
Common Mistakes
- Using harsh household cleaners that dry or discolor leather
- Soaking soles or soaking the shoe, which can damage glue and stitching
- Over-wetting the leather during cleaning, leading to warping
- Skimping on drying time and resuming wear quickly
- Neglecting regular conditioning after cleaning
Tips For Best Results
- Clean shoes in a well-ventilated area and protect surrounding surfaces from cleaner splashes
- Use the softest brush possible for delicate areas to minimize abrasion
- Apply conditioner sparingly; overly saturated leather loses its natural feel and finish
- Store shoes with shoe trees or forms to maintain shape and reduce moisture buildup
- Schedule routine maintenance after 3–5 wears, or sooner if exposure to dirt is heavy
Call A Professional
Consider professional help if there are deep structural issues, cracks around the sole edge, or persistent staining that DIY methods cannot resolve. Stop DIY attempts if you notice:
- Loose or cracked stitching near the sole
- Significant separation between sole and shoe
- Persistent odor that does not improve with cleaning
In these cases, a cobbler or shoe repair specialist can assess repair options and extend the life of the footwear.
FAQ
Can I use water to clean leather soles?
Lightly damp cloths are acceptable for spot cleaning; avoid soaking the leather to prevent damage.
Is conditioner necessary after cleaning?
Yes, a light conditioner helps maintain moisture and flexibility in leather soles.
How often should leather soles be cleaned?
Clean when visibly dirty, and perform maintenance every 3–5 wears for optimal longevity.
Will cleaning affect grip on leather soles?
Proper cleaning should restore appearance without significantly changing grip; test footwear on safe surfaces after cleaning.
Can I use a rubber eraser on all stains?
Leather sole cleaning erasers work on many stains, but avoid excessive force that could abrade leather.
Should I apply wax or polish to leather soles?
Generally not; leather soles benefit from conditioning rather than waxing, which can alter traction.
What about cleaning leather soles from different shoe types?
Process may vary slightly; always follow manufacturer recommendations for leather soles of your specific shoes.
Buying Guide
When choosing products for leather sole maintenance, consider these factors to optimize results:
- Size and compatibility: Ensure brushes and cloths fit the sole width and edge profiles of your shoes.
- Noise level: Quiet, non-abrasive tools reduce risk of scuffing; look for soft-bristle options for daily care.
- Energy efficiency (effort): Tools should require minimal scrubbing while achieving clean results; select products designed for leather care.
- Controls: Ergonomic handles and non-slip grips help maintain control during cleaning.
- Placement: Store kits in a dry area to prevent mildew and preserve tool integrity; keep different tool types organized.
For most users, a combination of a leather shoe cleaning brush set, a leather sole cleaning kit with brush, a hard bristle shoe brush for leather soles, a microfiber cloth kit, and a leather sole cleaning eraser tool provides comprehensive care. When evaluating options, prioritize gentle cleaners, durable brushes, and materials that suit the specific leather on your soles. Consider how often you clean and the types of stains you encounter to select a kit that matches your routine. If in doubt, start with a basic set and add specialized tools as needed.