Cleaning a K&N air filter extends its life and maintains optimal performance for vehicles. This guide provides practical, safe steps to restore airflow while protecting the filter’s integrity. The process uses common tools and the appropriate K&N cleaning products to ensure a thorough, effective clean.
Quick Answer
Rinse the filter with cool water from the clean side outward, apply K&N air filter cleaner, rinse again, let it dry completely, and re-oil lightly with K&N air filter oil before reinstalling. Always follow manufacturer directions for best results.
What You’ll Need
- K&N air filter cleaning kit
- K&N air filter oil and cleaner
- Reusable air filter cleaning kit for cars (optional, compatible alternatives)
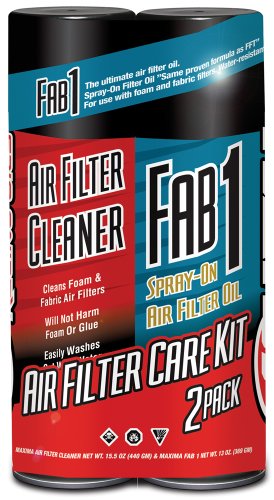
- Car air filter cleaning spray kit
- Air filter cleaner with brush and degreaser


Before You Start
Prepare a clean workspace, preferably outdoors or in a well-ventilated area. Gather all tools and read the product instructions before beginning. Protect your hands and eyes with gloves and safety glasses. Keep the cleaning solution away from paint finishes and rubber components. Allow ample time for drying between steps, especially in humid conditions. The typical process takes 30–60 minutes, plus drying time.
Step-By-Step: How To Clean A K&N Air Filter
- Remove the filter from the housing following the vehicle’s service manual. Note how it’s seated to ensure proper reinstallation.
- Gently tap or brush off loose dirt with a air filter cleaner with brush and degreaser to avoid embedding debris.
- Rinse the filter with cool, running water from the clean side outward to push dirt toward the outside.
- Apply K&N air filter cleaner liberally and let it soak for 10 minutes to loosen grease and contaminants.
- Rinse thoroughly from the clean side again, ensuring all cleaner residue is removed. Do not squeeze or wring the filter.
- Shake out excess water and let the filter air dry completely in a non-heat source area. This may take several hours.
- Once dry, apply a light coating of K&N air filter oil (or the designated oil from the kit) evenly across the filter’s surface. Avoid over-oiling, which can impede airflow.
- Reinstall the filter into the housing, ensuring a proper seal and gasket alignment. Reconnect any components that were removed during disassembly.
- Run the engine briefly to verify the filter is correctly installed and there are no air leaks.
- Record maintenance dates to maintain regular cleaning intervals based on driving conditions and mileage.
- Store remaining cleaning products in a cool, dry place and keep them away from children.
Troubleshooting
| Symptom | Likely Cause | Fix | Prevention |
|---|---|---|---|
| Filter dries unevenly or warps | Excess heat or improper drying | Dry in a shaded area away from direct heat | Allow full air-dry time; avoid forced drying |
| Oil appears blotchy after applying | Over-oiling or uneven application | Apply a thin, even coat and re-check seals | Follow oil instructions precisely |
| Unpleasant odor after cleaning | Residual cleaner or improper rinsing | Rinse thoroughly; use fresh water; repeat rinse if needed | Rinse until no cleaner scent remains |
| Loss of power after reinstall | Air leaks around the housing | Inspect gasket and clamps; reseal as needed | Double-check fit and torque |
Common Mistakes
- Using hot water or heat sources to dry the filter, which can damage the media
- Not allowing the filter to fully dry before applying oil
- Over-oiling the filter, which can attract dirt and clog airflow
- Ignoring manufacturer directions for cleaning and oiling ratios
Tips For Best Results
- Clean and re-oil on a regular schedule that matches driving conditions and mileage
- Work in a shaded, dust-free area to avoid secondary contamination during cleaning
- Keep cleaning products away from pets and children when stored
- Use the kit’s included brushes and accessories to ensure even coverage
- Record dates and mileage to track maintenance intervals
Call A Professional
Consider professional service if the filter shows signs of physical damage, tears in the media, or persistent leaks after reassembly. Seek expert help if the engine exhibits misfires, reduced power, or unusual noises that persist after reinstallation.
FAQ
How often should I clean a K&N air filter?
Follow driving conditions and mileage; harsh environments may require more frequent cleaning.
Is it safe to reuse K&N oil after cleaning?
Yes, apply fresh oil in a thin, even layer per the kit’s instructions.
Can I use other cleaners with a K&N filter?
Stick to the recommended K&N cleaners or compatible products to avoid damage.
What if the filter remains damp after washing?
Allow extra drying time in a well-ventilated area before oiling and reinstalling.
Will cleaning affect fuel economy?
Properly cleaned and oiled filters maintain optimal airflow and can sustain or improve efficiency.
Should I replace the gasket when I clean?
Inspect the gasket for wear; replace if it shows cracks or deterioration.
Is cleaning needed for all vehicle types?
Most standard automotive filters benefit from cleaning, but always follow manufacturer guidance for your specific model.
Buying Guide
When choosing a filter cleaning routine, consider size compatibility with your filter, the noise level of the cleaning actions (generally minimal with hand cleaning), energy efficiency of your garage setup, user controls, and placement for safe, convenient work. For K&N users, the primary buying factors include the availability of a complete kit (cleaner, oil, and accessories), kit compatibility with your filter model, and the presence of a degreaser or brush for thorough cleaning. Look for kits that provide clear instructions and color-coded components to minimize confusion. If you drive in dusty conditions or frequent off-road use, a robust cleaning and oiling regimen becomes more important. Compare kits based on included accessories, drying time, and reusability to maximize value and performance.