Kitchen floors endure daily traffic, spills, and splashes, making routine cleaning essential to maintain shine and hygiene. This guide offers practical, step-by-step methods using common tools to keep tile, grout, and linoleum floors spotless and durable. It covers techniques for different floor types and maintenance routines that prevent buildup while saving time.
Quick Answer
Choose a floor-cleaning method based on floor type: tile or vinyl floors respond well to a steam mop for sanitizing and quick touch-ups, while grout lines benefit from a dedicated grout brush and scrubber. Pair with a microfiber mop for daily maintenance and a wringer bucket for efficient cleanup.
What You’ll Need
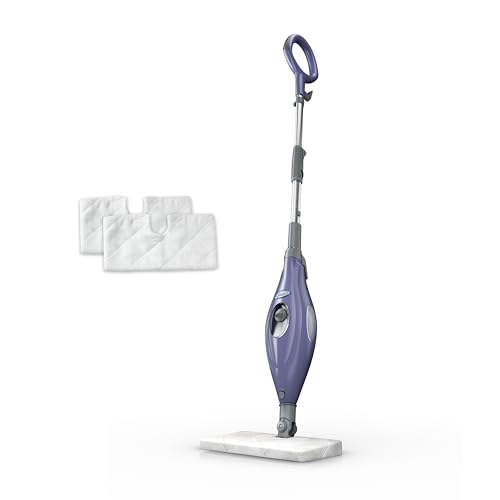
- Steam mop for kitchen tile floors
- Microfiber mop with replaceable pads kitchen
- Electric floor scrubber for grout and tile
- Mop bucket with wringer for kitchen cleaning
- Tile grout cleaning brush set


Before You Start
Evaluate your floor type: tile, vinyl, or sealed hardwood coatings require different cleaners and methods. Read manufacturer care labels on existing sealants and finishes. Gather tools ahead of time to avoid mid-clean interruptions. Safety notes: clip long hair, wear non-slip footwear, and use eye protection if splashes are possible. Time to complete: typically 20–40 minutes for routine cleaning; deep grout cleaning may take longer depending on floor size and condition.
Caution: Do not use abrasive tools on delicate surfaces, and never mix ammonia-based cleaners with bleach. Ensure the floor is fully dry before allowing foot traffic to resume to prevent slips.
Step-By-Step: How To Clean Kitchen Floor
- Clear the area of furniture and obstacles to create a clean working zone across the entire kitchen floor.
- Dry sweep or vacuum to remove loose debris, dust, and crumb buildup from both tiles and grout lines.
- For everyday cleaning, use a microfiber mop with replaceable pads kitchen with a neutral pH cleaner diluted as directed by the label.
- Use a steam mop for kitchen tile floors on sealed tile surfaces to sanitize and lift grime from grout lines. Move slowly to maximize contact time without over-wetting.
- Target grout lines with the tile grout cleaning brush set and a mild cleaning paste or solution. Scrub in small, circular motions, then wipe away loosened grime with a damp microfiber pad.
- When large areas feel sticky or heavily soiled, switch to an electric floor scrubber for grout and tile for efficient agitation and deep cleaning. Rinse the area thoroughly afterward.
- Empty and rinse the mop bucket with wringer for kitchen cleaning regularly to prevent dirty water from spreading. Use fresh cleaning solution for each pass if needed.
- Rinse and dry: after mopping, go over the floor with a clean, damp microfiber pad to remove any remaining residue, then dry with a dry pad or a clean, dry cloth to minimize streaks.
- Inspect grout and tile seams for any remaining spots. Repeat targeted scrubbing as needed, then re-seal grout if recommended for your tile type.
- Return furniture and mats, ensuring the surface is fully dry before heavy traffic resumes.
- Establish a regular schedule: light daily maintenance and a deeper weekly or biweekly cleaning based on traffic and kitchen use.
- Store tools properly in a dry area to prevent pad degradation and tool corrosion. Label cleaning solutions for easy future use.
Troubleshooting
| Symptom | Likely Cause | Fix | Prevention |
|---|---|---|---|
| Sticky residue after cleaning | Residue from cleaners or rinseWater | Switch to a neutral pH cleaner and thoroughly rinse with clean water | Rinse after mopping; use minimal concentrate |
| Streaks or dull appearance | Residual cleaner or improper drying | Dry with a clean microfiber pad; wipe in the direction of the grain | Use a single pass with a dry pad after damp cleaning |
| Streaks with steam mop | Over-wetting grout or unused appropriate setting | Adjust steam settings; avoid lingering on grout | Test on a small area first |
| Grout not lifting grime | Grout buildup or exhausted brushes | Use tile grout cleaning brush set and an abrasive paste; replace brushes as needed | Clean grout regularly to prevent heavy buildup |
| Pad degradation | Excessive scrubbing pressure or unsuitable pad | Use pads recommended for each tool; avoid harsh scrubbing | Rotate pads and follow manufacturer guidelines |
Common Mistakes
- Using harsh chemical cleaners on sealed tiles or grout
- Over-wetting the floor, especially with steam mops
- Neglecting grout maintenance, leading to stubborn buildup
- Using mismatched tools that scratch or wear surfaces
- Skipping dry-time, which invites slips and streaks
Tips For Best Results
- Establish a light daily wipe-down routine to prevent heavy buildup.
- Label cleaning tools and maintain pads for longevity.
- Work in small sections to ensure consistent cleaning and drying.
- Use a microfibre mop head with replaceable pads to preserve floor finish.
- Periodic grout sealing can extend the life of tile floors and simplify maintenance.
Call A Professional
Consider a pro if grout is deeply discolored, tiles are chipped, or there is extensive water damage. Stop signs include persistent mold growth, persistent odors, or significant cracking that affects the floor’s structural integrity. If you feel unsure about using steam or scrubber devices on certain surfaces, consult a flooring professional.
FAQ
Can I use a steam mop on vinyl or sealed hardwood floors?
Steam mops are typically best for tile or stone. Check manufacturer guidelines for vinyl and sealed hardwood, as excessive heat or moisture can damage those surfaces.
How often should I deep-clean grout?
For busy kitchens, a deep grout clean every 1–3 months helps prevent buildup and staining.
Is it okay to mix cleaning products?
Avoid mixing cleaners; follow label directions and use neutral cleaners when possible to prevent chemical reactions.
What’s the best way to dry a floor after mopping?
Use a dry microfiber pad or towel to remove remaining moisture and prevent water spots.
Buying Guide
The following factors help shoppers choose tools and supplies for kitchen floor cleaning. Consider your floor type, cleaning frequency, and home layout to pick suitable gear.
Size and Coverage
Choose a mop or scrubber that fits the kitchen size. A compact steam mop is easy to maneuver in tight spaces; larger electric scrubbers can expedite higher-traffic areas.
Noise Level
Engineered floor scrubbers vary in noise. If the kitchen is near living or dining areas, consider models with lower decibel ratings or variable speed control to minimize disruption.
Energy Efficiency
Opt for devices with efficient motors or compact motors designed for prolonged use. Energy-efficient tools reduce running time and heat exposure to floors.
Controls and Ease of Use
Look for simple, intuitive controls, ergonomic handles, and easy pad replacement compatibility. A mop bucket with wringer that’s easy to operate saves time and reduces strain.
Placement and Storage
Choose tools with compact footprints or upright storage options. Consider a dedicated cleaning caddy to keep tools organized and accessible in the kitchen area.
Material and Pad Compatibility
Ensure microfiber pads are replaceable and machine washable. For grout cleaning, select a set that includes stiff and soft brushes for varied grime levels.
Maintenance and Longevity
Assess warranty coverage and replacement part availability. Regular pad replacement and brush maintenance extend tool life and cleaning effectiveness.
Budget and Value
Balance initial cost with expected lifespan and ongoing consumables. A mid-range setup with replaceable pads and durable brushes often delivers the best long-term value.