The keg coupler is a critical bridge between the keg and the draft system. Regular cleaning eliminates beer residue, prevents contamination, and preserves flavor. This guide provides a clear, step-by-step method suitable for American home kegerators and professional setups alike.
Quick Answer
To clean a keg coupler, disconnect from the keg, rinse and scrub the exterior, disassemble the coupler to access seals and tubes, sanitize all parts, reassemble, and run clean water through the line to flush any remaining cleaner. Do this after every few kegs or at least monthly for heavy use.
What You’ll Need
- keg coupler cleaning kit
- beer line cleaning kit for kegs
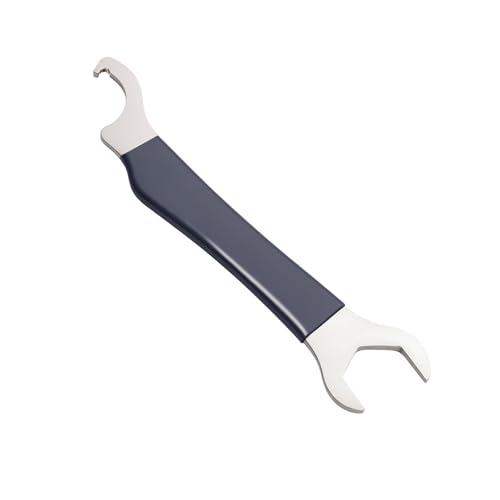
- keg coupler wrench tool
- keg dip tube brush
- keg cleaner and sanitizer spray


Before You Start
Prepare a clean workspace and have a drainage area ready. Disconnect power to any insulated taps and depressurize the system before disassembly. Wear gloves to protect hands from cleaning solutions. Time estimate: 20–40 minutes for a full clean, plus extra time for thorough drying. Critical cautions include never using caustic cleaners on seals not rated for them and ensuring all parts are fully rinsed to prevent sanitizer residue from affecting beer.
Step-By-Step: How To Clean A Keg Coupler
- Turn off and disconnect the gas and beverage lines from the keg coupler. Detach the coupler from the keg according to the model’s instructions.
- Rinse the exterior with warm water to remove loose beer residue. Wipe with a clean cloth and inspect seals for wear.
- Use the keg coupler wrench tool to carefully disassemble the coupler.
- Rinse and scrub internal components with warm water. Use the keg dip tube brush to remove buildup from the dip tube and small channels.
- Prepare a cleaning solution appropriate for beer systems. Soak removable parts according to the cleaner’s directions, then rinse thoroughly with clean water.
- Sanitize all parts that contact beer with a keg cleaner and sanitizer spray or a proper sanitizer solution. Allow proper contact time as specified by the product.
- Reassemble the coupler carefully, ensuring all seals and O-rings seat correctly. Reconnect the gas and beer lines to the keg.
- Flush the system by running clean water through the line to remove any residual cleaner or sanitizer. Allow the line to drain fully before tapping.
- Check for leaks by pressurizing the system at a low PSI and observing all connections. Tighten fittings if necessary with the wrench tool.
- Wipe down the exterior again and store cleaning supplies in a dry area. Keep a regular cleaning schedule based on usage.
Troubleshooting
| Symptom | Likely Cause | Fix | Prevention |
|---|---|---|---|
| Foamy beer or off taste after cleaning | Residual cleaner or sanitizer | Rinse line thoroughly with water and run beer through a short test pour | Rinse multiple times; allow complete drying |
| Leaking at connections | Loose fittings or worn O-rings | Tighten fittings; replace damaged O-rings | Regularly inspect seals during cleaning |
| Blockage in dip tube | Buildup in tube | Use dip tube brush; replace if necessary | Clean during every maintenance cycle |
| Unusual noises from the faucet | Dirty lines or trapped air | Flush lines with clean water; bleed the system | Keep lines clean and prime lines after cleaning |
Common Mistakes
- Using the wrong cleaner or not diluting it as directed
- Forgetting to sanitize after cleaning or skipping the rinse step
- Reassembling with dirty hands or without checking O-rings
- Over-tightening fittings, which can damage seals
Attention to detail during each step reduces the risk of taste issues and equipment wear over time.
Tips For Best Results
- Schedule regular cleaning aligned with keg usage to prevent heavy buildup.
- Keep a dedicated cleaning kit for keg lines to avoid cross-contamination with other dispensing components.
- Rinse and sanitize in the correct order: wash, rinse, sanitize, then dry thoroughly before reassembly.
- Document the date of each clean and inspection to establish a reliable maintenance rhythm.
Call A Professional
Consider professional service if there are persistent leaks, frequent foaming, or if the coupler shows signs of wear that hinder proper seating. Stop and contact a technician when you notice cracks, irreparable O-ring damage, or gas line malfunctions that require specialized tools or calibration.
FAQ
Can I use regular dish soap to clean a keg coupler?
Plain dish soap can be used for initial cleaning, but follow with a dedicated beer line cleaner or sanitizer to ensure proper disinfection.
How often should I clean the keg coupler?
Clean after every few kegs or at least monthly for heavy use, and immediately if a spill or contamination is suspected.
Do I need to disassemble the coupler completely?
Partial disassembly is often enough, but fully disassembling during a deep clean ensures all channels and seals are accessible.
What’s the best sanitizer for keg lines?
Use a sanitizer specifically rated for beverage systems, following the product’s contact time and rinse guidance.
Buying Guide
Choosing the right cleaning and maintenance tools for keg couplers influences flavor integrity and system reliability. Consider size compatibility with your keg type and the number of taps. Look for a comprehensive keg cleaning kit that includes line brushes and dip tube brushes for thorough access. Check that a keg dip tube brush fits your tube diameter and length. For metal fittings and seals, ensure the kit provides spare O-rings and a wrench tool to facilitate safe disassembly and reassembly. A reliable keg cleaner and sanitizer spray offers convenient, ready-to-use protection between deeper cleans. Finally, confirm that replacement parts are readily available to minimize downtime when components wear out.