Induction hobs offer fast, efficient cooking, but they require careful cleaning to maintain their smooth surface and performance. This guide provides practical steps using common tools and gentle cleaners to keep glass ceramic surfaces spotless and scratch-free.
Cleaning a glass ceramic or induction hob isn’t about strength; it’s about the right products and a light touch. By following these steps, users can remove stains, heat marks, and fingerprints while protecting the surface from scuffs and cloudiness.
Quick Answer
Wipe away spills when cool, apply a dedicated glass ceramic cleaner, scrub with a non-scratch pad if needed, dry with a microfiber cloth, and buff to a glossy finish. Avoid abrasive pads, harsh chemicals, and excessive moisture near controls.
What You’ll Need
- glass ceramic cooktop cleaner kit with scraper blade
- induction hob glass scraper 4 inch replacement blade
- microfiber cleaning cloth for glass cooktop 12×12 inches
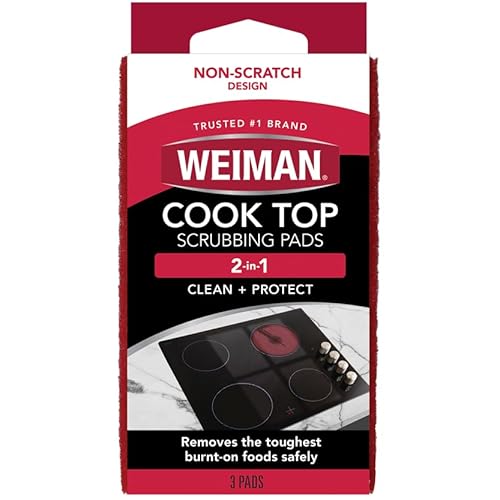
- non-scratch scrub pad for ceramic stove top 3 pack
- stovetop cleaner spray for glass ceramic induction cooktop 500 ml


Before You Start
Read manufacturer instructions for your specific hob model. Let the surface cool completely before cleaning. Use only soft tools to avoid scratches and avoid steam or water intrusion into control areas. Always test cleaners in an inconspicuous area first to ensure no adverse reaction with the surface.
Time estimate: 5–15 minutes per cleaning session, depending on stains and residue.
Step-By-Step: How To Clean A Glass Ceramic Induction Hob
- Remove loose debris with a dry microfiber cloth to prevent scratching during cleaning.
- Spray a light layer of stovetop cleaner spray over the cool surface, focusing on spills and smudges.
- Allow the cleaner to sit for 1–2 minutes to loosen residue.
- Use the non-scratch scrub pad to gently lift stuck-on residue, working in circular motions.
- For stubborn marks, use the glass scraper blade at a low angle to lift residue without gouging the surface.
- Wipe away loosened dirt with a clean microfiber cloth, turning the cloth to a dry area as needed.
- Buff the surface with a dry microfiber cloth to restore shine and remove streaks.
- Inspect the surface for remaining marks; repeat steps if necessary.
- Finish by wiping the edges and around control areas with a damp cloth, then dry thoroughly.
- Store cleaning tools in a dry place away from heat sources to prevent damage.
Troubleshooting
| Symptom | Likely Cause | Fix | Prevention |
|---|---|---|---|
| Cloudy or hazy surface after cleaning | Residue build-up or improper buffing | Re-clean with cleaner and a fresh microfiber cloth, then buff firmly | Use a clean cloth and follow up with a final buff |
| Scratches visible near heavily used areas | Using abrasive pads or metal scrapers | Switch to non-scratch pads and soft tools only | Avoid metal implements; never use abrasive cleaners |
| Streaks after cleaning | Uneven drying or excess cleaner | Wipe with a dry microfiber cloth in straight motions | Apply minimal cleaner and dry promptly |
| Liquid pooling near control panel | Excess moisture near electronics | Wipe away liquid and dry the area thoroughly | Avoid spraying cleaner directly on controls |
Common Mistakes
- Using abrasive pads or steel wool that scratches the glass
- Spraying cleaner directly on controls or hot surfaces
- Over-wetting the surface or leaving cleaner residue
- Skipping the drying step, which leaves streaks
Tips For Best Results
- Clean spills as soon as the hob cools to minimize hard-to-remove residue.
- Use a scraper blade only on flat, solid residue; avoid circular motions with excessive pressure.
- Choose a dedicated glass ceramic cleaner for optimal clarity and protection.
- Keep a dedicated microfiber cloth for the hob to prevent cross-contamination with other surfaces.
- Regular maintenance reduces the need for aggressive cleaning methods.
Call A Professional
Seek professional help if there are deep scratches, cracks, or if the surface shows signs of delamination. Also contact a pro if the display or touch controls malfunction after cleaning or if cleaning products cause discoloration.
FAQ
Can I use soap and water on an induction hob?
Plain soap and water can be used for light cleaning, but a dedicated glass ceramic cleaner typically provides better results for tough stains.
Is it safe to use a scraper on my induction hob?
Yes, with the glass scraper blade at a shallow angle and only on dried-on, solid residue.
What should I do about steam or excess moisture?
Avoid spraying liquids near the control panel and dry the surface thoroughly after cleaning.
How often should I clean my induction hob?
Clean spills promptly and perform a deeper clean weekly or as needed based on usage.
Buying Guide
When choosing cleaning tools for an induction hob, consider size, material, and compatibility with glass ceramic surfaces. Look for non-scratch pads and soft microfiber cloths to prevent scratches. A dedicated stovetop cleaner spray designed for glass ceramic surfaces helps maintain clarity and shine. Scraper blades should be replacement-friendly and sized to reach around knobs and edges without gouging. A complete kit with a scraper blade, replacement blades, microfiber cloths, and non-scratch pads offers a balanced option for routine maintenance. Consider storage convenience and kit contents to match your cleaning cadence and household needs.