Headlights that look dull or yellowish can dim nighttime visibility and reduce the car’s overall appearance. While specialized products exist, many drivers wonder if everyday household items can help restore clarity. This guide explains a practical, safe approach to cleaning headlights using Coca Cola, paired with common detailing tools for better results.
Note: Coca Cola is used here as a mild acidic cleaner to help loosen surface grime, not as a sole restoration method. For best outcomes, combine it with proven polishing compounds and protective sealants designed for automotive lenses.
Quick Answer
Yes, Coca Cola can help remove surface grime from headlights when used as a gentle cleaner in combination with proper polishing steps and protective sealants. For reliable results, follow a structured process with the right tools and materials and finish with a sealant to protect against future oxidation.
What You’ll Need
- headlight restoration kit abrasive compound
- microfiber cloth for headlight polishing
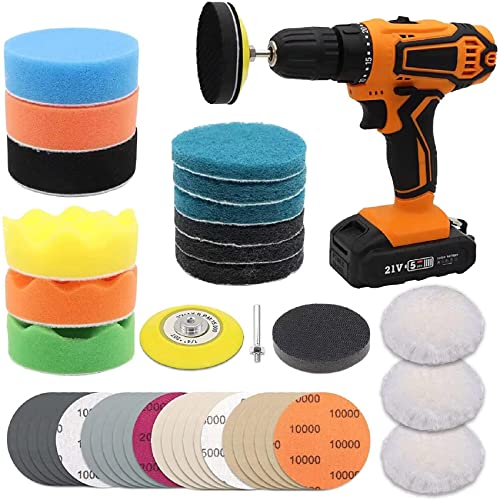
- car headlight polishing pad kit
- 1200 2000 grit sanding block for headlights
- headlight sealant and protectant kit


Before You Start
Assess each headlight for deep pitting or cracks; Coca Cola is not a substitute for structural repair. Work indoors or in a shaded, well-lit area to prevent fast drying of cleaners and to maintain visibility. Protect surrounding paint with painter’s tape. Time estimate: 30–60 minutes per pair depending on wear. Wear eye protection and gloves to avoid irritation from cleaners and sanding dust. If lenses are severely discolored or hazy beyond typical fogging, consider professional refinishing.
Step-By-Step: How To Clean Headlights With Coca Cola
- Rinse the headlight with water to remove loose dirt and debris.
- Spray a small amount of Coca Cola onto a clean microfiber cloth and gently wipe the lens in a circular motion to lift surface grime.
- Rinse the lens and dry with a clean microfiber cloth to inspect the level of clarity before sanding or polishing.
- Apply a small amount of headlight restoration kit abrasive compound to a polishing pad or cloth and begin light, circular polishing on the cloudy area.
- For deeper oxidation, use the 1200 grit sanding block to carefully sand the lens with light, even pressure. Keep the surface wet and frequently wipe away residues.
- Switch to 2000 grit sanding block for finer smoothing, continuing with gentle, even strokes until the lens looks clearer.
- Wipe clean and apply the microfiber cloth for headlight polishing to buff the surface to a smooth, clear finish.
- Coat with the headlight sealant and protectant kit, spreading evenly across the lens to create a protective layer against UV exposure and yellowing.
- Allow the sealant to cure as directed by the product instructions before exposing the headlights to rain or parking lots.
- Inspect both headlights and repeat steps as needed for any remaining haze, finishing with a final wipe and sealant boost if desired.
- Optionally, reapply the sealant every few months to maintain clarity and protection.
- Clean up tools and store them properly to avoid contamination or dry residue on lenses.
Troubleshooting
| Symptom | Likely Cause | Fix | Prevention |
|---|---|---|---|
| Lens remains cloudy after polishing | Deep oxidation or pitting | Repeat steps with gradual sanding; consider a professional service | Maintain sealant and avoid prolonged UV exposure |
| Purple or uneven discoloration | Harsh cleaners or uneven application | Re-clean with mild cleaner and re-polish evenly | Use recommended products and follow cure times |
| Sealant won’t cure | Too warm or humid environment | Move to a cooler, drier area and reapply | Follow temperature guidelines on the sealant label |
| Streaks after sealing | Overapplication or insufficient buffing | Buff with microfiber cloth until clear | Apply thin, uniform coats |
Common Mistakes
- Using aggressive cleaners or all-purpose solvents on plastic lenses
- Sanding too aggressively or using too coarse grit on clear plastic
- Skipping masking of surrounding trim and paint
- Underestimating the need for a protective sealant after polishing
- Rushing the curing times of sealants
Tips For Best Results
- Keep the sanding area consistently wet to avoid heat buildup and lens damage.
- Test Coca Cola on a small, inconspicuous area of the lens first to gauge reaction.
- Use a dedicated polishing pad kit designed for headlights for even pressure distribution.
- Work in a shaded area to prevent premature drying of cleaners and sealants.
- Follow the manufacturer’s guidelines for curing times and number of sealant coats.
Call A Professional
Consider professional help if: the lenses show deep cracks, extensive hazing that won’t buff out, or if the headlight housing is damaged. Stop and consult a pro if you notice water ingress behind the lens or if you feel uncertain about sanding near delicate components. A professional can advise on restoration versus replacement and ensure compliance with safety standards.
FAQ
Can Coca Cola damage my headlight lens?
Used sparingly as a cleaner, Coca Cola is unlikely to cause harm, but it should be followed by proper polishing and sealing to protect the lens.
Is Coca Cola a substitute for a headlight restoration kit?
No. Coca Cola can assist with light cleaning, but a dedicated restoration kit provides polishing compounds and abrasives designed for plastics.
How often should I seal headlights after cleaning?
Typically every few months, or as directed by the sealant product you use, to maintain clarity.
What if only one headlight needs work?
Treat each lens individually, maintaining consistent steps and using fresh materials to avoid cross-contamination.
Will Coca Cola help with yellowed headlights long-term?
It can improve surface clarity temporarily, but long-term yellowing requires polishing and protective sealing or replacement if necessary.
Buying Guide
When choosing products to use alongside Coca Cola as a cleaning method, consider these factors:
- Size and fit of headlight restoration kit abrasive compound relative to your lens size
- Noise level of polishing pads and grinders if used, and comfort in handling
- Energy efficiency of tools, though most hand tools are low-energy
- Controls and ease of use—look for single-step or multi-step kits with clear instructions
- Placement and accessibility in your garage or driveway, with adequate lighting
For best results, compare kits that include a dedicated headlight polishing pad kit, 1200–2000 grit sanding blocks, a reliable microfiber cloth set, and an effective headlight sealant and protectant kit. Consider user reviews and compatibility with your vehicle make and model to ensure proper lens compatibility and protective performance. A balanced combination of cleaning, polishing, and sealing typically yields durable clarity and improved nighttime visibility.