Grout in kitchens and bathrooms can darken and crumble over time, making tiled surfaces look worn. This guide explains effective, safe methods to restore clean grout between tiles using common tools and specialized brushes. Readers will learn quick methods, recommended products, and preventive tips to keep grout looking fresh.
Quick Answer
For most grout lines, start with a stiff nylon grout brush or a tile grout cleaning kit, apply a grout cleaner or a steam cleaner, scrub thoroughly, rinse, and seal if appropriate. Avoid harsh bleach on colored grout and test any cleaner on a small area first.
What You’ll Need
- 4 inch grout cleaning brush nylon stiff bristles for tight lines and stubborn stains
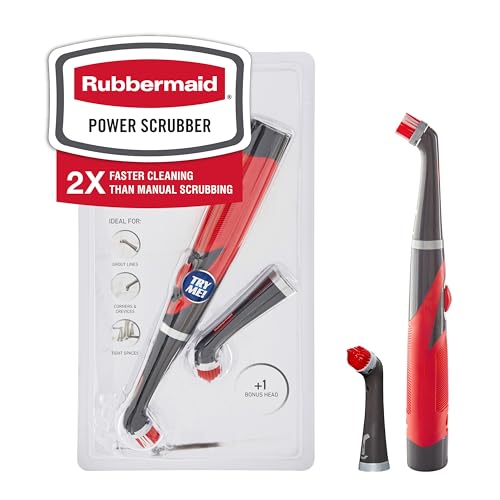
- handheld electric grout cleaner brush tool to power through heavy grime
- steam cleaner for grout and tile for deep sanitizing without chemicals
- grout scraper and brush set for tile grout to remove old, crumbling grout
- tile grout cleaning kit with silicone grout brush and scrub pad for versatility


Before You Start
Assess grout damage: surface stains respond differently from crumbling or peeling grout. Wear eye protection and gloves, open windows for ventilation, and protect adjacent surfaces. Time estimates vary: light touch-ups take 30–60 minutes; deep cleaning in larger areas may take 1–3 hours. Critical cautions: avoid sanding or grinding grout, which can damage tiles; test cleaners on a hidden corner first; never mix cleaners unless instructions permit.
Step-By-Step: How To Clean Grout Between Tiles
- Prepare the area by sweeping or vacuuming to remove loose dirt and debris.
- Choose a cleaning method based on grout condition: surface stains or mild grime may use a brush and cleaner; heavy grime may require a handheld electric tool or steam cleaner.
- Apply a grout cleaner or a mild homemade solution along the grout lines and let it sit for several minutes.
- Scrub with the 4 inch grout cleaning brush nylon stiff bristles or the grout scraper and brush set for tile grout, focusing on lines at the tile edges.
- Rinse with clean water and wipe away residue; repeat as needed for stubborn areas.
- For deep-seated stains, use a steam cleaner for grout and tile to sanitize and lift grime from pores.
- If grout is crumbling, consider removing old grout with a grout scraper and applying new grout following manufacturer directions.
- Seal the grout after drying if recommended for your grout type and tile installation.
- Dry thoroughly and inspect for missed spots; perform a touch-up if necessary.
- Document any maintenance routine for consistent future cleaning, such as quarterly deep cleaning.
Troubleshooting
| Symptom | Likely Cause | Fix | Prevention |
|---|---|---|---|
| Dark grout that won’t lighten after cleaning | Deep staining or resin-based sealant residue | Use a stronger cleaner approved for your grout; rinse thoroughly | Test cleaners first; avoid over-application near sealed areas |
| Gaps in grout after cleaning | Crumbled grout or old grout failure | Replace damaged sections with new grout | Inspect grout during cleaning and regrout as needed |
| Streaks or smearing after rinse | Soap residue or insufficient rinsing | Rinse multiple times with clean water and dry with a towel | Rinse thoroughly after each cleaning stage |
| Tile edge damage during scrubbing | Too aggressive scrubbing or abrasive tools | Switch to gentler brushes; use shorter sessions | Select appropriate brush stiffness for tile type |
Common Mistakes
- Using highly abrasive tools on delicate or epoxy grout
- Applying cleaners directly to metal fixtures or aluminum trims
- Over-wetting grout lines, which can lead to mold growth behind walls
- Skipping a test patch before full-area application
- Neglecting to seal grout after cleaning when recommended
Tips For Best Results
- Brush in a consistent direction to avoid missed spots and reduce grout wear
- Work in small sections to prevent cleaner from drying on grout lines
- Combine mechanical scrubbing with steam cleaning for best sanitation
- Use color-matched or epoxy grout if modernizing or repairing a renovation
- Schedule periodic maintenance; annual or semiannual cleanings prevent heavy buildup
Call A Professional
Contact a professional if grout is severely damaged, tile grout has crumbled to a depth that affects tile adhesion, or mold growth extends beyond accessible grout lines. Signs to seek help include persistent staining after multiple cleanings, cracked tiles, or suspected water intrusion behind walls. Additionally, if you are unsure about grout type and appropriate cleaners, a pro can advise on safer products and methods.
FAQ
What is the best tool for cleaning grout?
The best tool depends on grout condition: a stiff nylon bristle brush for routine cleaning, a handheld electric grout cleaner for heavy grime, and a steam cleaner for deep sanitization.
Can I use bleach on grout?
Bleach can whiten grout but may discolor colored grout and damage certain tile finishes. Test first and use diluted solutions as directed.
How often should grout be cleaned?
Plain grout may be cleaned every 3–6 months; high-traffic bathrooms might require more frequent cleanings and resealing as needed.
Is sealing grout after cleaning necessary?
Sealing helps protect cementitious grout from moisture and stains; epoxy grout may not require sealing. Follow manufacturer guidance for your grout type.
What causes grout to crumble?
Cement-based grout can crumble due to age, moisture intrusion, or improper installation. Regrouting may be needed for long-term durability.
Can steam damage grout?
Steam is generally safe for sealed, non-porous grout but may affect certain resealed or epoxy grout; follow steam cleaner instructions and grout type guidelines.
Buying Guide
When selecting tools to clean grout between tiles, consider size, grip comfort, and compatibility with grout type. For frequent cleaners, a handheld electric grout cleaner offers convenience, while a dedicated grout brush with nylon bristles is budget-friendly and effective for routine maintenance. Steam cleaners provide chemical-free sanitation, but may be heavier and require more energy. A grout scraper helps with deteriorated grout, but use gently to avoid tile damage. Look for kits that include both brushes and scrub pads for versatility. Consider noise level, weight, and ease of replacement parts for long-term use. Placement considerations include bathroom vs. kitchen areas and moisture exposure, which influence tool choice and cleaning frequency.