Maintaining a clean cold air intake filter is essential for optimal engine performance and fuel efficiency. Over time, dust, oil, and grime can clog the filter, reducing airflow and potentially causing engine strain. This guide outlines practical steps and safe supplies to keep your intake system functioning at its best.
Whether you own a performance setup or a daily driver, properly cleaning and reusing your air filter can extend its life and improve air quality entering the engine. The methods here emphasize using common automotive cleaning kits and tools designed for foam or cotton air filters, with emphasis on foam or reusable media where applicable.
Quick Answer
How to clean a cold air intake filter involves removing the filter, inspecting for damage, applying a dedicated cleaner, rinsing with water, drying completely, re-oiling if required, and reinstalling. Always follow the cleaner’s instructions and avoid harsh solvents that could degrade the filter material.
What You’ll Need
- K&N air filter cleaning kit
- automotive air filter cleaning kit with degreaser
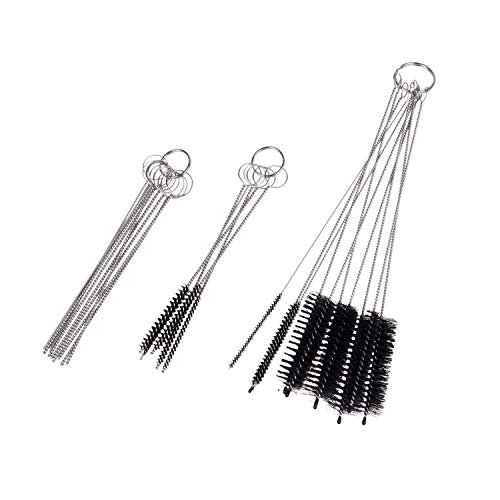
- car air filter cleaning brush set
- air intake filter cleaner spray for cars
- reusable foam air filter cleaning kit


Before You Start
Prepare a clean workspace and protect surfaces from rinse water. Remove the filter from the intake housing and inspect for cracks or torn seams. Do not reuse a damaged filter. If you use a spray cleaner, wear gloves and eye protection. Allow ample time for drying to avoid reintroduction of moisture into the intake tract, which can cause hydrolock or poor idle. Avoid applying cleaner to hot surfaces or in direct sunlight.
Step-By-Step: How To Clean A Cold Air Intake Filter
- Disconnect the air intake housing and carefully remove the filter, noting its orientation for reinstallation.
- Inspect the filter media for damage such as tears in foam or pleats, and set aside any units needing replacement.
- Spray or apply the recommended filter cleaner evenly on the exterior and interior surfaces, allowing the cleaner to saturate the dirt and oil.
- Gently agitate with a car air filter cleaning brush set to lift embedded debris without tearing the media.
- Rinse the filter from the clean side to the dirty side with low-pressure water until the rinse runs clear.
- Shake off excess water and place the filter in a well-ventilated area to air dry completely, which may take several hours.
- If applicable, re-oil the filter according to product instructions, ensuring an even, light coating without over-saturation.
- Reinstall the filter back into the intake housing, ensuring a snug seal and proper orientation.
- Reconnect any electrical sensors or hoses and perform a careful startup to confirm there are no leaks or idle issues.
- Test drive the vehicle to ensure smooth acceleration and consistent airflow into the intake system.
- Dispose of any used cleaner according to local regulations and clean your work area.
- Periodically repeat the cleaning on a schedule aligned with driving conditions and manufacturer recommendations.
Troubleshooting
| Symptom | Likely Cause | Fix | Prevention |
|---|---|---|---|
| Rough idle after reinstall | Residual cleaner or moisture in the intake | Recheck seal, dry filter thoroughly, restart | Ensure complete drying before reuse |
| Loss of power or hesitation | Partially clogged filter or improper re-oiling | Clean and re-oil per instructions, inspect seal | Use recommended cleaner and oiling method |
| Visible tears in foam media | Wear during cleaning or age-related degradation | Replace filter if torn | Inspect before cleaning, avoid aggressive scrubbing |
| Water entering intake | Over-rinsing or improper drying | Allow full air drying; do not rush the process | Place in a dry, ventilated area away from moisture |
Common Mistakes
- Using household cleaners not designed for filters, which can degrade media.
- Not drying the filter completely, which can cause poor idle and misfiring.
- Over-oiling foam filters, leading to oil dripping into the intake and emissions issues.
- Reinstalling without checking for cracks or improper seating, causing leaks.
Tips For Best Results
- Follow the cleaner’s instructions precisely to maximize filter life.
- Perform cleaning in a shaded area to prevent rapid drying that could trap moisture.
- Keep spare gloves and towels handy to manage油-stained cleaning tasks and spills.
- Use a dedicated brush set to avoid damaging delicate filter media.
- Record maintenance dates to track cleaning intervals and replacement needs.
Call A Professional
Certain situations warrant professional service. If the filter or housing is damaged, if there are persistent performance issues after cleaning, or if you are unsure about re-oiling procedures, consult a certified automotive technician. Seek help immediately if you notice unusual noises, smoke, or strong fuel odors after maintenance.
FAQ
Can I use a standard soap to clean my air filter?
Standard soaps can leave residues that affect airflow and filter performance. Use a product designed for air filters.
Do reusable foam air filters require oiling?
Some foam filters require oiling for filtration efficiency; follow the product’s instructions to apply a light, even coating.
How long should an air filter dry after cleaning?
Drying times vary by climate but plan for several hours in a well-ventilated area.
Is it necessary to replace an old filter during cleaning?
If the media shows tears, collapsed pleats, or excessive wear, replacement is recommended.
Can cleaning affect engine performance?
Proper cleaning and reinstallation improve airflow, which can enhance throttle response and efficiency.
Should I clean the filter every time I replace the oil or spark plugs?
Routine checks are sensible; frequency depends on driving conditions and filter type.
Is a cleaning kit essential for cold air intakes?
Dedicated cleaning kits provide safer chemistry and wood-based or synthetic cleaners that protect filter media.
Buying Guide
When choosing a cold air intake filter cleaning setup, consider size and compatibility with your filter type, such as foam or cotton media. Look for kits that include a degreaser or dedicated cleaner spray, an oiling stage if required, and a robust brush set for safe scrubbing. Noise and energy efficiency factors are not directly tied to cleaning products but reflect overall intake system design and installation quality.
Key buying factors:
- Size and compatibility: Ensure the kit matches your filter’s dimensions and media type.
- Cleaner type and safety: Prefer kits with dedicated cleaners and degreasers that won’t degrade filter media.
- Oil compatibility: Some foams require oiling; others are oil-free—understand your filter’s needs.
- Included tools: A brush set and rinsing tools save time and reduce the risk of media damage.
- Reusability and cost: Reusable foam or cotton filters paired with cleaning kits can lower long-term costs.
- Ease of use: Clear instructions and footprint-friendly kits help ensure proper application.
Think about your driving environment—dusty rural roads vs. urban streets—and choose a kit that aligns with how often you plan to clean and maintain the filter. Would you benefit from a kit that includes a quick-dry feature or a more thorough cleaning cycle? A well-chosen kit helps maintain consistent air flow and engine performance.