Cloudy plastic surfaces, from car headlights to household panels, can reduce visibility and aesthetics. The right cleaning and polishing routine restores clarity without damaging the material. This guide focuses on practical methods using commonly available tools and products designed for plastic surfaces.
The process blends gentle cleaning, light polishing, and protective care to extend the life of plastic components. Readers will learn steps that minimize scratching while achieving clear, even results across different plastic types.
Quick Answer
For cloudy plastic, start with a dedicated plastic cleaner and polish, followed by a polishing kit designed for polycarbonate or similar plastics. If scratches are present, use a scratch remover kit and finish with a microfiber cloth for a smooth, clear result.
What You’ll Need
- Plastic lens cleaner polish kit
- Polycarbonate plastic scratch remover kit
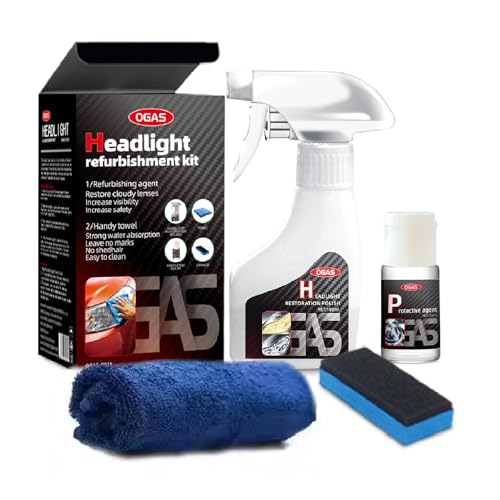
- Headlight restoration kit with polishing compound microfiber cloth
- Microfiber cleaning cloth for plastic polishing 16×16
- Plastic surface cleaner and polish spray 12 oz


Before You Start
Prepping the area and choosing the right product are essential. Work in a shaded, well-lit area to avoid rapid drying that could leave streaks. Inspect the surface for deep cracks or crazing; such damage may require replacement. Avoid harsh solvents, abrasive pads, or high-pressure streams that can create new scratches or haze. Estimate the time required: most projects take 30–60 minutes, depending on size and condition.
Step-By-Step: How To Clean Cloudy Plastic
- Prepare the surface by wiping loose dirt with a dry microfiber cloth to prevent scratching during cleaning.
- Apply a small amount of Plastic surface cleaner and polish spray to a clean microfiber cloth or the recommended applicator.
- Gently rub in a circular motion across the cloudy area, applying light pressure to lift surface haze without removing the base material.
- If haze persists, switch to a Polycarbonate plastic scratch remover kit and use the included pad or cloth with moderate pressure, following the grain of the plastic when possible.
- Wipe away residue with a fresh microfiber cloth and inspect for clarity. Repeat as needed with light passes.
- For deeper clouding or light scratches, use the Headlight restoration kit with polishing compound and microfiber cloth to even out the finish.
- Finish with a final pass of Plastic lens cleaner polish kit to restore shine and protective clarity.
- Apply a protective layer with the Plastic surface cleaner and polish spray or similar product to seal the surface and reduce future dulling.
Troubleshooting
| Symptom | Likely Cause | Fix | Prevention |
|---|---|---|---|
| Hazy residue remains after polishing | Inadequate initial cleaning | Re-clean with microfiber cloth and reapply polish | Use fresh cloths; clean surface thoroughly before polishing |
| Scratches become more visible after polishing | Over-application or abrasive choice | Switch to a milder compound and lighter pressure | Test on a small area first |
| Streaks or uneven shine | Surface contaminated with oils or cleaners | Wipe with a clean, damp cloth then dry | Use a dedicated plastic cleaner and follow with a final polish |
| Chemical scent or residue lingering | Excess cleaner residue | Wipe with a damp microfiber cloth and dry thoroughly | Rinse lightly if product instructions allow |
Common Mistakes
- Using abrasive pads or household cleaners not labeled for plastic
- Failing to dry the surface fully before applying the next product layer
- Skipping a test area and applying heavy pressure on a small spot
- Not following product directions or cure times
Tips For Best Results
- Work in short, controlled passes to avoid overheating the plastic, which can cause warping or discoloration.
- Keep a clean, lint-free microfiber cloth dedicated to plastic work to prevent cross-contamination.
- Use multiple, progressively finer cloths or compounds to achieve a clearer result.
- Finish with a protective spray to help repel dust and maintain clarity longer.
Call A Professional
Consider contacting a professional if the plastic shows deep, deep-set scratches, hazing from UV exposure, or if the item is a critical safety component like a car headlight. Stop and seek a pro if you notice material deformation, cracking, or compromised structural integrity.
FAQ
Can I use household polish on cloudy plastic?
Household polishes are not ideal for plastic and may cause more hazing. Use products labeled for plastic care.
Will polishing restore completely clear headlights?
Many headlights improve substantially, but severe oxidation orUV damage may limit full restoration.
How often should I polish plastic surfaces?
Every 6–12 months is typical for high-use or UV-exposed plastics, with touch-ups as needed.
Is it safe to use a polycarbonate scratch remover on all plastics?
Check the product label; some removers are formulated for polycarbonate and may not suit other plastics.
Buying Guide
When selecting products to clean cloudy plastic, consider key factors that influence results and ease of use:
- Size and scope: Choose kits sized for the project area (headlights, panels, or large plastic surfaces). Small kits may be insufficient for broader surfaces.
- Noise level and usability: Some spray bottles and polisher pads produce minimal noise and are easy to handle for beginners.
- Energy efficiency is less of a concern for hand-applied products, but choose long-lasting cleaners that require fewer reapplications.
- Controls and consistency: Look for spray options or applicator pads that provide steady, even coverage to minimize streaks.
- Placement and storage: Store in a cool, dry place; keep all products labeled and away from children.
- Compatibility: Verify the product is suitable for your plastic type (polycarbonate, acrylic, or polyolefin) to avoid damage.
- Included accessories: Kits with microfiber cloths, application pads, and polishing compounds save time and improve results.
Will a single kit cover multiple surfaces? Some products are versatile, but it may be best to use a dedicated cleaner and a polish designed for the specific plastic type to achieve best results. Are you cleaning headlights, dashboards, or decorative panels? The choice of kit can vary by use case and desired finish. If unsure, start with a dedicated plastic surface cleaner and polish spray for initial cleaning, then follow with a polycarbonate scratch remover kit if needed.