The plastic surfaces inside a vehicle—dash, doors, consoles, and panels—set the look and feel of the cabin. Proper cleaning removes dust, fingerprints, and grime without dulling or damaging finishes. This guide explains a practical, step-by-step method using common detailing tools and safe cleaners to restore plastic trim to a like-new appearance.
By following best practices, motorists can achieve a cleaner, more comfortable interior with minimal effort and without professional equipment.
Quick Answer
Fast method: Gather a car interior detailing brush set, microfiber towels, a plastic trim cleaner spray kit, and a dash plastic cleaner spray bottle kit. Lightly agitate with the brush, wipe with microfiber, and finish with a plastic conditioner if desired. For stubborn stains, consider a car interior steam cleaner for a deeper clean.
What You’ll Need
- Car interior detailing brush set
- Microfiber towels for car interior cleaning
- Plastic trim cleaner spray kit for car
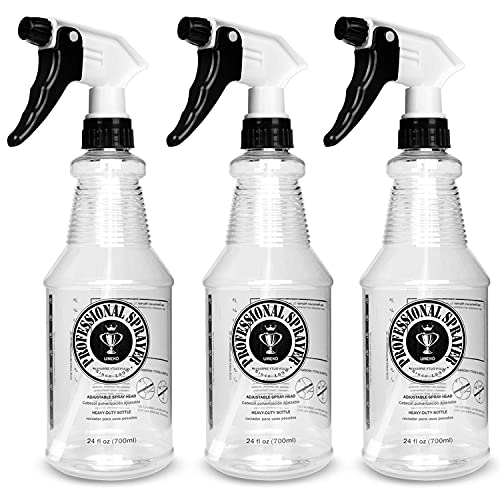
- Dash plastic cleaner spray bottle kit
- Car interior steam cleaner


Before You Start
Prepare a well-lit, ventilated workspace in the garage or driveway. Remove loose debris with a microfiber cloth before applying cleaners. Test cleaners on an inconspicuous area to check for colorfastness or streaking. Set aside 20–40 minutes for the process, plus extra time for drying. Important cautions: never use abrasive pads on glossy plastics, avoid harsh solvents near LCD screens, and keep cleaners away from delicate leather edges or painted surfaces.
Step-By-Step: How To Clean Car Interior Plastic Surfaces
- Remove loose dust with a microfiber cloth, paying attention to air vents and seams.
- Lightly mist a plastic trim cleaner on a small section of the surface.
- Use a soft brush from the car interior detailing brush set to lift embedded dirt from grain patterns.
- Wipe with a microfiber towel, folding the cloth to a clean side for a streak-free result.
- Repeat on larger panels, using circular motions to cover all plastic surfaces.
- Apply a second pass on stubborn spots with a damp cloth and a touch more cleaner if needed.
- Wipe edges and corners where dust tends to accumulate; avoid over-wetting the material.
- For persistent grime near cup holders or seams, use a foam or spray cleaner and a small brush to work it in.
- Dry the area with a fresh microfiber towel to prevent water spots.
- Optionally apply a dash plastic cleaner spray bottle kit or a conditioner to restore slightly faded plastic.
- Clean vents last with a dry brush to prevent dispersing dust into the cabin.
- Inspect the entire surface; repeat any steps as necessary for an even finish.
Troubleshooting
| Symptom | Likely Cause | Fix | Prevention |
|---|---|---|---|
| Streaks after cleaning | Over-wetting or improper wipe | Use a dry microfiber and light pressure | Wipe in straight lines or circular motions; use minimal cleaner |
| Dull or chalky finish | Repeated use of harsh cleaners | Switch to a plastic trim cleaner designed for interiors | Follow up with a conditioner if recommended |
| Color transfer or staining | Cleaner contains dyes | Test on hidden area first; use a color-safe product | Avoid long dwell times on colored plastics |
| Sticky surface after spray | Over-application of product | Buff with a clean microfiber until dry | Apply sparingly and wipe promptly |
Common Mistakes
- Using abrasive scrubbers on glossy plastics
- Over-wetting panels, causing seepage into seams
- Relying on household cleaners not designed for automotive plastics
- Neglecting to wipe vents and crevices where dust collects
Awareness of these pitfalls helps maintain the trim’s color, texture, and durability over time.
Tips For Best Results
- Work in small sections to keep cleaners from drying unevenly.
- Use a dedicated brush set to reach textured areas without scratching.
- Choose a spray bottle kit that offers even, controlled application to avoid oversaturation.
- When possible, finish with a protective conditioner designed for automotive plastics to preserve sheen and resist UV damage.
- Regular quick cleanings prevent heavy buildup and prolong the life of trim materials.
Call A Professional
Consider a professional if the interior shows:
- Persistent staining that resists standard cleaners
- Cracking, warping, or color fade beyond routine maintenance
- Mold or mildew growth within vents or fabric-adjacent areas
In these cases, a certified automotive detailer can assess the surface and apply advanced treatments safely.
FAQ
What is the best cleaner for car interior plastic?
Use a dedicated plastic trim cleaner spray kit designed for automotive interiors, followed by a conditioner if appropriate.
Can I use a steam cleaner on plastic trim?
A car interior steam cleaner can help loosen grime, but test first and avoid high heat on sensitive edges.
Are microfiber towels necessary?
Yes. Microfiber towels remove residues without scratching and are essential for a streak-free finish.
How often should I clean interior plastics?
Light weekly touch-ups plus a deep clean every few months help maintain appearance and longevity.
Buying Guide
Key buying factors for cleaning car interior plastic include size and reach of tools, noise level, energy efficiency, controls, and placement in the toolkit. When comparing products, consider how well each item handles textured surfaces, the ease of spray application, and compatibility with your vehicle’s materials. For a balanced setup, combine a car interior detailing brush set with microfiber towels for car interior cleaning and a plastic trim cleaner spray kit for car. If deeper cleaning is needed, a car interior steam cleaner can be a valuable addition. Look for kits that include a dash plastic cleaner spray bottle kit for convenient spot cleaning and quick touch-ups.