Maintaining a camera involves careful cleaning to preserve image quality and extend equipment life. This guide lays out proven steps to safely clean lenses, sensors, and other sensitive parts using common photography tools.
Whether you’re a casual shooter or a budding professional, a clean camera helps you capture sharp, vibrant photos. The methods below emphasize gentle, controlled cleaning and avoiding common mistakes that can damage optics or electronics.
Quick Answer
Use a dedicated camera lens cleaning kit and microfiber cloths for most surface dust. For stubborn smudges, apply a small amount of alcohol-free lens cleaning solution to a microfiber cloth and wipe gently. Reserve sensor cleaning swabs for DSLR sensors only when necessary and follow manufacturer guidelines.
What You’ll Need
- Camera lens cleaning kit microfiber cloth blower brush
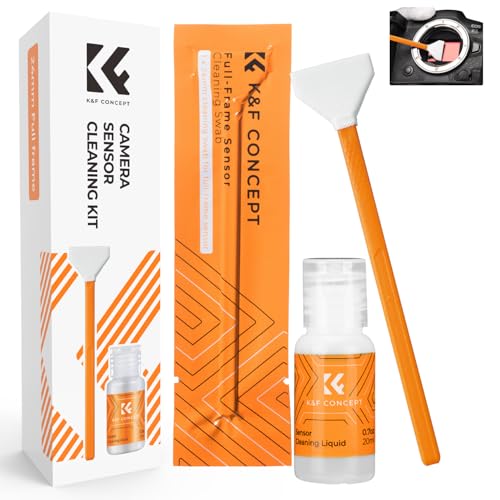
- Sensor cleaning swabs for DSLR camera
- Air blower for camera lens cleaning
- Alcohol-free lens cleaning solution for cameras
- Microfiber cloth set for camera lens cleaning


Before You Start
Work in a clean, dust-free area away from direct sunlight. Ensure the camera is powered off and the battery is removed when possible. Avoid touching the image sensor and optic surfaces with fingers. Never spray cleaning solutions directly onto lenses or sensors. Allow surfaces to dry fully before reassembling. Time estimate: 10–20 minutes for a complete, careful cleaning session.
Step-By-Step: How To Clean A Camera
- Remove the lens and inspect both the lens and the camera body for loose dust or debris.
- Use a blower brush to gently dislodge loose dust from the lens exterior and the camera’s viewfinder and sensor area (avoid touching any glass).
- Wipe the lens exterior with a microfiber cloth to remove fingerprints and smudges.
- For stubborn smudges on the lens, dampen a microfiber cloth lightly with an alcohol-free lens cleaning solution and wipe in a circular motion from the center outward.
- Clean the lens internal elements by using a specialized lens cleaning swab if the kit includes them and you are confident in handling them.
- Reinstall the lens and check for any remaining dust by viewing a test shot against a plain background or a blank sky; repeat cleaning if necessary.
- Inspect the camera body air intake and port areas; use the blower to remove any debris that could be drawn into internal components.
- For sensor cleaning on a DSLR, follow the manufacturer’s instructions precisely, typically using sensor swabs and a dedicated cleaning method; avoid excessive pressure.
- After cleaning, recheck all glass surfaces for streaks or residue and perform a quick shot test to confirm clarity.
- Store tools in a clean, dry place and recap the bottles or containers to prevent contamination.
- Document your cleaning routine to track when the next cleaning session should occur based on usage and dust exposure.
Troubleshooting
| Symptom | Likely Cause | Fix | Prevention |
|---|---|---|---|
| Smeared lens after cleaning | Residue from cleaning solution | Wipe again with a dry microfiber cloth | Use minimal liquid; ensure cloth is just barely damp |
| Dust remains on sensor | Insensitive to surface cleaning; improper technique | Follow manufacturer sensor-cleaning steps precisely or seek professional cleaning | Schedule periodic sensor checkups in dusty environments |
| Scratch marks on lens surface | Using dirty or rough cloth | Switch to a clean microfiber cloth; avoid touching the lens surface | Always handle lenses by the edges |
| Moisture on sensor or glass | Excess liquid during cleaning | Wait for it to evaporate fully before reassembly | Use only intented amounts of liquid and proper swabs |
Common Mistakes To Avoid
- Cleaning lenses with household cleaners or ammonia-based solutions
- Using paper towels or rough cloths that scratch optics
- Spraying liquid directly onto lenses or sensors
- Applying excessive pressure when cleaning the sensor
- Neglecting to remove dust before wiping, which can smear surfaces
Tips For Best Results
- Work in a controlled, dust-free environment to minimize airborne particles.
- Use a dedicated air blower rather than compressed air canisters, which can spray propellants.
- Keep a routine inventory of cleaning tools and replace worn or contaminated items promptly.
- Hold the camera securely and avoid bending delicate components during cleaning.
- Test lens calibration and auto-focus after cleaning to ensure performance remains consistent.
Call A Professional
Stop and seek help if you notice any of the following: persistent sensor dust intrusion after multiple attempts, water damage, or scratches on the lens or sensor area. If the camera fails to operate correctly after cleaning, contact an authorized service provider for diagnosis and repair.
FAQ
Is it safe to clean my sensor at home?
Sensor cleaning at home is possible with the proper tools and instructions, but it carries risk. Follow manufacturer guidelines closely and avoid excessive pressure.
What should I use to clean camera lenses?
Use a dedicated lens cleaning kit with microfiber cloths, a gentle, alcohol-free solution, and, if needed, sensor cleaning swabs for DSLRs.
How often should I clean my camera?
Frequency depends on use and environment. Clean lenses regularly, and perform deeper sensor checks only when you notice image degradation or dust spots on shots.
Can I use household wipes on camera gear?
No. Household wipes and solvents can damage coatings and seals. Stick to camera-specific cleaning products.
What products are best for travel cleaning?
A portable lens cleaning kit, microfiber cloths, and a compact blower are ideal for on-the-go maintenance.
Buying Guide
Choosing the right camera cleaning setup depends on several factors. Consider size and portability for field cleaning, noise level of any air-based tools, energy efficiency if you rely on rechargeable devices, control options on cleaning tools, and where you’ll place your gear when cleaning. Look for a kit that includes a microfiber cloth set, a blower, and sensor-safe swabs if you own a DSLR. A bundled solution that minimizes liquid exposure and provides protective storage is ideal for consistent maintenance. Compare kits by the breadth of tools, material quality, and ease of use to fit your camera system and cleaning frequency.