Cabinet hardware accumulates fingerprints, dust, and grease over time, affecting both appearance and shine. A careful cleaning routine can restore luster and extend the life of knobs, pulls, hinges, and plates. This guide outlines practical, step-by-step methods suitable for common finishes found in American homes.
Quick Answer
For most finishes, wipe with a gentle cleaner tailored to the metal, then dry and buff with a soft cloth. Use dedicated kits for brass, brushed nickel, stainless steel, oil-rubbed bronze, or antique brass finishes to avoid dulling or tarnish. Avoid abrasive pads and harsh chemicals that can scratch or corrode hardware.
What You’ll Need
- Stainless steel cabinet hardware cleaner spray 12 oz
- Brass cabinet knob cleaning kit with polishing cloth
- Oil-rubbed bronze cabinet hardware restoration kit
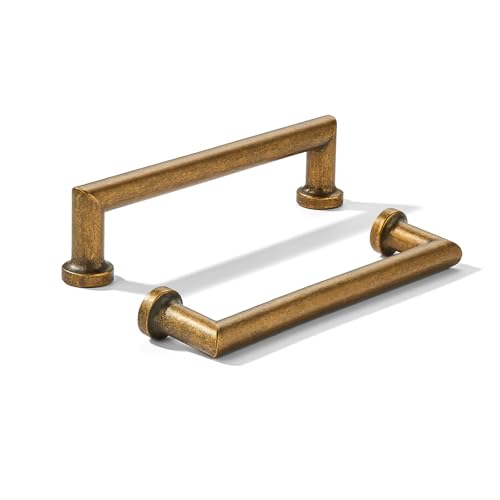
- Antique brass cabinet pull cleaning solution and polish
- Brushed nickel cabinet hardware polish microfiber cloth
- Soft microfiber cloths
- Non-abrasive sponge or washcloth
- Small bowl of warm water


Before You Start
Clear the area around the cabinets to prevent drips on countertops. Remove hardware if possible to ensure thorough cleaning on all surfaces. Test cleaners on a hidden area first to confirm compatibility with the finish. Work in a well-ventilated area and wear gloves if you have sensitive skin. Expect a cleaning session to take 20–40 minutes, depending on the number of pieces and finishes.
Step-By-Step: How To Clean Cabinet Hardware
- Remove all cabinet hardware from doors and drawers, labeling each piece if needed to reassemble correctly.
- Inspect finishes to choose the appropriate cleaning method: stainless steel, brass, antique brass, brushed nickel, or oil-rubbed bronze.
- Dust surfaces with a dry microfiber cloth to remove loose dirt and prevent scratching during cleaning.
- Apply the appropriate cleaner to a soft cloth or directly onto a small area of the hardware, following the product’s instructions.
- Gently wipe in the direction of the grain or along the contours to lift grime without scratching the surface.
- Rinse lightly with a damp cloth if the cleaner requires it, then dry immediately with a clean towel or microfiber cloth to prevent water spots.
- Buff stainless steel and brushed nickel pieces with a dry microfiber cloth to enhance shine.
- For brass and antique brass finishes, use the brass or antique brass kit as directed to restore polish and color balance, avoiding over-application.
- Reassemble hardware once all pieces are completely dry, ensuring screws are tightened to a secure but not over-tightened state.
Troubleshooting
| Symptom | Likely Cause | Fix | Prevention |
|---|---|---|---|
| Dull or cloudy finish after cleaning | Incompatible cleaner or over-wiping | Switch to a finish-specific cleaner; buff thoroughly with a soft cloth | Use products designed for the metal finish |
| Stubborn stains on brass | Oxidation or tarnish buildup | Apply brass restoration kit as directed; rinse and dry completely | Clean regularly to prevent heavy tarnish |
| Scratches on brushed nickel | Abrasive contact | Avoid rough pads; use a microfiber cloth and gentle cleaners | Handle hardware with care during cleaning |
| Finish fading after cleaning | Harsh chemicals | Discontinue use of harsh solvents; switch to manufacturer-recommended products | Do a small test patch first |
Common Mistakes
- Using abrasive pads or strong chemicals on delicate finishes
- Over-wetting hardware or leaving cleaners to sit too long
- Neglecting to dry hardware after cleaning, leading to water spots or corrosion
- Cleaning hardware while still attached to cabinets with moisture trapped behind doors
Tips For Best Results
- Clean regularly with a light wipe to prevent heavy buildup and simplify maintenance.
- Always dry hardware thoroughly to prevent water spots and corrosion.
- Keep a small kit on hand with the appropriate cleaners for common finishes in the home.
- Label and store hardware during cleaning to ensure proper reassembly and alignment.
Call A Professional
Consider professional help if hardware shows deep corrosion, significant tarnish that cannot be restored with standard kits, or if cleaning might affect applied finishes in ways that DIY methods cannot safely address. Seek a pro for extensive restoration, refinishing, or replacement decisions.
FAQ
Can I use the same cleaner on all finishes?
No. Use cleaners formulated for stainless steel, brass, antique brass, or brushed nickel to avoid damage.
Is it safe to remove all hardware for cleaning?
Yes, removing hardware allows more thorough cleaning and reduces the risk of missed spots or moisture damage behind doors.
How often should cabinet hardware be cleaned?
Light cleaning every 1–3 months helps maintain shine; deeper polishing can be done every 6–12 months depending on use.
What should I do if a finish starts peeling or chipping?
Stop using any cleaner on the area and consult a professional or consider replacement to prevent further damage.
Are finishes like oil-rubbed bronze compatible with standard cleaners?
Oil-rubbed bronze may require specialized products; follow the restoration kit directions to avoid finish loss.
Buying Guide
Choosing cabinet hardware cleaning products requires understanding finish compatibility, cleaning strength, and storage convenience. Key factors include size, finish type, and ease of use. For finishes such as stainless steel, brass, antique brass, brushed nickel, and oil-rubbed bronze, select cleaners and polishing cloths designed specifically for each finish to prevent dulling or damage. Consider a multi-finish cleaning kit if multiple finishes exist in the home. Noise and energy efficiency do not apply to cleaning products, but safety and non-toxicity are important for households with kids and pets. Evaluate how easy the products are to apply and whether they come with microfiber cloths or polishing pads. Finally, verify that the kit includes clear instructions and does not contain harsh solvents that could harm finishes over time.