Regular maintenance of a slicker brush helps extend its life and keeps grooming sessions comfortable for pets. This guide covers practical, step-by-step methods to clean a slicker brush using common tools and safe practices. By following these steps, pet owners can remove hair, dirt, and oils efficiently while preserving the brush’s performance.
Effective cleanup also reduces the spread of loose fur and can prevent matting during future grooming. The methods below are suitable for home use and aim to minimize stress for both the pet and the caregiver.
Quick Answer
Fast method: Remove loose hair with gloved fingers, use a brush cleaning tool to lift stubborn fibers, rinse with warm water, dry thoroughly, and replace worn pins if needed. For sticky residues, apply a light spray designed for slicker brushes and wipe clean.
What You’ll Need
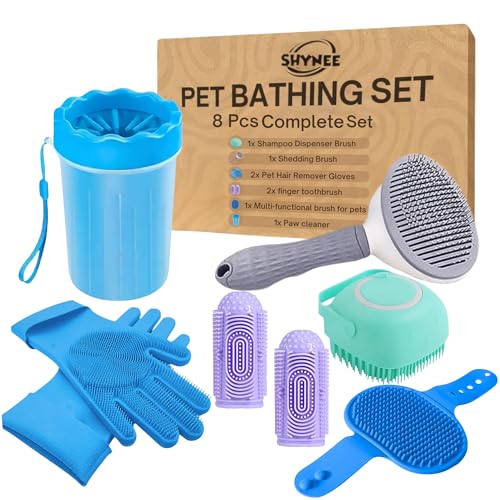
- Slicker brush cleaning tool for pets or a set of metal-tooth grooming picks
- Pet grooming brush cleaner kit including a small comb and bristle tool
- Brush cleaning mat for grooming tools to work on and lift hair effectively
- Replacement pins for slicker brush to refresh worn areas (optional)
- Slicker brush cleaner spray for spot cleaning and deodorizing


Before You Start
Prepare a clean work area and have a towel ready to dry the brush. Wear gloves to minimize contact with hair and oils. Check the brush for any broken or bent pins before cleaning; damaged pins can scratch the skin and should be replaced promptly. Time estimate: 10–15 minutes for a typical brush, longer for heavy shedding or very dirty brushes.
Step-By-Step: How To Clean A Slicker Brush For Pets
- Remove loose hair — Use gloved fingers or a comb to lift and pull out hair from between the pins. Do this over a trash can or paper towel to keep the area tidy.
- Loosen stubborn debris — Press the slicker brush cleaning tool for pets into the densely packed areas and drag outward to pull out embedded hair and oils. Repeat across the entire head of the brush.
- Clean between pins — If a brush cleaning mat for grooming tools is available, press the pins through the mat to extract filth and hair that cling to the base.
- Dislodge oils and residues — Lightly spray the brush with a slicker brush cleaner spray and work it into the base of the pins. Let it sit for a minute, then wipe with a microfiber cloth.
- Rinse (optional for non-water-sensitive brushes) — If the manufacturer allows water, rinse the brush under warm water, ensuring no water enters the handle. Pat dry with a towel.
- Dry completely — Place the brush pins-up on a dry towel in a well-ventilated area until fully dry. Avoid storing the brush while damp to prevent rust.
- Refresh pins (if needed) — If pins are bent or dull, replace them with replacement pins for slicker brush and reassemble according to the brand’s instructions.
- Sanitize and store — Wipe the exterior with a mild, pet-safe cleaner and return to its storage area once dry.
Troubleshooting
| Symptom | Likely Cause | Fix | Prevention |
|---|---|---|---|
| Hair remains stuck after cleaning | Oil buildup or fine debris | Apply a small amount of slicker brush cleaner spray and work with the cleaning tool again | Clean after each grooming session |
| Pins bent or rusted | Age and frequent exposure to moisture | Replace pins using replacement pins for slicker brush | Dry thoroughly; store in a dry place |
| Brush has a strong odor | Residual oils or dirt | Deep clean with cleaner spray and wipe dry | Regular maintenance after shedding season |
| Stiff brushing action after cleaning | Residual soap or dries clinging to pins | Rinse or wipe with a clean damp cloth and dry completely | Avoid leaving product on pins |
Common Mistakes
- Using harsh cleaners not intended for pet brushes
- Cleaning with the brush fully submerged in water if the handle isn’t water-safe
- Forgetting to dry pins completely, leading to rust
- Neglecting replacement of worn pins, which reduces grooming effectiveness
Common mistakes can reduce brush lifespan or irritate a pet’s skin. Following manufacturer guidance for cleaning products and drying times helps maintain performance and safety.
Tips For Best Results
- Clean the slicker brush after heavy shedding sessions to minimize matting during future grooming
- Use a dedicated cleaning mat for grooming tools to simplify hair removal
- Keep a spare set of replacement pins on hand for quick refreshes
- Label and store tools together to prevent loss of small parts
Call A Professional
Consider a professional groomer if the brush shows persistent rust, significant wear, or if pets react negatively to grooming tools. Seek help when a brush cannot be cleaned effectively or when replacement pins are damaged beyond simple replacement, which may indicate the entire tool needs upgrading.
FAQ
How often should I clean a slicker brush?
Clean it after each grooming session, or at least weekly during heavy shedding periods.
Can I use soap and water to clean the brush?
Only if the brush’s instructions allow water exposure to the handle; otherwise use a spray cleaner and wipe.
What if the pins are rusted?
Replace the pins with replacement pins for slicker brush; consider upgrading the brush if rust recurs.
Is it necessary to replace pins regularly?
Yes, worn pins reduce brushing effectiveness and can irritate the pet’s skin.
Buying Guide
When selecting a slicker brush and cleaning accessories for a pet, consider size, coat type, and comfort for both the pet and user. Key buying factors include:
- <bBrush size and pin density: Larger brushes suit long-haired dogs; denser pins help detangle but require gentler use on sensitive skin.
- <bEase of cleaning: Look for a brush cleaning tool for pets and a brush cleaning mat for grooming tools to streamline maintenance.
- <bReplacement pins availability: Ensure replacement pins for slicker brush are easy to find and compatible with your model.
- <bCleaning spray compatibility: Choose a pet-safe slicker brush cleaner spray to maintain hygiene without harsh chemicals.
- <bDurability and grip: Non-slip handles reduce hand fatigue, especially during extended grooming sessions.
- <bValue vs. accessories: A kit with multiple cleaning tools can save time, but verify that items match your brush model.
Consider how often you groom, your pet’s coat type, and whether you prefer a spray-based or water-based cleaning routine. A well-chosen setup minimizes maintenance time and maximizes brush performance.