Cleaning a range helps maintain cooking performance and extend appliance life. A systematic approach, using the right tools, makes the task faster and easier for American households.
Whether the range is gas or electric, a thorough clean includes the surface, burners, oven interior, racks, and surrounding vent area. This guide uses common kitchen cleaning tools and practical steps to restore shine and prevent buildup.
Quick Answer
Fast method: Remove loose debris, spray a degreaser on the surface, scrub with non-scratch pads, clean racks with an oven rack brush, wipe a crevice brush across seams, and rinse. Finish with a wipe-down and dry to prevent streaks.
A Quick Look At What You’ll Need
The following tools and supplies cover typical range cleaning tasks. Use as many as needed to match your range type and level of grime.
- oven cleaning brush with scraper
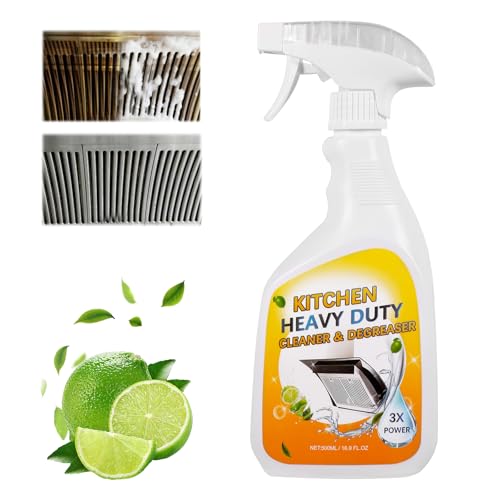
- stainless steel range hood degreaser spray
- oven rack cleaning brush
- non-scratch scrubbing pads for oven racks
- crevice brush for oven interior cleaning


Before You Start
Prepare the area by removing burners, racks, and heat shields as applicable. Lay down a protective mat and ensure good ventilation. Put on gloves and eye protection if using chemical degreasers. Time estimate: 20–60 minutes depending on the grime level. Avoid mixing cleaners and never spray cleaners directly onto electrical controls. If you have a self-cleaning oven, follow the manufacturer’s safety steps before manual cleaning.
Step-By-Step: How To Clean A Range Inside And Out
- Remove loose debris from the cooktop surface and oven interior using a dry cloth or soft brush to prevent scratching.
- Apply degreaser to the cooktop and to the exterior hood area. Allow the product to sit for a few minutes to loosen grease, then wipe with a microfiber cloth.
- Use the crevice brush for tight areas along seams, burners, and grates to dislodge stuck-on grime. Wipe away debris after brushing.
- Clean oven racks by removing them and scrubbing with the oven rack cleaning brush or non-scratch scrubbing pads. Rinse and let dry before reinstalling.
- Scrub the oven interior with the crevice brush or non-scratch pad, paying attention to corners and rails. For stubborn spots, reapply a degreaser and repeat.
- Wipe surfaces and controls with a damp cloth, then dry to reduce streaks. If needed, wipe the vent hood and splashback area to remove residue.
- Rinse and inspect the entire area for missed spots. Repeat steps where necessary to achieve an even finish.
- Reassemble the racks and any removable parts, ensuring all pieces are dry before use.
- Final wipe-down with a clean, dry microfiber cloth to remove any remaining cleaner and to brighten metal surfaces.
- Test caution with a low-heat burn-off if recommended by the manufacturer, to eliminate residual cleaner odors.
- Maintenance schedule plan regular cleanings after heavy cooking and monthly light wipes to prevent buildup.
Troubleshooting
| Symptom | Likely Cause | Fix | Prevention |
|---|---|---|---|
| Streaks on stainless steel | Residue left from cleaner or water | Wipe with a clean microfiber and a little water, then dry | Use small amounts of cleaner; wipe in the direction of the grain |
| Grease buildup on oven racks | Oil residue from cooking | Soak racks in warm soapy water or use oven rack brush | Wipe racks after use to prevent hardening |
| Foul odor after cleaning | Cleaner residue or trapped grease | Rinse thoroughly and run a short empty cycle if allowed by manufacturer | Ventilate during cleaning; use low-residue products |
| Scratches on enamel | Harsh scrubbing pads or metal tools | Switch to non-scratch pads; avoid metal tools on enamel | Use proper tools and gentle pressure |
Common Mistakes To Avoid
- Using abrasive scrubbers on enamel or glass stovetops
- Spraying cleaner directly on knobs or electronics
- Rushing the degreaser dwell time without sufficient contact
- Not drying surfaces after cleaning, leading to mineral streaks
Tips For Best Results
- Choose a degreaser spray formulated for kitchen hoods to break down heavy grease efficiently.
- Keep a dedicated set of non-scratch pads for racks to avoid metal transferring to coating surfaces.
- Warm water and a mild soap solution can be effective for routine maintenance between deeper cleanings.
- Delegate the racks and interior parts cleaning to a separate step to manage time and effort.
- Always follow the manufacturer’s cleaning guidelines for your specific range model.
Call A Professional
Stop and call a professional if there is gas line damage, persistent odor of gas after cleaning, broken knobs or gas burners, or if the oven fails to ignite safely. Do not attempt complex disassembly or repairs beyond basic cleaning beyond your comfort level.
FAQ
Can I use bleach or ammonia on a range?
Bleach or ammonia can be harsh and may damage surfaces or vent components; use manufacturer-approved degreasers instead.
Is it okay to leave the oven racks out overnight?
Yes, but ensure racks are dry to prevent rust and ensure safe reinstallation.
How often should I deep clean the range?
Deep clean every few months, or as needed based on cooking frequency and grease buildup.
Will self-cleaning cycles replace manual cleaning?
Self-cleaning cycles reduce some mess, but manual cleaning is still needed for stubborn grime and to maintain door seals and racks.
Buying Guide
When selecting range-cleaning tools and products, consider size and fit for your range, noise level of spray nozzles or brushes, energy and chemical efficiency of degreasers, control placement for safe handling, and where you store supplies. Compare products by how well they tackle baked-on grease, ease of use, and compatibility with enamel, stainless steel, and glass surfaces. Look for kid- and pet-safe cleaners, minimal odor, and clear instructions. If cleaning stubborn residues is a frequent task, a combination kit that includes an oven cleaning brush with scraper, a dedicated crevice brush, and rack cleaning tools can streamline workflows. Always test cleaners on an inconspicuous area first to prevent damage. Consider whether you prefer spray degreasers for quick jobs or concentrated cleaners for tougher grime, and ensure you have adequate ventilation during use.