The P-trap is a small U-shaped pipe under sinks and some plumbing fixtures that prevents sewer gases from entering living spaces. Over time, it can accumulate hair, grease, soap scum, and mineral deposits, leading to odors or slow drainage. This practical guide explains how to safely and effectively clean a P-trap using common tools and targeted cleaners.
Whether you are facing a sluggish sink or a visible buildup, following a structured approach helps maintain your home’s plumbing and avoid costly calls. The steps below are suitable for typical household bathrooms and kitchens with standard P-trap configurations.
Quick Answer
Disassemble the P-trap, remove blockages, rinse with hot water, and reassemble. Use a brush for stubborn deposits and a enzyme-based cleaner for ongoing upkeep. This approach minimizes odors and restores steady drainage without harsh chemical exposure.
What You’ll Need
- P-trap cleaning tool kit for sinks
- Handheld drain snake auger 3/8 inch
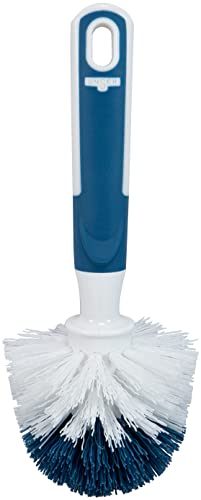
- Drain cleaning brush with stiff bristles
- Toilet bowl auger plunger combo kit
- Enzyme drain cleaner for P-trap and pipes


Before You Start
Prepare the area by placing a bucket under the trap to catch water and debris. Have towels or rags ready for spills. Turn off the water supply to the sink if needed and ensure you have gloves for hygiene. If the P-trap is stuck or damaged, avoid forcing it apart and consider professional help.
Safety note: P-traps can contain wastewater and sharp edges on the fittings. Do not use excessive force to avoid cracking pipes. If you notice persistent leaks after reassembly, stop and reassess. The following steps are designed for standard metal or PVC traps commonly found in U.S. homes.
Step-By-Step: How To Clean A P-Trap
- Place a bucket underneath and place towels to catch spills. Loosen the slip nuts with a wrench or adjustable pliers and carefully detach the P-trap from the drain assembly.
- Inspect the trap for visible blockages. Remove any hair, soap scum, or mineral deposits by hand or with a stiff-bristle brush. Set aside resistant debris for disposal.
- Use a handheld drain snake auger 3/8 inch to break up stubborn clogs inside the trap and the short tailpiece. Extend into the pipe, rotate, and gently push until resistance lessens.
- Rinse the trap and fittings with warm water. Use the drain cleaning brush with stiff bristles to scrub the interior surfaces thoroughly, paying attention to the bends where buildup collects.
- Reassemble the P-trap, ensuring the seals on the slip nuts are intact. Hand-tighten, then snug with a wrench—avoid overtightening to prevent leaks.
- Run warm water through the sink to flush the system. If the water drains slowly, repeat the cleaning steps or try an enzyme drain cleaner for ongoing maintenance.
- Apply enzyme drain cleaner per label directions to help break down organic material in pipes beyond the trap. This supports long-term cleanliness without harsh chemicals.
- Check for leaks at all joints and tighten gradually if needed. Wipe the exterior and ensure the area around the trap remains dry after testing.
Troubleshooting
| Symptom | Likely Cause | Fix | Prevention |
|---|---|---|---|
| Slow drainage returns after reassembly | Residual blockage | Reopen joints, clean, and reassemble; consider a deeper rod | Regular maintenance with enzyme cleaner |
| Water leaks at slip nuts | Improper seal or overtightening | Disassemble, inspect gaskets, reseal, finger-tighten, then snug | Replace worn washers periodically |
| Odor persists | Organic buildup in trap or pipes | Thorough cleaning and enzyme treatment | Routine cleaning schedule |
| Trap is cracked or corroded | Age or damage | Replace trap assembly | Inspect during each major drain service |
Common Mistakes
- Underestimating the trap’s compact space leading to incomplete cleaning
- Using overly aggressive plunging or forcing pipes apart
- Forgetting to re-seat slip nuts and washers correctly
- Relying solely on chemical cleaners without mechanical removal for clogs
Tips For Best Results
- Work with gravity in mind: keep the bucket positioned to catch spills as you detach fittings
- Choose an enzyme-based cleaner for routine maintenance to minimize harsh chemical exposure
- Combine mechanical removal with chemical pretreatment for stubborn clogs
- Record the date of maintenance to establish a preventive cleaning cadence
Call A Professional
Seek professional help if you encounter persistent leaks after reassembly, visible cracks in the pipe, or repeated clogs that return within a short timeframe. Do not attempt to repair severely damaged fittings yourself, as improper fixes can cause further damage or health hazards.
FAQ
What is a P-trap and why is it important?
The P-trap is a curved pipe that prevents sewer gases from entering living spaces while allowing drainage.
Can I use chemical drain cleaners to clean a P-trap?
Chemical cleaners can help, but they may damage certain materials and fail to address blockages effectively. Mechanical cleaning combined with enzyme cleaners is often safer and more effective.
How often should I clean my P-trap?
Inspect and clean during routine maintenance or when you notice slow drainage or odors.
What tools are essential for P-trap maintenance?
A P-trap cleaning tool kit, a handheld drain snake, a stiff-bristle brush, and an enzyme cleaner are highly advisable.
Is it normal to have some water spills during cleaning?
Yes, expect some spills when disconnecting fittings; use a bucket and towels to manage residual water.
Buying Guide
Choosing the right tools and approach for P-trap maintenance depends on several factors. Size matters: ensure the drain snake auger is compatible with typical 3/8 inch fibers and trap depths. Noise level is a consideration for living spaces; manual tools are quieter than power devices. Energy efficiency isn’t a primary concern for such tasks, but select simple, reusable tools to minimize waste. Look for user-friendly controls and durable construction that resists corrosion. Placement considerations include accessibility under sinks in kitchens or bathrooms, and whether the trap is easily removable. When evaluating products, compare:
- Tool compatibility with your drain size and trap design
- Build quality and materials (stainless steel parts, rust resistance)
- Inclusion of multiple cleaning accessories
- Effectiveness of enzyme cleaners for ongoing maintenance
- Warranty and customer support options
For many homeowners, a combined kit that includes a P-trap cleaning tool, a handheld auger, a stiff-bristle brush, and an enzyme cleaner offers a practical, one-stop solution. Consider your typical drainage scenarios (kitchen vs bathroom) and choose a kit that covers both routine maintenance and occasional heavy cleaning. Would you prefer a compact set for tight spaces or a more robust toolkit for frequent DIY plumbing tasks? A thoughtful choice will simplify future upkeep and help maintain clear, odor-free drains.