Maintaining a compact Keurig K‑Mini ensures your brews stay fresh and flavorful. Regular cleaning helps prevent mineral buildup, stale flavors, and occasional malfunction. This guide provides practical steps and safe practices to restore peak performance without disassembly.
The following instructions focus on the Keurig Mini line and compatible cleaning products designed to remove residue, coffee oils, and scale from internal components and the water reservoir. Readers will find a clear, step-by-step process, troubleshooting tips, and a concise buying guide for cleaning supplies.
Quick Answer
Run a descaling cycle with a Keurig descaler product, rinse the reservoir and internal components, and wipe the exterior. Use cleaning tablets or powder specifically formulated for Keurig machines, followed by a water-only brew to flush residues. Regular maintenance every 1–3 months, depending on usage, keeps the machine in top condition.
What You’ll Need
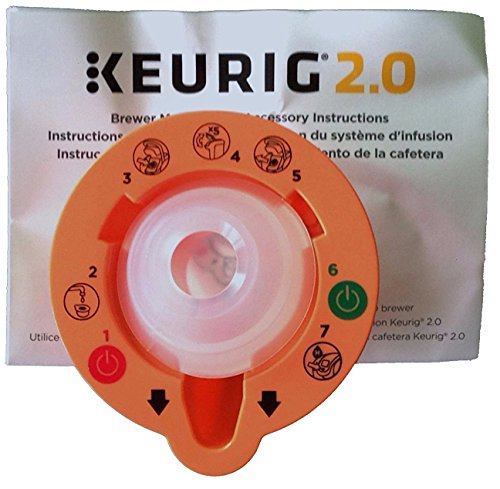
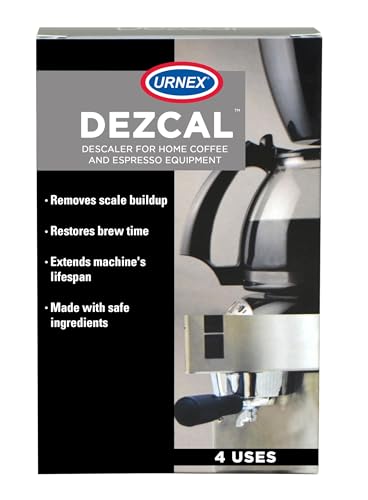
- Keurig Mini descaling solution kit
- Keurig K-Mini cleaning tablets
- Keurig mini coffee maker descaler powder
- Keurig mini water reservoir cleaning brush
- Keurig K-Mini cleaning needle and brush kit

Before You Start
Unplug the machine before any disassembly or cleaning. Empty the water reservoir and discard any remaining coffee in the pod holder. Use warm water and mild dish soap for exterior cleaning only. Do not use abrasive pads or harsh chemicals on the exterior, and avoid soaking electrical components. Time estimate for a full cleaning cycle is typically 30–45 minutes, including drying time.
Important cautions: Descaling solutions may be caustic if ingested; keep away from children. If the machine shows signs of electrical issues, leaks, or unusual noises, stop the cleaning and seek professional help.
Step-By-Step: How To Clean The Keurig Mini
- Fill the water reservoir with fresh water and add the recommended amount of descaler powder or follow the descaler kit directions. Avoid using plain hot water at this stage, as it may not dissolve residues effectively.
- Place a mug on the drip tray and run a descaling cycle, selecting the largest cup size. Let the machine complete the cycle, then repeat with the same setup using only fresh water to rinse.
- Remove the water reservoir, rinse it thoroughly with warm water and mild soap, then dry it completely before reattaching.
- Use the Keurig mini cleaning brush to scrub the interior of the reservoir housing and any accessible crevices. Rinse again after brushing.
- For the needle and spray mechanism, insert the cleaning needle and brush kit according to the manufacturer’s instructions. Gently clear any coffee grounds from the needle’s puncture point.
- Run several cycles with only clean water to purge any remaining cleaner or descaler residue from the system. The goal is a neutral-tasting brew after final rinses.
- Wipe the exterior with a damp cloth. Dry the housing and ensure no water remains around control buttons or vents.
- Reassemble everything and perform a final test brew with a cup to confirm the flavor is clean and free of cleaners’ aftertaste.
Troubleshooting
| Symptom | Likely Cause | Fix | Prevention |
|---|---|---|---|
| Weak or no brew | Blockage in needle or descaling residue | Clean the needle with the brush kit; descale again if needed | Regular cleaning schedule; use purified water |
| Off-flavor coffee | Old coffee oils or mineral buildup | Descale with recommended kit; run multiple clean water cycles | Clean reservoir and cradle monthly |
| Dripping or leaks | Seal around reservoir loose or worn | Re-seat reservoir; check for cracks | Inspect parts during cleaning to detect wear |
| Door not closing properly | Residue on the pod holder or housing | Clean the pod area; wipe hinges and seals | Clean after each few uses |
Common Mistakes
- Using dishwasher to clean components not rated for immersion
- Skipping the rinse cycles after descaling
- Neglecting to clean the water reservoir and lid
- Overlooking the needle area during maintenance
Tips For Best Results
- Schedule descaling every 1–3 months based on water hardness and brewing frequency.
- Use filtered or bottled water if your tap water is very mineral-rich to reduce buildup.
- Mark cleaning dates on a calendar to stay consistent with maintenance.
- Store cleaning tablets in a cool, dry place to preserve potency.
Call A Professional
Contact a professional if the machine repeatedly malfunctions after cleaning, if there are visible leaks from the base or electrical cord, or if the unit fails to power on after following maintenance steps. Do not attempt internal repairs beyond the manufacturer’s recommended cleaning routines.
FAQ
Can I use regular vinegar to descale a Keurig Mini?
Vinegar is not recommended for Keurig machines, as it can degrade internal components over time and void the warranty. Use the manufacturer-recommended descaler products instead.
How often should I clean the reservoir?
Clean the reservoir and lid weekly if the machine is used daily; otherwise, perform a thorough cleaning at least monthly.
Is it safe to use the cleaning needle regularly?
Yes, using the cleaning needle as part of routine maintenance helps prevent clogs. Follow the kit instructions for safe insertion and removal.
What indicates that descaling is needed?
Persistent weak brews, off-taste, or a visible mineral film around the reservoir suggests descaling is due.
Will cleaning kits damage the Keurig Mini?
When used as directed, cleaning kits are safe for Keurig Mini models and help maintain performance and flavor.
Buying Guide
Choosing compatible cleaning products for a Keurig Mini requires considering size, contents, and compatibility with the device. Look for certified descalers and cleaning aids designed for Keurig K‑Mini models to ensure safe use and effective cleaning. Buyers should compare descaler powders versus tablet formats, as both methods work well but offer different convenience levels. Consider a kit that includes a reservoir brush and a cleaning needle set for comprehensive maintenance. Check for packaging that clearly lists compatibility with K‑Mini machines and includes clear usage instructions. Availability of quick-replace parts and replacement brushes is a plus for long-term upkeep.
Key buying factors include size and frequency of use, noise level during operation (not typically a major concern for cleaning), energy efficiency (not affected by cleaning but relevant for overall use), and placement in the kitchen. A compact descaler kit is ideal for limited counter space, while a larger kit with multiple tools can be cost-effective for households with frequent cleaning cycles. If the water in the home is hard, investing in a robust descaling kit may extend the life of the brewer and maintain flavor quality. Always store cleaning products in a cool, dry place away from children and pets.