Silver cups add a touch of elegance to any table, but tarnish can dull their shine. This guide provides practical, step-by-step methods to restore luster using common silver care products. The goal is a safe, streak-free finish that preserves the cups’ delicate detailing.
American households often rotate between home remedies and commercial cleaners. By following these steps, you can choose the approach that best fits your supplies and the cup’s finish, whether you’re dealing with everyday use or heirloom pieces.
Quick Answer
For quick results, start with a dedicated silver cleaner and a soft polishing cloth. For stubborn tarnish, apply a silver tarnish remover cream, rinse well, and buff with the polishing cloth. Always test a small, inconspicuous area first and dry thoroughly to prevent water spots.
What You’ll Need
- Silver tarnish remover cream for cups 4oz
- Silver polishing cloth for cups and goblets
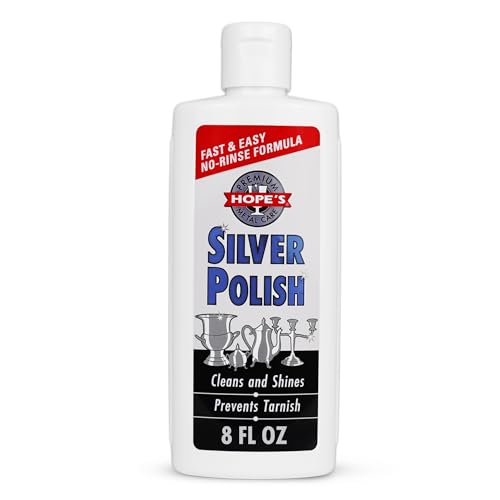
- Silver cleaner with included polish for cups
- Liquid silver cleaner for cups and goblets
- Silver cup cleaning kit tarnish remover


Before You Start
Inspect each cup for weak spots, cracks, or worn plating. Use a soft, lint-free cloth to remove dust before cleaning. Work in a well-ventilated area and wear gloves if you have sensitive skin. For antiques or silver-plated items, avoid abrasive pads that can scratch the surface. Time estimate: 15–45 minutes per piece, depending on tarnish severity.
Critical cautions: do not soak silver cups with glued handles or delicate engravings for extended periods; excessive moisture can loosen joints. Always dry immediately after cleaning to prevent water spots and corrosion.
Step-By-Step: How To Clean Silver Cups
- Lay a soft towel on your work surface and gather all tools and cleaners.
- Dust the cup with a dry, soft cloth to remove surface debris.
- Apply a small amount of silver cleaner with included polish to a clean, soft cloth and rub gently in circular motions.
- For tougher tarnish, use silver tarnish remover cream for cups 4oz on a fresh cloth, following the product instructions.
- Rinse the cup under lukewarm running water or wipe with a damp cloth to remove cleaner residue.
- Dry the cup completely with a clean cloth, then buff with the silver polishing cloth for a high-luster finish.
- Inspect for remaining spots; repeat as needed, using minimal cleaner to avoid over-processing.
- Polish edges and engravings last to minimize smudges and ensure uniform shine.
Troubleshooting
| Symptom | Likely Cause | Fix | Prevention |
|---|---|---|---|
| Dull or speckled finish after cleaning | Improper rinsing or abrasive cloth use | Rinse thoroughly and switch to a soft cloth | Rinse promptly after cleaning; avoid abrasive pads |
| Streaks or water spots | Water mineral deposits or drying too quickly | Dry with a lint-free cloth and buff gently | Dry completely; consider a final wipe with a microfiber cloth |
| Finish wearing off or thinning plating | Over-cleaning or harsh cleaners | Stop using abrasive products; switch to mild cleaner | Use the lightest effective cleaner; follow product directions |
| Engravings dulled after cleaning | Over-polishing | Polish surrounding areas only, avoid direct rubbing over engravings | Be gentle around details |
Common Mistakes
- Using abrasive pads or scrub brushes on delicate silver
- Over-soaking items or leaving cleaner on too long
- Neglecting to rinse and dry promptly, causing spots or corrosion
- Ignoring manufacturer recommendations for plated versus solid silver
Tips For Best Results
- Test cleaners on a small area before full use, especially on antique cups.
- Use warm, not hot, water to prevent thermal shock to metal joins.
- Handle with clean gloves to avoid transferring oils from skin.
- Store cleaned cups in a dry, breathable space to prevent rapid tarnish return.
- For regularly used cups, establish a simple routine: dust, light cleaner, and buff weekly.
Call A Professional
Call a professional if a cup has severe tarnish that won’t respond to standard cleaners, visible cracks, loose handles, or if the cup is an heirloom with sentimental value. Seek expert advice for antique pieces or uniquely plated items to avoid irreversible damage.
FAQ
Can I use regular household cleaners on silver cups?
Avoid common household cleaners that contain ammonia or bleach; they can damage silver plating and cause tarnish to accelerate.
Is it safe to soak silver cups during cleaning?
Soaking is sometimes okay for solid silver, but plated pieces or antiques may be damaged; always follow product instructions and test first.
How often should I clean silver cups?
Frequency depends on usage and storage; light cleaning weekly and deeper polish as tarnish appears helps maintain shine.
What if my cup has intricate engravings?
Use a soft brush or cloth to gently reach intricate areas, avoiding aggressive rubbing that can wear details.
Can I mix cleaners for faster results?
Mixing cleaners is not recommended; use one product at a time per instructions to prevent chemical reactions.
What is the best way to store silver cups after cleaning?
Store in a low-humidity area, away from direct sunlight, ideally wrapped in a soft cloth or placed in a breathable container.
Are silver cleaners safe for food-contact surfaces?
Choose cleaners labeled safe for food-contact if cups are used for drinking; rinse thoroughly after cleaning.
Buying Guide
When selecting silver care products, consider these factors to ensure effective cleaning and protection:
- Size and coverage: Choose tarnish remover creams or cleaners based on how many cups you plan to treat. Smaller kits may suffice for a few cups, while larger sets cover frequent use.
- Noise level: Cleaning products themselves are silent, but consider the friction from polishing cloths; soft cloths minimize noise and prevent scratches.
- Energy efficiency: Not a major factor for manual cleaning, but if you use electric polishers, select low-energy options and use them sparingly on delicate pieces.
- Controls and instructions: Look for products with clear usage steps, safety warnings, and wipe-off guidance to avoid over-cleaning.
- Placement and storage: Keep cleaners in a cool, dry cabinet away from sunlight; store polish cloths separately to preserve their texture.
- Material compatibility: Distinguish between solid silver and silver-plated items; use gentler formulations for plated pieces to prevent wear.
- Brand and reputation: Prefer products with explicit test results, safe for cups and goblets, and user reviews that reflect real-world results.
- Safety features: Choose products with clear safety instructions and child-resistant packaging where appropriate.
By comparing these factors, you can assemble a reliable silver-care routine that keeps cups looking bright and ready for gatherings.