Plastic shower walls, including acrylic and PVC panels, can look bright and fresh with regular cleaning. This guide covers practical methods, tool choices, and safety notes to remove soap scum, mildew, and grime without damaging the surface. Readers will find a step-by-step process, troubleshooting tips, and a shopper’s guide for choosing reliable products for ongoing maintenance.
Quick Answer
Use a non-abrasive cleaner spray designed for acrylic or plastic surfaces, apply with a microfiber cloth, and use a non-scratch nylon brush for any stubborn spots. Rinse thoroughly and dry with a microfiber cloth to prevent water spots and mildew buildup.
What You’ll Need
- acrylic shower wall cleaner spray non-abrasive
- plastic shower wall mildew remover spray
- non-scratch nylon scrub brush for acrylic shower walls
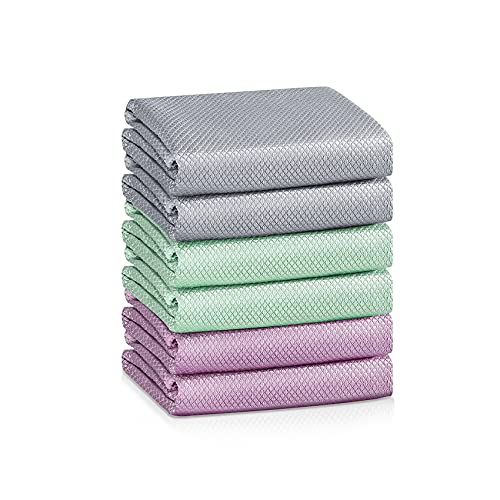
- microfiber cloth for cleaning acrylic shower walls
- PVC shower panel cleaning kit


Before You Start
Prepare a clean, ventilated workspace. Protect surrounding surfaces with a towel or plastic sheet if needed. For safety, wear gloves and avoid mixing chemical cleaners, especially ammonia-based products with bleach. Time estimate: 20–40 minutes for a standard shower; longer for heavy mildew buildup. Critical cautions: never use abrasive pads on plastic surfaces, and avoid strong solvents that can dull or scratch PVC or acrylic finishes.
Step-By-Step: How To Clean Plastic Shower Walls
- Clear the shower area and remove personal items. Rinse the walls with warm water to loosen loose soap scum.
- Spray an even layer of acrylic shower wall cleaner spray non-abrasive on the walls, focusing on corners and grout lines if present.
- Let the cleaner sit for 3–5 minutes to break down residues, then re-spray any heavily soiled areas.
- Using a non-scratch nylon scrub brush for acrylic shower walls, gently scrub in a circular motion to lift grime without scratching the surface.
- For mildew or persistent stains, apply a plastic shower wall mildew remover spray and allow it to dwell as directed on the bottle before scrubbing again.
- Rinse thoroughly with warm water, ensuring all cleaner residues are removed from seams and corners.
- Dry the walls completely with a microfiber cloth for a streak-free finish and to reduce mold growth.
- Inspect the walls for any remaining spots. Repeat targeted cleaning on stubborn areas, then rinse and dry again.
- Optional maintenance: spray a light protective coat of cleaner on the walls once a week to prevent buildup.
- Store tools and cleaners in a dry area away from direct sunlight to preserve effectiveness and avoid plastic degradation.
- Document a regular cleaning schedule, especially in high-humidity bathrooms, to maintain shine and hygiene.
Troubleshooting
| Symptom | Likely Cause | Fix | Prevention |
|---|---|---|---|
| Streaks after cleaning | Water spots or residue | Dry thoroughly with microfiber cloth; use distilled water for final rinse | Wipe down after every use; keep a microfiber cloth handy |
| Stubborn soap scum near seams | Soap residue in crevices | Apply cleaner, dwell longer, use nylon brush gently along seams | Regular quick clean to prevent buildup |
| Mildew reappears quickly | Humidity and poor ventilation | Increase ventilation; consider a mildew-specific spray; ensure complete dryness | Use a dry towel after showers; run exhaust fan |
| Scratches after cleaning | abrasive pads or overly aggressive scrubbing | Switch to non-scratch nylon brush; avoid steel wool | Follow manufacturer guidance; test on inconspicuous area first |
Common Mistakes
- Using abrasive pads or highly acidic/solvent cleaners on PVC or acrylic surfaces
- Skipping drying, which encourages mildew growth
- Letting cleaners sit too long or not rinsing thoroughly, leaving residue
- Overloading with cleaner on textured panels, causing buildup in seams
Tips For Best Results
- Perform a weekly quick wipe with a mild cleaner and microfiber cloth to prevent heavy buildup.
- Rinse and dry after every shower, especially in humid bathrooms.
- Keep a dedicated microfibre cloth in the bathroom for immediate wipe-downs.
- Choose a spray cleaner labeled safe for acrylic and PVC surfaces to minimize risk.
- Avoid chlorine bleach on colored plastics as it can cause discoloration with repeated use.
Call A Professional
Consider a pro if:
- There is extensive mold growth behind panels or stubborn mildew that recurs after cleaning
- Panels show warping, cracking, or discoloration that cleaning cannot address
- You are unsure about panel type (acrylic vs. PVC) and cleaning compatibility
FAQ
Can I use household bleach on plastic shower walls?
Bleach can harm certain plastics and cause discoloration; use milder mildew-removing sprays designed for acrylic or PVC surfaces.
How often should I clean plastic shower walls?
Weekly quick clean plus a deeper clean every 1–2 weeks helps prevent buildup and mildew.
What’s the best tool for cleaning without scratching?
A non-scratch nylon scrub brush paired with a microfiber cloth protects the surface while removing grime.
Are PVC shower panels easy to maintain?
Yes, PVC panels respond well to mild cleaners and soft brushes, with regular drying to prevent mold.
Can I use a steam cleaner on plastic shower walls?
Steam can be effective but may cause warping over time; follow manufacturer recommendations if you choose steam cleaning.
Buying Guide
When selecting cleaning products for plastic shower walls, consider the following factors to ensure safe and effective maintenance.
- Size and coverage: Choose spray cleaners or wipes that cover a typical shower efficiently; larger bottles reduce frequent purchases.
- Noise level: Cleaning tools like electric scrub brushes can be helpful; prefer models with adjustable speed to minimize noise.
- Energy efficiency: If using electric cleaning tools, select efficient, battery-powered models with long-lasting power.
- Controls: Simple spray triggers or twist-and-lock caps reduce complexity during quick cleans.
- Placement and storage: Keep cleaners within reach near the bathroom but away from moisture sources to extend shelf life.
From an efficiency and safety perspective, a good approach combines a non-abrasive acrylic cleaner spray, a mildew-targeted spray, a non-scratch nylon brush, and a microfiber cloth. For homeowners with PVC panels, a dedicated cleaning kit can streamline maintenance and help ensure compatibility across surfaces.