Bath toys add fun to bath time, but toys with holes can trap water, creating a perfect environment for mold, mildew, and unpleasant odors. Proper cleaning prevents residue buildup and extends the life of the toys. This guide outlines practical methods using common tools and kid-safe products to keep bath toys clean and sanitary.
Readers will find a step-by-step approach, safety notes, troubleshooting, and a buying guide to help choose reliable cleaning tools. The focus stays on non-toxic methods and products suitable for households across the United States.
Quick Answer
Attach a bath toy cleaning brush for small holes to scrub crevices, then use a mold and mildew removing spray for bath toys. For a stronger clean, consider a bleach-safe bath toy cleaner spray or a UV sterilizer for bath toys for periodic sanitation. A silicone drain brush for bath toy holes can reach the narrow openings, and a quick soak with a safe cleaner often resolves most odors.
What You’ll Need
- Bath toy cleaning brush for small holes
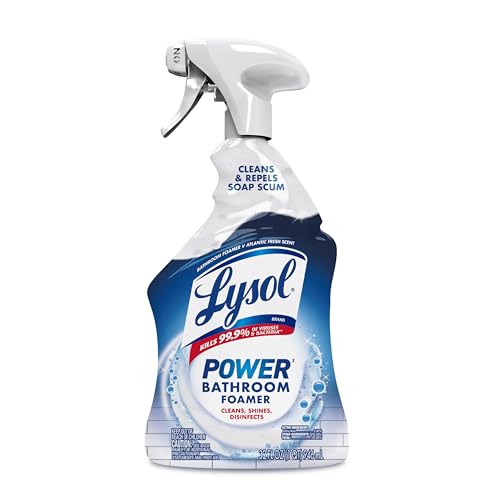
- Mold and mildew removing spray for bath toys
- Bleach-safe bath toy cleaner spray
- Silicone drain brush for bath toy holes
- UV sterilizer for bath toys


Before You Start
Prepare a dedicated cleaning area near the sink or tub. Gather all toys, remove battery-operated parts if applicable, and rinse toys with warm water before applying products. Allow for adequate ventilation when using sprays. Never mix cleaners or use harsh chemicals on toys intended for young children. Time estimates vary: a quick rinse and scrub can take 5–10 minutes; a thorough overnight soak may take several hours for deep cleaning.
Step-By-Step: How To Clean Bath Toys With Holes
- Rinse all toys with warm water to remove loose soap scum and debris.
- Use the bath toy cleaning brush for small holes to scrub interior seams and hole openings, paying attention to valve-less or valve-like structures.
- Prepare a cleaning solution: a mold and mildew removing spray for bath toys or a bleach-safe bath toy cleaner spray diluted according to label instructions.
- Submerge or soak toys with holes in the solution for the recommended contact time, ensuring all surfaces are submerged if possible.
- Gently scrub again with the brush, especially where water tends to pool, then rinse thoroughly with clean water.
- If odors persist, use a UV sterilizer for bath toys as directed, typically after drying to ensure effectiveness.
- Use a silicone drain brush for bath toy holes to reach tight openings and flush out any remaining debris.
- Dry toys completely, ideally in a ventilated area or under a fan. Store them in a dry, open container to prevent moisture buildup.
- Periodically, repeat the process with stronger cleaning agents or swap to alternate methods to maintain hygiene.
- Inspect toys regularly; discard any that show cracking, warping, or mold that resists cleaning.
- For color-fast materials, test a small area with the cleaner first to ensure no damage occurs.
- Document a regular cleaning schedule—monthly for busy households, or weekly for shared bath toys in households with young children.
Troubleshooting
| Symptom | Likely Cause | Fix | Prevention |
|---|---|---|---|
| Persistent odor after cleaning | Residual moisture in tiny crevices | Repeat cleaning and increase drying time | Air-dry fully; store in a dry place |
| Mold returns quickly | Poor drying routine; porous materials | Use faster-drying materials or add UV sterilization | Rinse after each use; daily air-dry |
| Bleach smell lingers | Insufficient rinsing; overuse | Rinse thoroughly; dilute solution per label | Alternate cleaners to minimize residue |
| Scratches or color fading | Harsh cleaners on sensitive plastics | Switch to milder options or test first | Use gentler products on colored toys |
| Water trapped in holes remains after cleaning | Complex hole geometry | Use silicone drain brush to flush gaps | Choose toys with easy-to-clean designs |
Common Mistakes
- Not drying toys completely after cleaning
- Using strong cleaners on soft or brittle plastics
- Neglecting hidden holes and seams during scrubbing
- Reusing dirty water for multiple toys
- Relying on a single cleaning method without rotation
Addressing these mistakes promptly can prevent recurring mold and odors and extend toy life.
Tips For Best Results
- Rotate cleaning methods: sanitize with spray, scrub with brush, then use a UV sterilizer for an extra layer of safety.
- Keep a dedicated cleaning kit near the bath to simplify routine maintenance.
- Label toys that require different cleaning approaches to avoid cross-contamination.
- Test cleaners on a small area to prevent material damage, especially on colored or soft plastics.
- When in doubt about a toy’s material, contact the manufacturer for cleaning recommendations.
Call A Professional
If mold returns despite repeated cleaning, if toys are cracked or warped, or if a child develops skin sensitivities or rashes after bath time, consult a pediatrician and consider replacing the affected toys. A professional cleaning consultant can advise on safe alternatives and proper storage practices.
FAQ
How often should bath toys with holes be cleaned?
Clean them at least once a week, with deeper cleanings monthly for households with heavy usage or visible mold.
Are there toys that don’t require special cleaning?
Most toys with holes benefit from routine cleaning; select materials designed for easy cleaning when possible.
Can I use vinegar to clean bath toys?
Yes, vinegar can be a milder option for some toys, but test first and dilute appropriately to avoid damage.
Is UV sterilization safe for all bath toys?
UV sterilization is effective for many plastics; follow device instructions and avoid exposing soft stickers or decals unnecessarily.
Buying Guide
When choosing cleaning tools for bath toys with holes, consider the following factors:
- Size and hole accessibility: Tools should reach narrow openings without damaging the toy.
- Cleaning power and safety: For homes with kids, select non-toxic, bleach-safe options and ensure child-safe residues.
- Energy and maintenance: UV sterilizers provide frequent sterilization but require power; weigh convenience against energy use.
- Controls and ease of use: Simple spray bottles, brushes with ergonomic handles, and visible indicators help everyday use.
- Placement: Store cleaning supplies within easy reach but out of children’s reach; designate a dry, ventilated area for drying.
- Durability and materials: Choose tools compatible with common bath plastics to avoid scratching or cracking.
For best results, combine tools to tackle different cleaning challenges. A quick scrub with a dedicated brush, followed by a targeted spray and optional UV sterilization, typically yields the cleanest, safest bath toys for children. Regular inspection and proper storage complete the routine, helping to keep bath time clean and enjoyable.